Dake Corporation
1809 Industrial Park Drive
Grand Haven, MI 49417
19
983113
REV112020
VERTICAL SAW POSITION:
1. Make sure that the moving wheels of the machine
are fixed, and the machine will not move.
2. Close the on-off valve of the hydraulic cylinder and
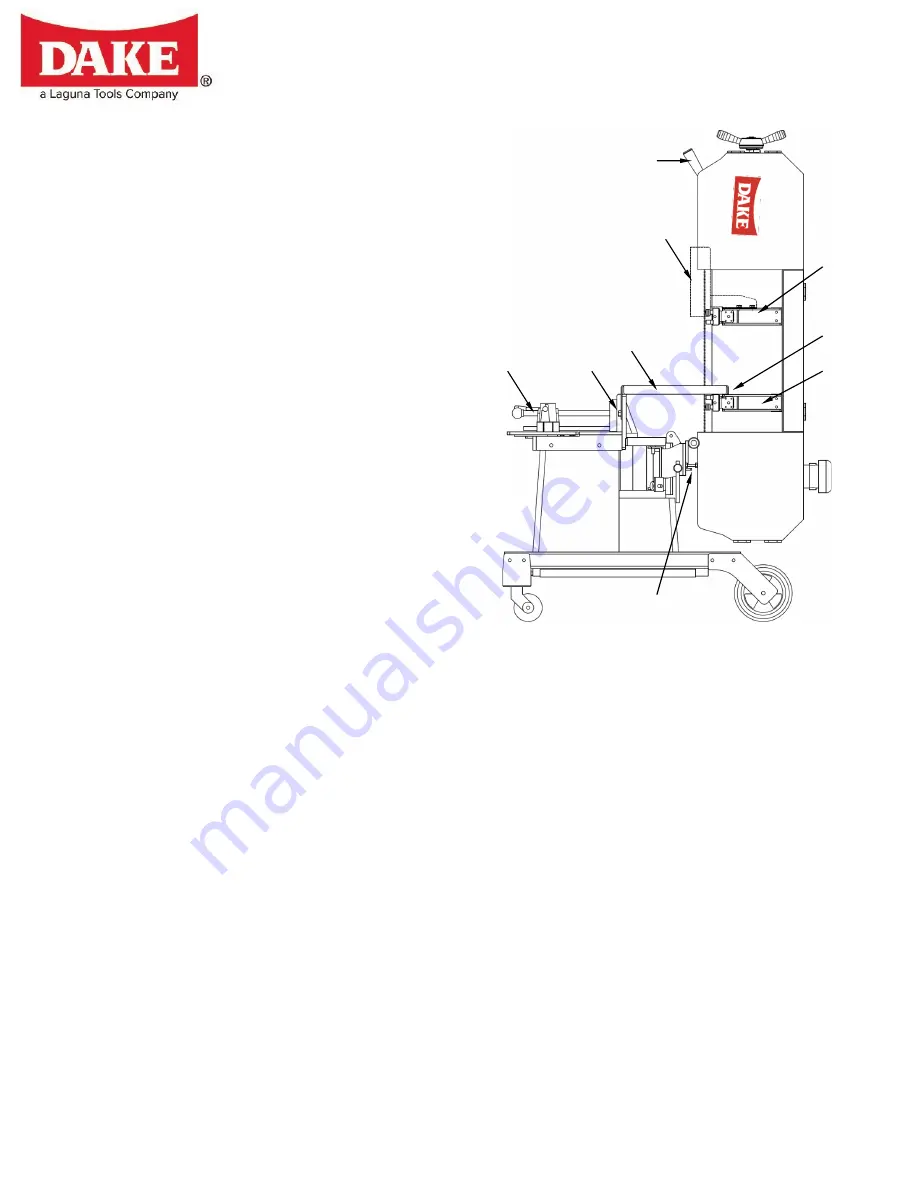
put the bow on the table with the handle (A), so
that the saw belt is raised to an angle of about 40
degrees with the table.
3. Loosen the spring bracket, remove the fixing screw
of the weight spring, and remove the weight spring.
4. Raise the saw bow again, so that the back end of
the saw bow rests on the upper threaded screw of
(B), and the bandsaw and the workbench are at an
angle of about 90 degrees, as shown in Fig. 3.
Lastly, open the hydraulic cylinder switch valve.
5. Remove the vertical saw blade (C). Insert the cut
groove into the saw belt. Hold saw blade against the
upper end of the fixing vise, fixed with the screw (D). and the position of the saw blade groove
in the middle of the saw blade rear fixed up right board. The main support arm (F) loosen the
handle and adjust the upper and lower positions so that the support arm (F) can contact the
vertical saw board. Press against the surface of point (C), which can maintain the stability of the
vertical saw board in use.
6. Take out the vertical saw cover (H) and fix it on the slave arm (K) with screws to ensure the
safety protection of the exposed bandsaw.
7. Adjust the up and down position from the support arm (K) to match the height of the workpiece
to be sawed.
8. Clamp the vise surface of the vise (G) and fix it so that it will not shake.
9. Check if there is any foreign matter interference on the moving line of the saw belt.
10. After making sure that it is correct, turn on the power and make the saw belt run at the slowest
speed to see if there is any noise or intervention.
11. When the saw belt can rotate normally, the normal, vertical saw cutting pin can be started.
A
H
K
C
E
G
D
F
B


