11
SHEARTEC 2 CUTTERHEAD
WARNING:
Knife inserts are dangerously sharp.
Use extreme caution when inspecting,
removing or replacing knife inserts.
The knife inserts on the Jointer are four-sided.
When dull, simply remove each insert, rotate it
90° for a fresh edge, and re-install it. No further
adjustment is necessary. Use the two provided
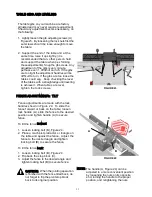
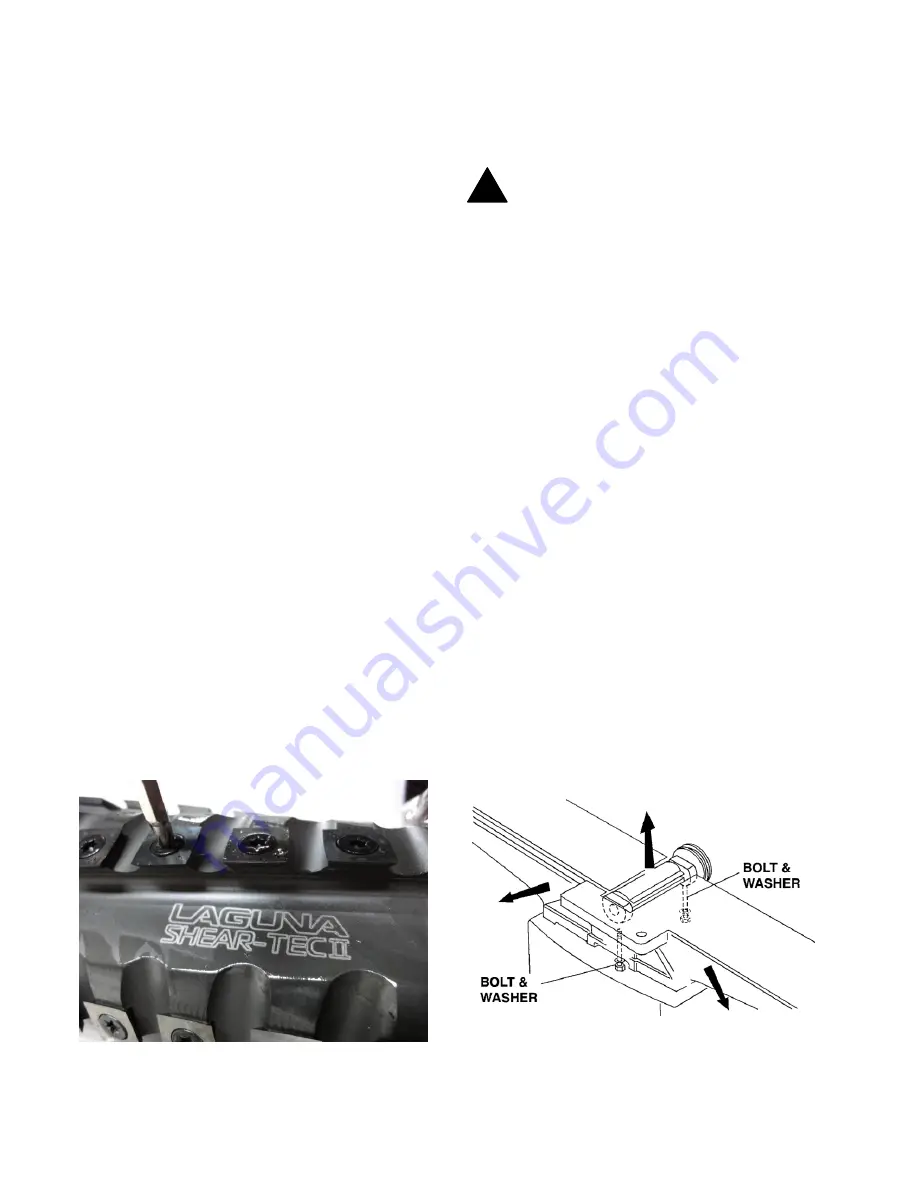
torx wrench to remove the knife insert screw.
Use one of the torx wrenches to help hold the
cutterhead in Position, and the other to remove
the screw. See Figure 19A. It is advisable to
rotate all inserts at the same time to maintain
consistent cutting. However,
if one or more knife inserts develops a nick,
rotate only those inserts that are affected.
Each knife insert has an etched reference mark
so you can keep track of the rotati
ons.
IMPORTANT: When removing or rotating
inserts, clean saw dust from the screw, the
insert, and the cutterhead platform. Dust
accumulation between these elements can
prevent the insert from seating properly, and
may affect the quality of the cut.
Before installing each screw, lightly coat the
screw threads with machine oil and wipe off any
excess.
Securely tighten each screw which holds the
knife inserts before operating the jointer!
Make sure all knife insert screws are tightened
securely. Loose inserts can be propelled at high
speed from a rotating cutterhead, causing injury.
FIGURE
19A
CUTTERHEAD REMOVAL
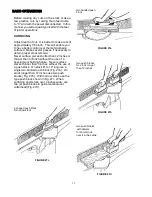
If removal of the cutterhead is necessary, do
the following:
WARNING: Disconnect jointer from
power source.
1. Remove the entire fence assembly by
releasing lock handle and removing hex nuts
(see page 4) Lift the fence off the machine.
2. Loosen the bolts connecting the motor to the
motor mount and remove the drive belt from
cutter- head pulley (see page 4).
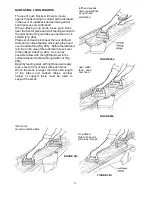
3. Lower
both
infeed
and
outfeed
tables
to
expose
the
cutterhead.
4. Remove
the
two
bolts
and
spring
washers
which
secure
the
cutterhead
to
the
base,
as
shown
in
Figure 19B
5. Remove
the
cutterhead
assembly,
with
studs
at-
tached,
by
lifting
cutterhead
straight
up
from
base.
The
belt
pulley
may
be
left
on
cutterhead
to
assist
in
raising
the
cutterhead.
6. Remove
pulley
and
both
bearing
housings
with
attached
studs
from
the
cutterhead.
NOTE:
You
may
wish
to
keep
on
hand
an
extra
cutterhead
in
order
to
maintain
shop
productivity.
7. When
mounting
new
cutterhead
to
base,
make
sure
the
curved
seats
of
the
base
are
cleaned
and
free of
dust
and
grease.
FIGURE 19B
!


