Double Drum Sander 37 x 2
66
starting with the rear drum on dual drum sanders.
***(Follow Steps 1.) through 3.) for the bearing on the left
side of single drum sanders, but do not loosen the rear bolt as instructed in Step 3.)***
.
1.) Begin by:
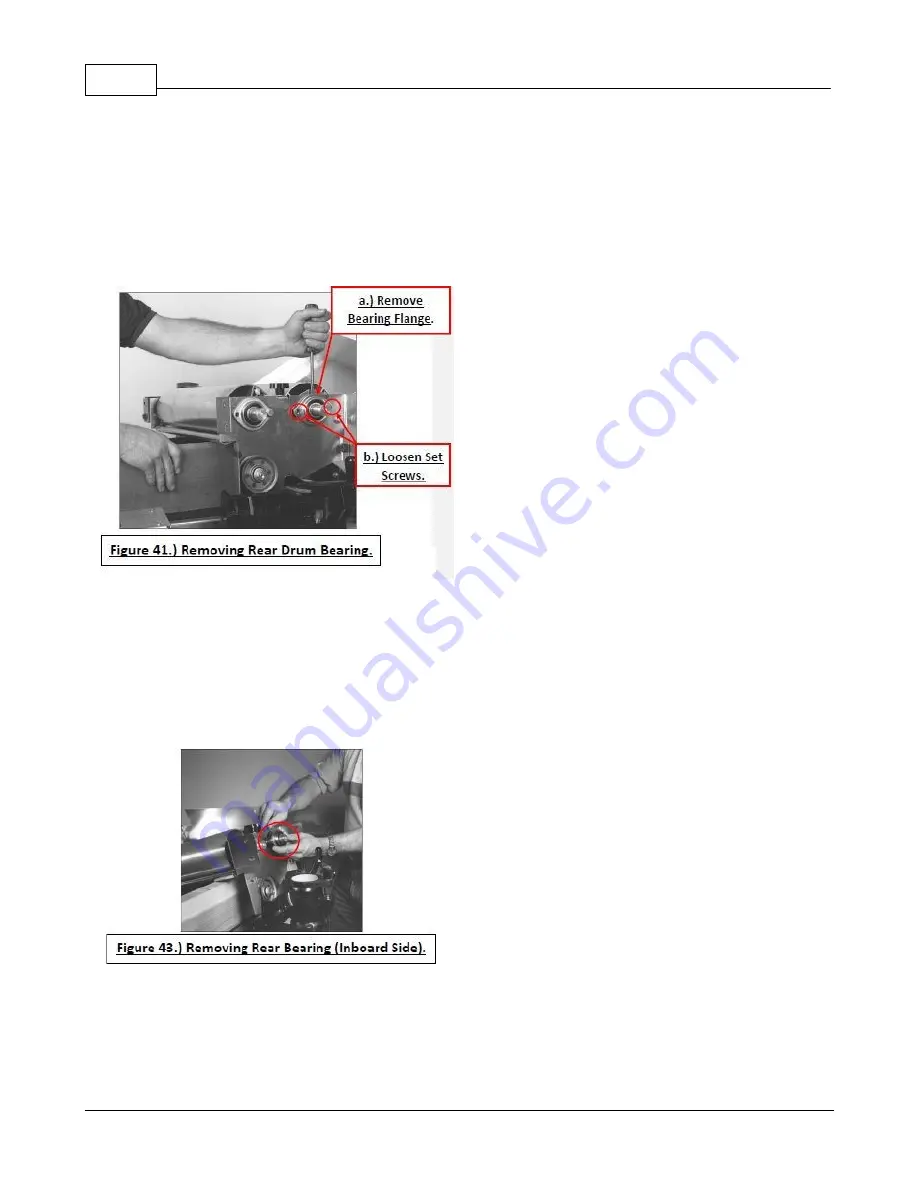
a.) Removing the outer half of the bearing flange.
b.) Loosen the set screws in the bearing collars.
c.) Remove the bearing
(See Figure 41)
.
2.)
If the shaft of the drum is rough from the set screws, use emery cloth or sandpaper to smooth down any raised
edges. Slide the new bearing on the shaft, but do not tighten the set screws yet.
3.)
Install the outer half of the original bearing flange and tighten the bolts on the rear drum. After tightening the rear
bolt in the flange, loosen it approximately 1/4 turn, which allows the rear drum to pivot. Then tighten the set screw
in the bearing collar
(See Figure 43)
.
4.
) Now move to the front drum and repeat Steps 1.) through 3.), but do not loosen the rear bolt as instructed in
Step 3.).
Summary of Contents for 37 x 2
Page 2: ......
Page 17: ...General Information 17 Castings...
Page 18: ...Double Drum Sander 37 x 2 18 Supermax Specifications...
Page 19: ...General Information 19 Supermax Accessory Supply Check List...
Page 47: ...Mainteance 47...
Page 54: ...Double Drum Sander 37 x 2 54...
Page 56: ...Double Drum Sander 37 x 2 56 Drumhead Assembly Exploded View...
Page 57: ...Drumhead Parts List 57 Drumhead Parts List...
Page 58: ...Double Drum Sander 37 x 2 58...
Page 59: ...Conveyor Exploded View 59 Conveyor Exploded View...
Page 60: ...Double Drum Sander 37 x 2 60 Conveyor Parts List...
Page 61: ...Conveyor Parts List 61...
Page 62: ...Double Drum Sander 37 x 2 62 Exploded Diagrams...
Page 63: ...Parts Lists 63 Parts Lists...
Page 77: ...Disassembly Procedure 77...
Page 79: ...Warranties 79 Warranties Laguna Tools Warranty...
Page 80: ...Double Drum Sander 37 x 2 80 Modifications RMA Policy Laguna Tools Packaging RMA Procedure...
Page 81: ...Warranties 81...


