
WARRANTY FOR INFORMATION ONLY-
ORIGINAL WARRANTY SENT WITH SHIPMENT.
4
#15
#10
1. Remove the grate-cover (#2), and store as recommended
in Paragraph D above.
2. Install the safety handle (#9).
3. Disengage the Safety Position Lock (#10) on the right
side of the mixer frame by pulling the lock handle out
and rotating it ¼ turn. This handle is spring loaded,
and a firm pull is required to disengage it from the
mixing tub.
4. Rotate the tub forward to approximately 100º with the
safety handle, but do not force the rotation. If the
stiffness of the clay prevents the rotation of the tub,
remove the safety handle and go on to step 5. below.
5. Place one hand each on the two, discharge buttons (#11,
#12).
6. While depressing Discharge 1 (#11), press Discharge 2
(#12) intermittently. This will cause the mixing tub to
tilt forward into the unloading position.
7. Repeat this process several times until the tub has tilted is resting on the Stop Bar (#13).
8. Place a table, cart, or wheelbarrow into which the mixed clay is to be unloaded in front of the mixing tub.
9. Repeat step 5 above allowing the mixing blades to push your mixed clay out of the mixing tub and into
the waiting container.
10.
Once the blades cease to eject clay, turn the power key (#6) to the OFF position and use a scraping tool to
remove any remaining clay.
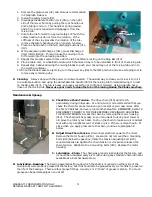
K. Cleaning.
Always clean with the power cord disconnected. The easiest way to clean your mixer is to roll it
to a suitable location and using the detachable tub handle (#9) tilt the mixing tub forward allowing it to rest
on the Stop Bar (#13). The tub is heavy, so brace yourself prior to tilting it forward. Using a garden hose,
rinse out the mixing tub.
Never use your hands to clean the tub or the mixing blades; the blades are sharp
.
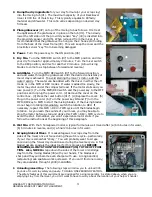
Maintenance & Upkeep
A. Check Drive Chain Tension.
The drive chain (#18) will stretch,
particularly during initial use. At a minimum, it is recommended that you
check the chain for proper tension upon receipt of your new mixer, after
the first 20 batches, and every 4-6 months hereafter. REMEMBER; ALWAYS
DISCONNECT POWER TO THE MIXER BEFORE CHECKING OR ADJUSTING
THE CHAIN TENSION. Access the chain by removing the motor housing
(#14). The chain will be greasy, so you may want to use a paper towel or
old glove to protect your hand. Push on the chain to make sure it is almost
taut with only a slight amount of slack or give. If there is more than
⅛
-
¼
”
slack when you apply pressure to the chain, continue to paragraph B
below.
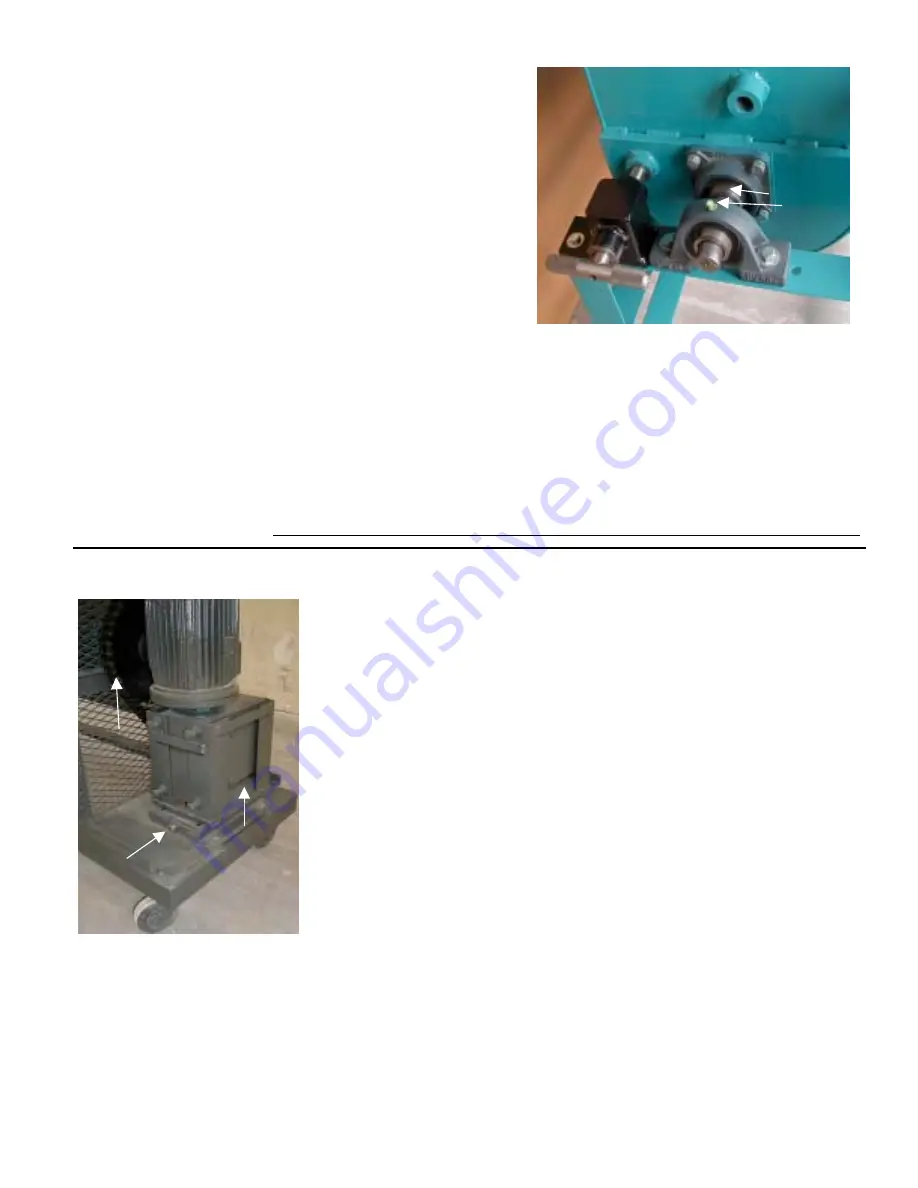
B. Adjust Drive Chain Tension.
Disconnect electrical power to the mixer.
Remove the motor housing (#14). Loosen (do not remove) the 4 mounting
bolts (#19) below the gear box; rotate the tension adjusting bolt (#20)
counterclockwise to tighten the chain tension or clockwise to loosen the
chain tension. Retighten the 4 mounting bolts (#19). Replace the motor
housing.
C. Lubrication – Chain.
The chain was properly lubricated at the factory, and
it should be lubricated every six months using any standard chain lubricant
available at a local hardware store.
D. Lubrication – Bearings.
The bearing assemblies (through which the shaft is mounted on either side of the
mixing tub) were properly greased at the factory, but the should also be greased every six months to preserve
the life of the bearings. There are four grease fittings. Usually 1 or 2 “shots” of grease is plenty. Too much
grease can be as damaging as none at all!
Motor
18
19
20
Gearbox


