Fusion F3 Table Saw - Setup - Accessory Installation
44
© 2020 Laguna Tools
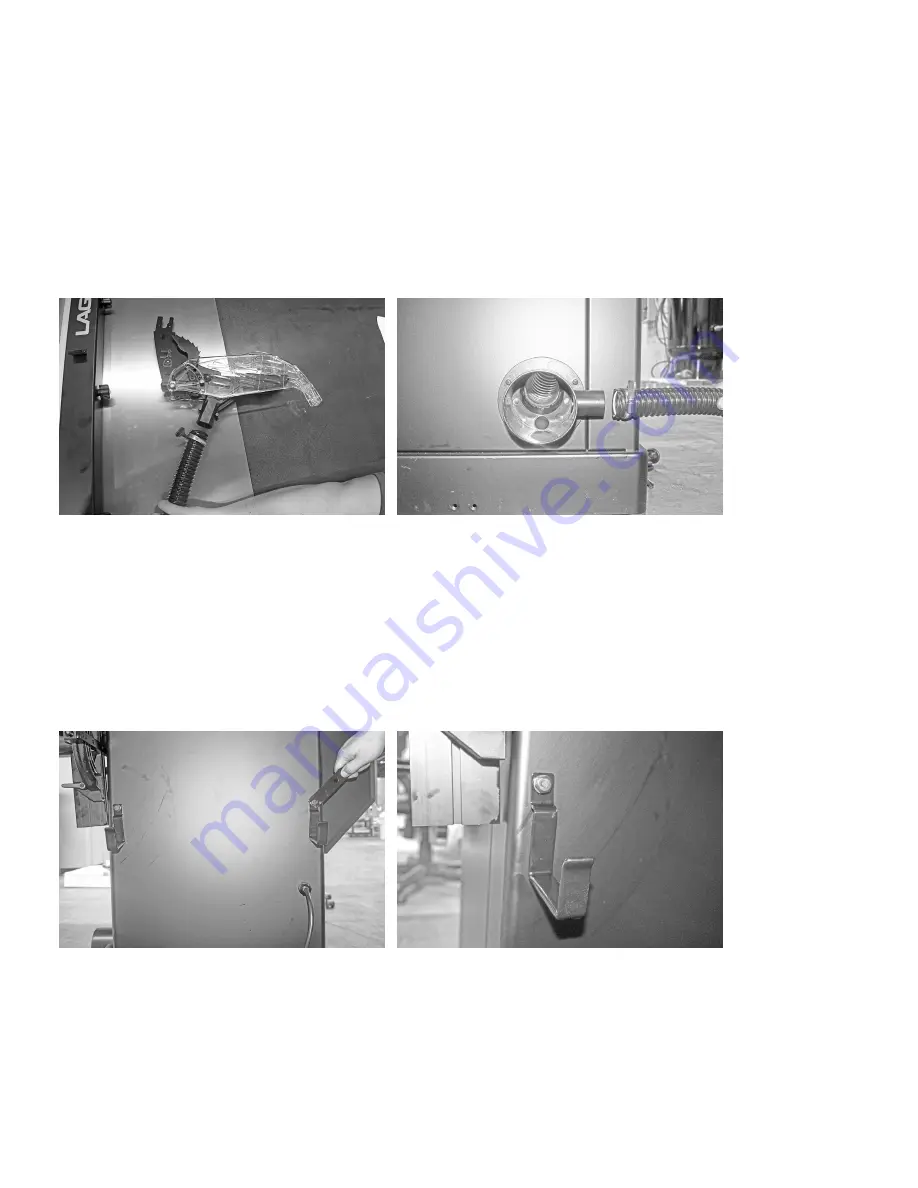
Attaching the Dust Collector Hose:
1. Attach a band clamp on the mouth of the dust collector hose.
2. Attach the hose to the dust port on the blade guard.
3. Tighten the band clamp to secure the hose to the blade guard.
4. Repeat steps one through three to attach the hose to the table saw’s 4” dust outlet.
Attaching hose to blade guard assembly:
Attaching hose to dust port:
Attaching the Fence Hooks to the Table:
1. Locate the fence hook bolt holes on the back of the table saw (located underneath the rear extension table).
2. Thread the fence hook’s hex bolts through the fence hook’s bolt holes.
3. Thread the hex bolts through the bolts holes on the back of the table saw.
4. Tighten the hex bolts with the general wrench.
Fence Hook Installation
Fence Hook Installation
Tool Caddy:
The table saw’s tool caddy is located under the the right extension table. The tool caddy provides a space to store the miter
gauge, the writing knife, and the blade wrench, and the general wrench when not in use.
See the picture shown below to see proper placement of these tools.
Summary of Contents for Fusion F3
Page 1: ...PRECISION WOODWORKING MANUAL Fusion F3 Table Saw MTSF3362203 0130 36 MTSF3362203 0130 52...
Page 21: ...Fusion F3 Table Saw Setup 21 2020 Laguna Tools Setup...
Page 54: ...Fusion F3 Table Saw Wiring Diagram 54 2020 Laguna Tools Wiring Diagram...
Page 56: ...Fusion F3 Table Saw Replacement Parts Diagram 56 2020 Laguna Tools Internal...
Page 57: ...Fusion F3 Table Saw Replacement Parts Diagram 57 2020 Laguna Tools Blade Guard Mitre Gauge...
Page 58: ...Fusion F3 Table Saw Replacement Parts Diagram 58 2020 Laguna Tools 36 Rails Fence...
Page 59: ...Fusion F3 Table Saw Replacement Parts Diagram 59 2020 Laguna Tools 52 Rails Fence...


