9
PXl16 Sheartec:II Planer \ Electrical Safety
Electrical Safety
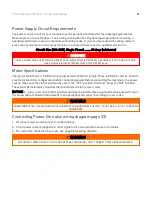
WARNING!
·
RUNNING ON A DIFFERENT VOLTAGE THAN STATED BELOW WILL DAMAGE THE MACHINE. NEVER RUN THE
MACHINE IN WET OR DAMP CONDITIONS.
·
ELECTROCUTION, FIRE, SHOCK, OR EQUIPMENT DAMAGE MAY OCCUR IF MACHINE IS NOT PROPERLY GROUNDED
AND CONNECTED TO POWER SUPPLY.
Power Supply
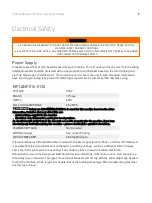
A separate electrical circuit should be used for each machine. This circuit should not be less than the wiring
listed below and should be protected with an appropriate circuit breaker based on the total running and
start-up amperage's (listed below). If an extension cord is used, use only 3-wire extension cords which
have 3-prong grounding type plugs and matching receptacle which will accept the machine’s plug.
MPLANPX16-0130
VOLTAGE
220V
PHASE
1 Phase
HERTZ
60Hz
FULL LOAD AMPERAGE
23 AMPS
Below are RECOMMENDATIONS to be used for this machine based on the above
information. Variables that may affect this are:
·
Actual voltage supplied to the machine
·
Electrical code that must be met in your local province.
An electrician will verify that all the demands are met to properly wire the machine. If you have
absolutely any doubt when wiring this machine - please consult with a qualified electrician.
PLUG/RECEPTACLE
Not Included
WIRING (Gauge)
See Jacket Printing
CIRCUIT BREAKER
30 Amp Minimum
If this information is different than what is stated on the Motor Specification Plate - omit this information. It
is possible that the documentation is outdated to a machine change - such as a different motor. Always
check the motor plate prior to any wiring. If any doubts, please consult a certified electrician.
Know when to use a time delay fuse! AKA Slow blow fuse. Generally, if the motor uses a start capacitor, a
time delay fuse is required. This type of fuse (circuit breaker) will not trip with the initial amperage needed
to start the machine, which is typically double that of the running amperage. Most woodworking machines
use this type of fuse.
Summary of Contents for Sheartec:II PXl16
Page 1: ...PXl16 Sheartec II Planer Owner s Manual MPLANPX16 0130 3 10 2021...
Page 24: ...24 PXl16 Sheartec II Planer Setup Assembling FIGURES 10 12 DRO ADJUSTMENT...
Page 38: ...38 PXl16 Sheartec II Planer Replacement Parts Diagram Table Lift...
Page 39: ...39 PXl16 Sheartec II Planer Replacement Parts Diagram Stand Motor...


