background image

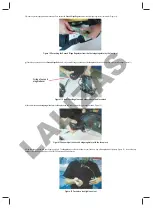
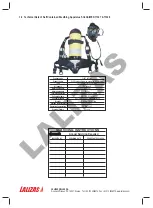
Figure 19 

Insert the face piece on your face to fit the sealing edge 

and use the head net loop to place the head-net over the head

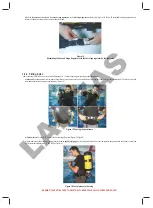
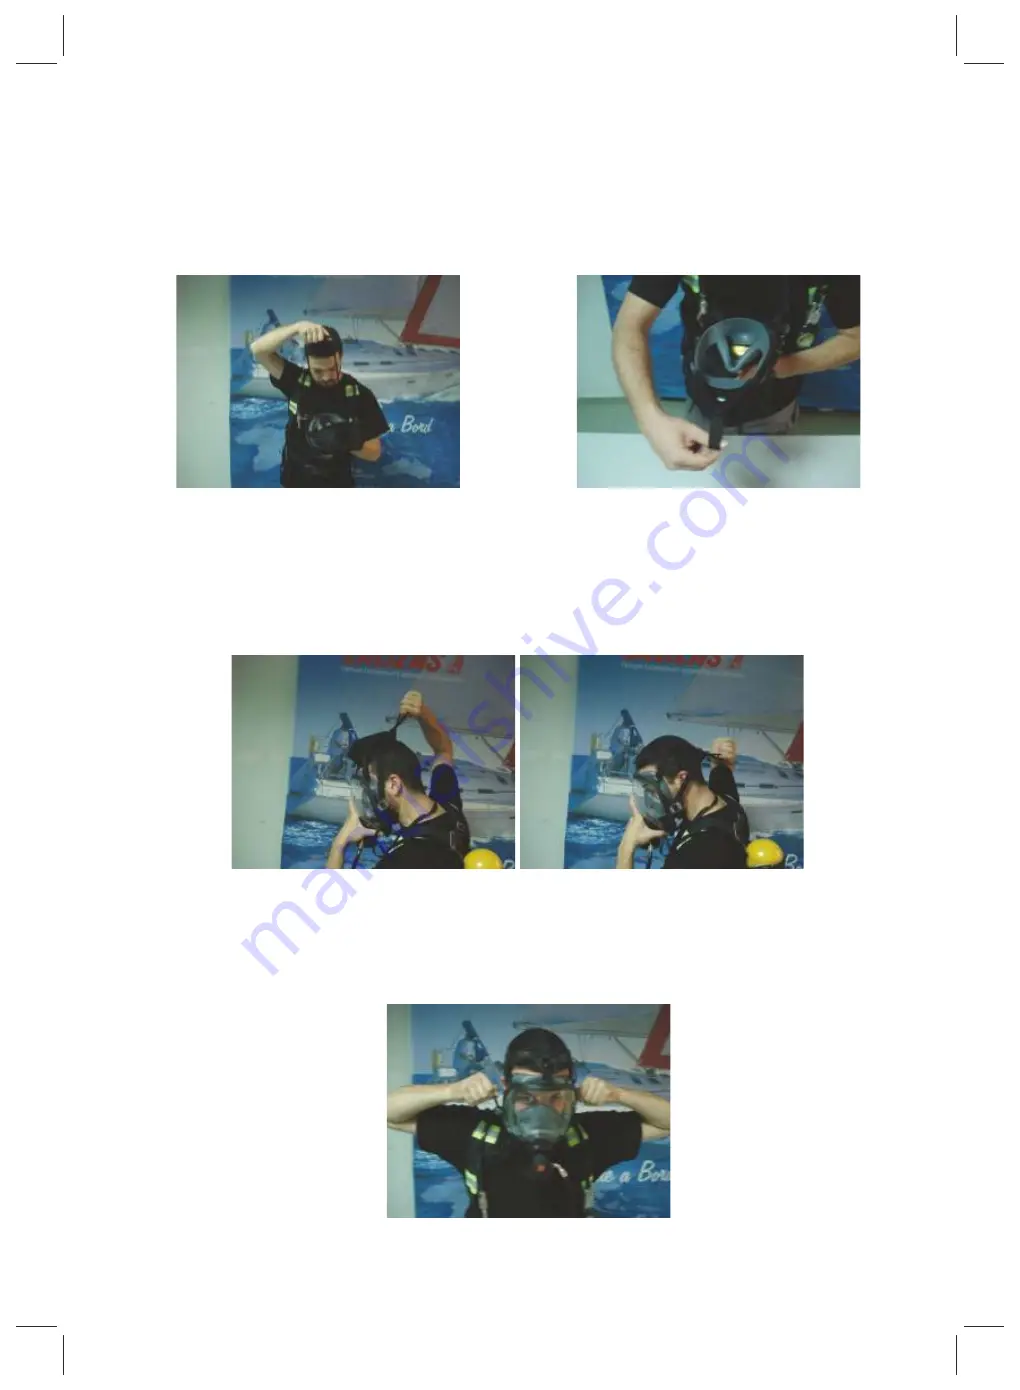
Figure 20 Tighten the side straps

d) Face mask:

In order to fit the Full face Mask, you have to follow the steps as below:                         
 

I.

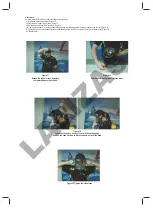
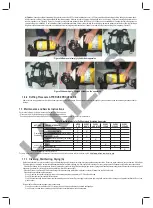
 Fully extend the face piece straps (Figure 17).            


II.

 Place the lower strap over your head (Figure 17).       


III.

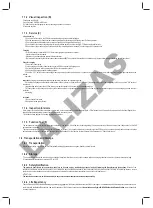
 Pull the head-net on top of the face piece (Figure 18). 

  IV.

 Insert the face piece on your face to fit the sealing edge and use the head net loop to place the head-net over the head (Figure 19).              

  V.

 Tighten the side straps to achieve a tight and comfortable fit. Notice: DO NOT over tight as this can distort the face seal (Figure 20). 


VI.

 Breathe freely.  

Figure 17 

Extend the rubber straps and place

the lower strap over your head.

Figure 18 

Pull the head-net on top of the face piece. 

LALIZAS

Summary of Contents for 71327

Page 1: ...71327 SELF CONTAINED BREATHING APPARATUS 6L SOLAS MED INSTRUCTIONS OF USE 71328 SELF CONTAINED BREATHING APPARATUS 9L SOLAS MED 0098 L A L I Z A S...

Page 2: ...g Whistle is so designed that when pressure reduces below 50 60bar it operates providing a continuous sound of pressure level 90dB A warning the user that the air is dropping down Moreover the First S...

Page 3: ...letConnector andEN144 2 RespiratoryProtectiveDevices GasCylinderValves OutletConnections More specifically the inlet and outlet connections on the pressure vessel valve are respectively in accordance...

Page 4: ...ator on demand valve and the full face mask The joint of the second stage regulator to the face mask provides a capability of rotationby360 foreasierconnectionandmorecomfortablefitting Aplug ininterfa...

Page 5: ...nder valve e After checking leak tightness bring the Second Stage Regulator in mouth and inhale to check the operability of the on demand valve Figure 9 After inhaling the air pressure willdropcausing...

Page 6: ...econd stage regulator with the face piece i Plug the tube entrance with your finger and inhale The face piece should deform towards your face as a sign of face piece leak tightness Figure 13 In case t...

Page 7: ...Open slowly the cylinder valve by turning counterclockwise until it is fully open Listen the whistle sound and check the pressure gauge indication to be equal or more than 80 oftheratedfillingpressure...

Page 8: ...7 II Placethelowerstrapoveryourhead Figure17 III Pullthehead netontopofthefacepiece Figure18 IV Insertthefacepieceonyourfacetofitthesealingedgeandusetheheadnetlooptoplacethehead netoverthehead Figure1...

Page 9: ...breathing take a breath and hold it Feel the air flow stopping and then insert your finger in the face piece seal as shown in Figure 21 This actionshouldforcethedemandvalvetoprovidesteadyflowagain Rem...

Page 10: ...iecefollowingthenextsteps Step1 Cleanthefacepiecethoroughlywithwarmfreshwater maximumtemperature 43 C andNeutralsoap Step2 Rinsethemaskthoroughlywithfreshwater Step3 Afterwardsshakethemasktoremovether...

Page 11: ...trapsandbuckles Visualchecking 1 ConductavisualcheckintheSCBAforexternaldamageswearandmaterialfatigue 2 Dontheapparatusandcheckshoulderstrapsandwaistbeltbyfasteningandlooseningthem Dofftheapparatus 3...

Page 12: ...71327 71328 Product code Product name Type Air supply Warning pressure Working pressure Total Rated duration Cylinder Volume Cylinder material Weight Storage temperature Operating temperature Storage...

Reviews: