2
La Marche A36D Battery Charger: Getting Started
WARNING: Please read the Important Safety Instructions before proceeding. Make sure to check
for any shipping damages before getting started.
1 – Connect Proper AC Voltage
Confirm proper AC voltage against charger nameplate. If charger is multi-tap, refer to AC Input Voltage Tap
Configuration table inside the charger or on charger schematic. Close AC breaker.
2 – Adjust Charger DC Output & Alarms
To access the Settings Menu, press the MENU button, select “Settings Menu”, and press the ENTER button.
Once in the Settings Menu, the user can navigate the menus with the up and down arrows. To enter a submenu,
use the ENTER button. The BACK button returns to the previous menu. When making a selection, the ENTER
button will store the value and step back. The BACK button will not save the change and will go a step back. At
any point, the settings menu can be exited, with or without saving the settings.
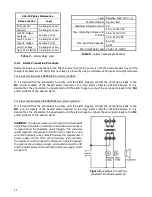
Float/Equalize Voltage
Advanced Settings
•
Float Voltage
•
Equalize Timer Settings
•
Equalize Voltage
o
Equalize Timer Mode
Alarm Settings
o
Equalize Timer Hours
•
Advanced Alarm Settings
•
Alarm Thresholds
o
Alarm Delays
o
Low Current
o
Alarm Operation
o
Overload
•
Temperature Compensation
o
Low Voltage
o
Temp Comp Enable
o
End of Discharge
o
Temp Comp Rate
o
High Voltage
•
Ground Detection Alarm Enable
o
High Voltage Shutdown
o
Enable or Disable
•
Summary Alarm Selects
•
Communication Settings
o
Low Current in Summary
o
Refer to manual for setup
o
AC Fail in Summary
•
LCD Settings
o
Ground Detection in Summary
o
Auto Off 2 Minutes or
Always On
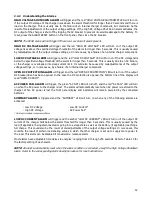
3 – Connect Batteries & Loads
Observe proper polarity when making
battery and load connections. Close DC
breaker, if applicable.
A36D
Quick Start Guide


