24
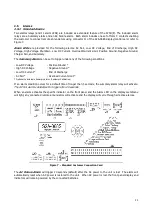
>Battery Cells
Float Voltage
3.4.3 Save/Load Configuration
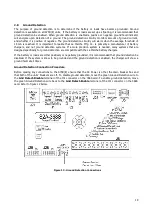
The A75D(E) enables customers to save and load a configuration file to an installed
Micro SD card. A saved configuration file can be loaded to multiple A75D(E)
chargers to ease set up time if an installation has more than one A75D(E) chargers.
The “Save/Load Confg” menu contains the options for saving or loading a Configuration file.
In order to properly transfer a configuration file a Micro SD card must be initialized first. After the memory card
has been initialized, the configuration can saved. In order to prevent data loss, the “Remove Drive” option
must be selected before physically removing the memory card.
To initialize a memory card for use in the A75D(E), select “Initialize” from the
“Save/Load Confg” menu and follow the prompts.
Initializing a Micro SD card will
erase all data from the card, it is recommended to use a blank Micro SD card for use.
A memory card only needs to be initialized once. After it has been initialized in an
A75D(E) charger, it can be used in any other A75D(E) charger without being
initialized again.
To load an existing configuration file, insert a Micro SD card with a previously saved
configuration file. Select “Load Config” from the “Save/Load Confg” menu and follow
the prompts. After a configuration file is loaded it is recommended to check the
settings to verify that they are correct for each charger.
To save a configuration file insert a Micro SD card into the S2A-368S, and initialize
the memory card (is needed) and select “Save Config” in the “Save/Load Confg”
menu. If a configuration file already exists, it will be overwritten.
In order to prevent data loss, the “Remove Drive” option must be selected before physically removing the
memory card.
Select “Remove Drive” in the “Save/Load Confg” menu, and then physically remove the Micro SD
card from the S2A-368S card.
3.4.4 Output Settings
The output settings menu allows the customer to adjust all settings relevant to the
charger output. To access the submenu select “Output Settings” in the settings
menu and press the ENTER button.
3.4.4.1
Battery Type
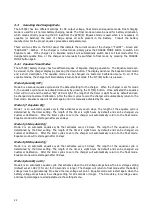
The “Battery Type” option allows the user to set the type of batteries to be charged.
This setting affects the volts per cell setting used by the software to determine the
charger output voltage. The available cell types are Lead or Nickel.
3.4.4.2
Battery Cells
The “Battery Cells” option allows the user to set the number of cells to be charged.
The number of cells available is based on the nominal charger voltage as well as the
battery type that is selected.
3.4.4.3
Float Voltage
The “Float Voltage” setting allows the user to adjust the float voltage supplied by the charger. Float voltage is
adjustable by both the total output voltage and volts per cell. To change the float voltage select “Float Voltage”
in the “Output Settings” menu. To switch between volts per cell and total output voltage press the LEFT and
RIGHT buttons.
The approximate adjustable range is as follows:
2.02 – 2.40 V/C (LA) (VRLA) and 1.29 – 1.55 V/C (NC)
>Initialize
Load Config
>Load Config
Save Config
>Save Config
Remove Drive
>Remove Drive
Initialize
>Save/Load Confg
Output Settings
>Output Settings
AC Volts Scale
>Float Voltage
Equal. Voltage
Float Voltage
2.17 V/C 130.2 V
>Battery Type
Battery Cells
Summary of Contents for A75D
Page 2: ......


