background image


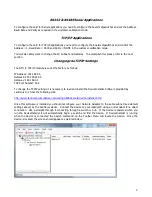
Pressing Assign will start the process of programming the device to the new IP Settings.   
 
A progress bar and Status will appear indicating a successful operation as shown below: 


Pressing Finish will complete the IP setting change process.   The DeviceInstaller Application can now be closed. 


Summary of Contents for Option 21Q

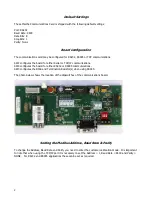
Page 1: ...PN 140620 Revision A00 Rev Date 05 19 ECN 21824 2 This manual is only valid for DCES AND ARBS units equipped with the S2A 383S 2X00 communications card and 225C software version P225C7001_050819 La Marche Manufacturing Company www lamarchemfg com MODBUS SCADA Interface for DCES and ARBS with S2A 225C Option 21Q Setup Instructions ...

Page 2: ... configures the board for either RS232 or RS485 communications SW3 configures the BIAS and Termination Resistor s when using RS485 The photo below shows the location of the dipswitches of the communications board Setting the Modbus Address Baud Rate Parity To change the Address Baud Rate and Parity you need to enter the customer calibration mode It is important to note that when using the TCP IP p...

Page 3: ... 0 Gateway 192 168 0 1 TCP Port Number 502 To change the TCPIP settings it is necessary to load and install the DeviceInstaller Software provided by Lantronix Inc from the following URL http www lantronix com device networking utilities tools device installer html Once this software is installed you should reconfigure your Network Adaptor to the same subnet see default settings above as the Lantro...

Page 4: ...lowing screen The Device Identification is located on the device itself as described in the dialog text above An example of the Lantronix device is pictured below In the example above the Device Identification would be 00 20 4A C4 DF E8 Note this is unique to each device After entering the ID press Next ...

Page 5: ...he device to operate on a network with a DHCP server however it is recommended that a specific IP address be assigned so it can be referenced directly on a SCADA Network Selecting Assign a specific IP address will bring up the following dialog Enter your desired IP settings and press Next ...

Page 6: ...f programming the device to the new IP Settings A progress bar and Status will appear indicating a successful operation as shown below Pressing Finish will complete the IP setting change process The DeviceInstaller Application can now be closed ...

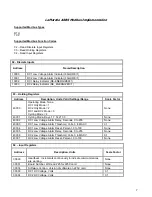
Page 7: ...de 2 DC1 and DC2 Mode 3 Cycling Mode 4 None 40001 Cycling Mode Days 1 7 14 21 30 None 40002 DC1 Low Voltage Alarm Delay Seconds 0 to 255 None 40003 DC1 Low Voltage Alarm Threshold Volts 0 to MAXV 0 1 40004 DC1 Low Voltage Alarm Reset Percent 0 to 100 None 40005 DC2 Low Voltage Alarm Delay Seconds 0 to 255 None 40006 DC2 Low Voltage Alarm Threshold Volts 0 to MAXV 0 1 40007 DC2 Low Voltage Alarm Re...

Page 8: ...8 04 Input Registers Address Description Units Scale Factor 30005 Max Set Voltage MAXV Volts 3 0vpc Cells Upper Limit For BT1 BT2 Low Voltage Alarm Settings 0 1 30006 DCA DC Current 0 1 ...

Reviews: