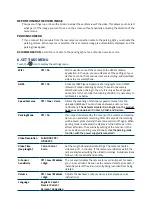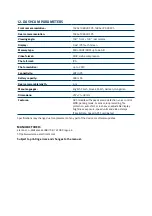
tUrNiNg thE CamEra oN aND oFF
›
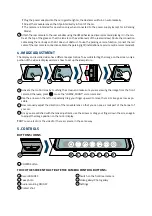
To turn on the camera, press the ON/OFF button on the bottom of the camera.
›
The camera turns on automatically when connected to the power source.
›
To turn off the camera, press and hold the ON/OFF button for about 3 seconds.
›
The camera will turn off automatically after a few seconds when it is unplugged. If you unplug the
dashcam whilst shooting, the dashcam will save the currently recorded video after a specified time and
turn off.
NavigatiNg thE mENU
›
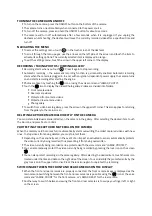
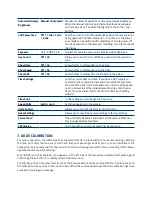
To access the settings menu, touch
on the touch screen of the dashcam.
›
To scroll through the menu pages, use the arrows on the left side of the screen and touch the item to
activate its setting options. The currently selected item is displayed in orange.
›
To exit the settings menu, touch the arrow in the upper left corner of the display.
rECorDiNg / takiNg photos / viEwiNg gallEry
›
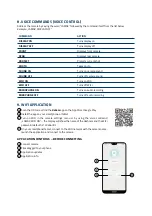
Recording starts when you touch
. Press it again to stop recording.
›
Automatic recording – the automatic recording function is permanently enabled. Automatic recording
starts when the camera is plugged in. In a car with an ignition-dependent power supply, the camera turns
on and starts recording after starting the engine.
›
Photos are taken by touching the
icon or using the voice command “LAMAX, PHOTO”.
›
Touch the
icon to display the Video/Photo gallery. Videos are divided into folders:
›
Front camera videos
›
Rear camera videos
›
Protected front camera videos
›
Protected rear camera videos
›
Photo gallery
›
To switch from video back to gallery, press the arrow in the upper left corner. This also applies to returning
from the gallery to the main screen.
DElEtiNg CaptUrED matErial DirECtly oN thE CamEra
You can delete individual material directly on the camera in the gallery. After selecting the desired item, touch
the bin icon and press Yes to confirm.
protECtiNg thE CaptUrED matErial oN thE CamEra
When the memory card becomes full, it automatically starts overwriting the oldest captured videos with new
ones. To stop videos from being deleted, you must protect them.
›
Depending on the sensitivity set, in the event of an impact an activated G-sensor automatically protects
the video currently being recorded, thus preventing it from being overwritten.
›
The video currently being recorded can be protected with the voice command “LAMAX, PROTECT”.
›
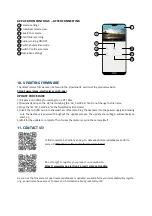
You can also manually protect the video currently being recorded by pressing the lock icon on the screen
.
›
You can also protect recordings in the camera gallery: After selecting the desired item, touch the lock icon
located under the time and date on the right side of the screen. You can identify the protected entry by the
grey lock icon in the upper left corner. Press the lock icon again to unprotect the recording.
switChiNg BEtwEEN thE FroNt aND rEar CamEras oN thE Display
›
When the front and rear cameras are properly connected, the front camera image is displayed as the
main camera. Switching between the front and rear cameras is possible using the
icon or the voice
command “LAMAX, FRONT” for the front camera, or “LAMAX, REAR” for the rear camera.
›
Another way to switch between viewing the front and rear cameras is to swipe your finger left or right
on the screen.
Summary of Contents for S9 DUAL
Page 2: ...EN User manual S9 DUAL MIRROR DASHCAM ...
Page 15: ...CS Uživatelská příručka S9 DUAL MIRROR DASHCAM ...
Page 28: ...DE Benutzerhandbuch S9 DUAL MIRROR DASHCAM ...
Page 42: ...SK Používateľská príručka S9 DUAL MIRROR DASHCAM ...
Page 55: ...PL Instrukcja obsługi S9 DUAL MIRROR DASHCAM ...
Page 68: ...HU Felhasználói kézikönyv S9 DUAL MIRROR DASHCAM ...


