


www.howdens.com
Page _ 12
LAMONA
Appliances
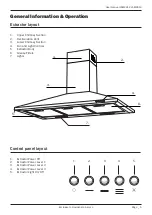
Electrical connections
IMPORTANT: Ensure that the electricity supply is switched off before connecting.
Your
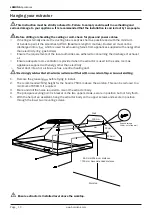
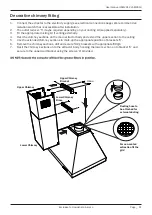
When fitting in recirculation mode (with carbon filters) ensure the cable is shortened or securely held in place to prevent
the loose cable from falling back into the motor.
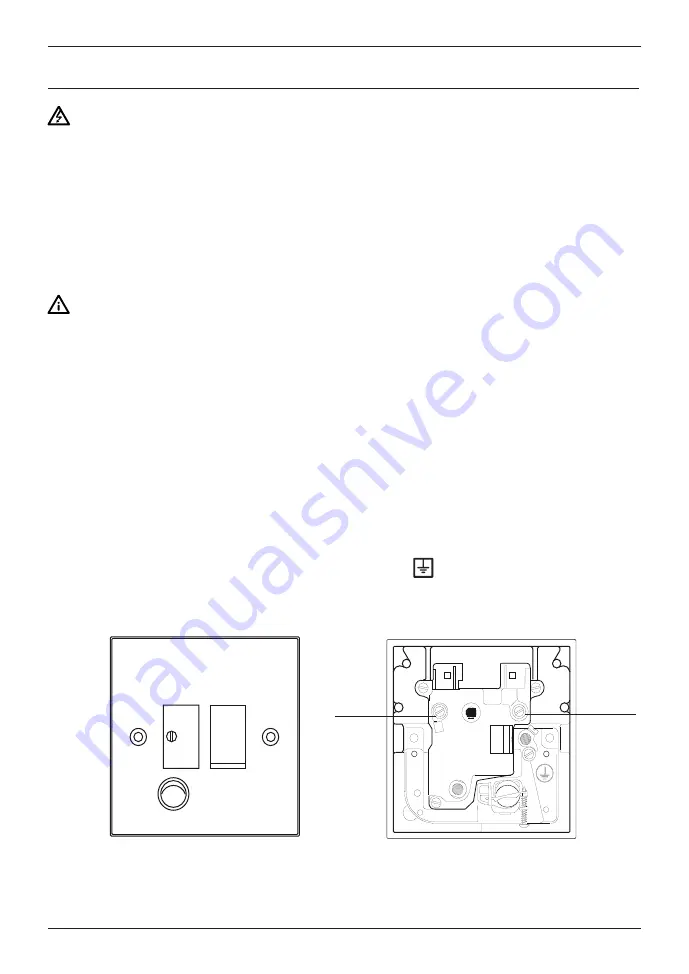
appliance must be connected to fixed wiring via the use of a double pole switched fused spur outlet
with at least 3mm contact separation, The isolation switch must be accessible after installation. (See
technical data for fuse rating).
We strongly recommend the appliance is connected by a suitably qualified person.
The product must be installed in accordance with all local regulations.
The terminology DOUBLE POLE -/+ means that both the live and neutral supplies are switched and
disconnected at the same time.
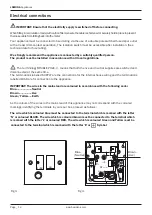
The terminations labelled SUPPLY are the connections for the internal house wiring and the terminations
labelled LOAD are for connection to the appliance.
IMPORTANT: The wires in the mains lead are coloured in accordance with the following code:-
Blue.....................Neutral
Brown..................Live
Green/ Yellow.....Earth
As the colours of the wires in the mains lead of this appliance may not correspond with the coloured
markings identifying the terminals in your spur box, proceed as follows;
The wire which is coloured blue must be connected to the terminal which is marked with the letter
‘N’ or coloured BLACK. The wire which is coloured brown must be connected to the terminal which
is marked with the letter ‘L’ or coloured RED. The wire which is coloured Green and Yellow must be
connected to the terminal which is marked with the letter ‘E’ or
Symbol
.
4
g
i
F
.
3
g
i
F
N
L
L
N
LOAD
SUPPLY
LOAD
SUPPLY
DP
13A 250V~
FUSE
ON
Blue.
(Neutral)
Brown.
(Live)


