15
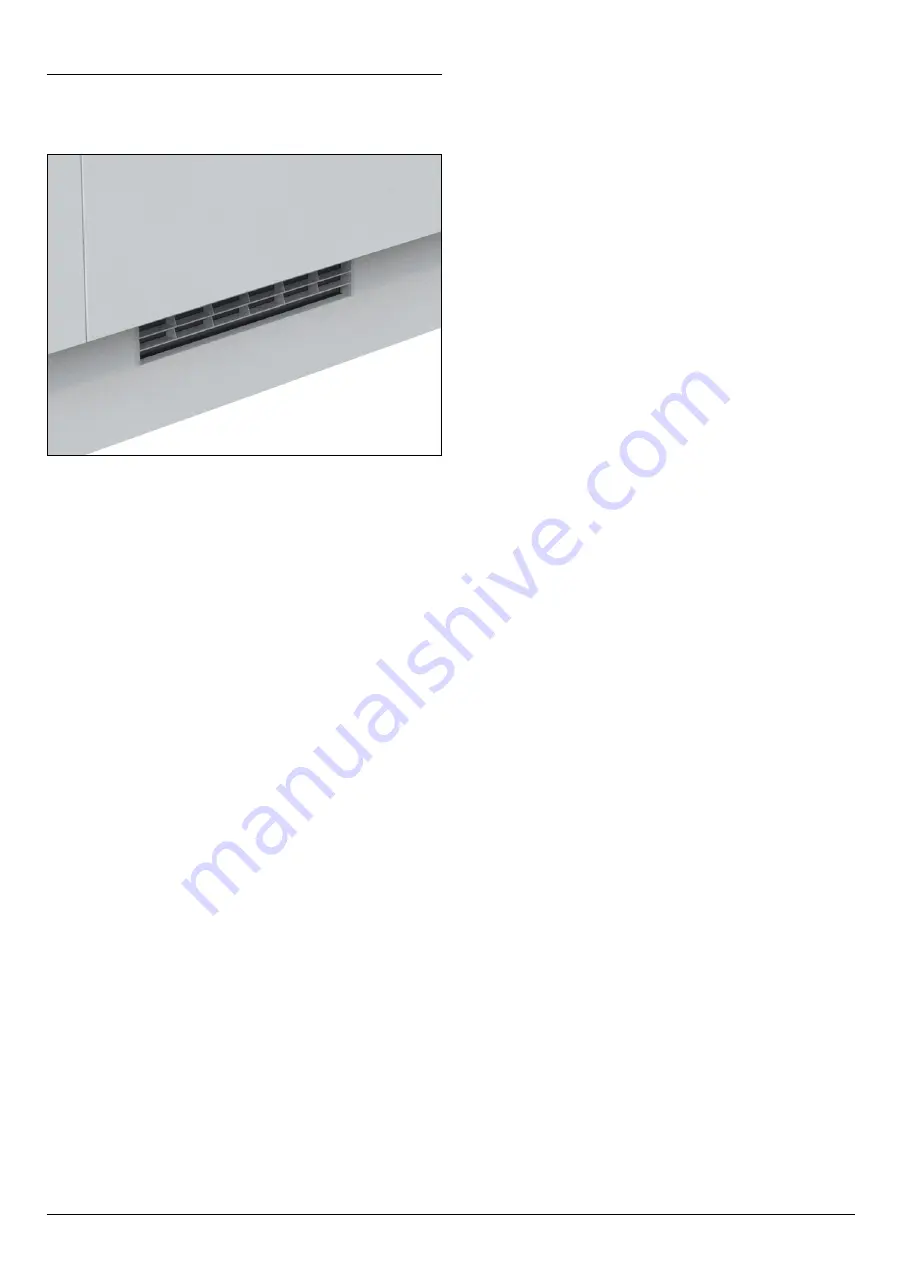
Exclusive to Howdens
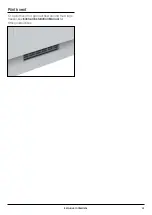
Plinth vent
Fit a plinth vent for good airflow around the fridge freezer, see
Kitchen Installation Manual
for
fitting instructions.
Page 1: ...ing and use of the appliance l The appliance should be fitted by a suitably competent and qualified person l Please keep these instructions in a safe place for future reference l Danger of suffocation...
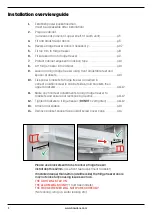
Page 2: ...nth vent p 5 3 Fit and adjust d cor doors p 5 4 Reverse fridge freezer doors if necessary p 6 7 5 Fit top trim to fridge freezer p 8 6 Fit side seal trim to fridge freezer p 9 7 Protect cabinet edges...
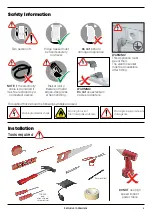
Page 3: ...loves when handling NOTE If the electricity cable is damaged it must be replaced by a competent person WARNING Do not use extension cables adapters WARNING This appliance must be earthed The electric...
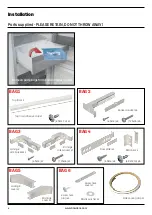
Page 4: ...e bracket x1 BAG 3 RH Hinge cover x2 LH Hinge cover x2 BAG 5 Plastic washer x2 BAG 6 Screw hole plug x4 Screw hole cover x2 Remove parts bags from salad crisper drawer Top trim x1 Top trim adhesive st...
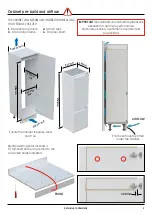
Page 5: ...he pre drilled holes indicated IMPORTANT Goodairflowaroundthefridgefreezeris essential for optimum performance and energy saving Ventilation channels must be provided AIRFLOW Plinth vent must be fitte...
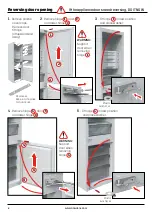
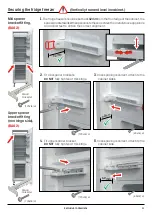
Page 6: ...upwardsand away 2 Remove hinge 1 door 2 and lower hinge 3 4 Remove hinge 4 door 5 and lower hinge 6 3 Fit hinge 1 in new position and place washer 5 Fit hinge 4 in new position and place washer 4 5 6...
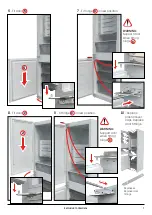
Page 7: ...door fittings 6 Fit door 5 8 Fit door 2 7 Fit hinge 6 in new position 9 Fit hinge 3 in new position WARNING Support door when fitting hinge 3 10 Replace plastic cover caps Replace door fittings 5 2 WA...
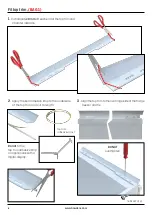
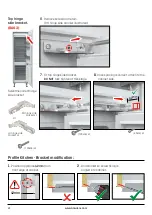
Page 8: ...self adhesive strip to the underside of the top trim and cut to length 1 Cutindicated3mmoffeachendofthetoptrimand chamfer inwards 3 Alignthetoptrimtothenonhingesideofthefridge freezer and fix DO NOT o...
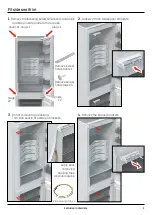
Page 9: ...ugs x5 Apply seal removing backing tape asyouprogress Side sealing strip x1 1 Removethefollowingscrewholecoversandplugs and keep in safe place for future use Fit side seal trim 2 Loosely attach two sp...
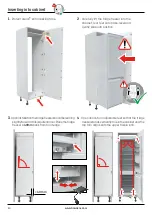
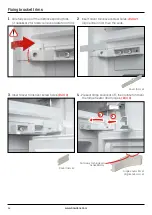
Page 10: ...0mm back from front edge 4 Open doors turn adjustable feet so that the fridge freezerstandsverticallytrueinthecabinetandthe top trim aligns with the upper fascia infill 2 Carefully lift the fridge fre...
Page 11: ...1 Thefridgefreezershouldbesetback42mmfromthefrontedgeofthecabinet the spacerbracketswillsettheappliancetothecorrectdepth Carefullymoveappliance and adjust feet to obtain the correct alignment 2 Fit m...
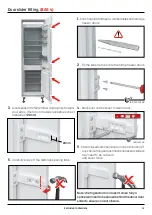
Page 12: ...6 Remove screw and retain RH hinge side bracket illustrated 8 Oncespacingiscorrect attachtothe cabinet side 7 Fit top hinge side bracket DO NOT fully tighten at this stage Top hinge side bracket BAG...
Page 13: ...door 5 Carefully snap off the distance spacing tabs 6 Open closedoorscheckingforcorrectfunction if anycabinethingeadjustmentisnecessarysliders may need to be re fixed Add cover trims Note If refriger...
Page 14: ...ixing bracket trims 1 Carefully snap off the distance spacing tabs if necessary for finish remove bracket and trim 2 Insert cover trims over screw holes BAG 2 Clip centre in first then the ends 3 Inse...
Page 15: ...15 ExclusivetoHowdens Plinth vent Fit a plinth vent for good airflow around the fridge freezer see Kitchen Installation Manual for fitting instructions...
Page 16: ...f Trading a copy of the Howdens Terms and Conditions is available upon request Copyright 2021 Howden Joinery Ltd All rights reserved Howden Joinery Ltd Thorpe Road Howden East Yorkshire DN14 7PA Engla...