17
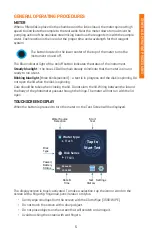
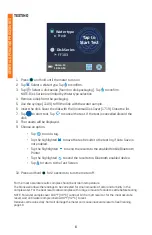
7. Tap
to start test.
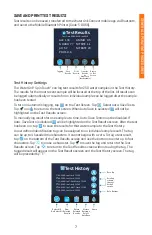
8. Results will be displayed.
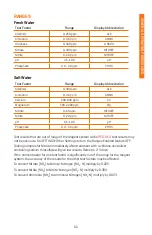
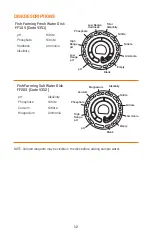
9. Compare the results on the display to the values on the chart shown on the pouch. If
the results are not within the range shown on the pouch, contact Support.
10. Replace the Meter Check Disk in the foil pouch for storage.
Alignment Procedure
The Meter Check Disk is inserted in the meter and Calibration is chosen from the Settings
Menu to perform an angle calibration which checks the alignment of the hub and disk. The
results are analyzed and reported as Pass or Fail. If the measurements pass, the settings
will be saved. If the analysis fails, contact Support.
1. Follow the Cleaning procedure on page 18 to clean the light chamber and optic lenses.
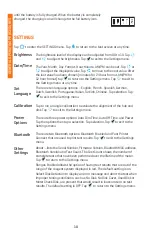
2. Tap to go to Settings.
3. Tap
Calibration
.
4. Remove the Meter Check Disk from the foil pouch. DO NOT remove the black cover
from the disk.
5. Insert the Meter Check Disk. Close the lid.
6. Tap
Start
to begin the meter check procedure.
7. If the meter is performing satisfactorily, “Angle Calibration Successful” will be
displayed and the settings will be saved. If the meter is not performing satisfactorily,
“Angle Calibration Unsuccessful. Contact Tech Support.” will be displayed.
8. Tap
g
to return to the Testing Menu and resume testing.
email: softwaresupport@lamotte.com
phone: 800-344-3100 option 3 | Mon-Fri 9am-5pm EST
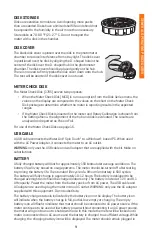
HELPFUL HINTS
¬
Do not touch top or bottom of disk. Handle disk by the edge.
¬
Do not fi ll disk while in the meter. Fill disk on clean, dry surface.
¬
Fill the disk on a dark surface to more easily see the sample water.
¬
The disk should not contain any large air bubbles. Air bubbles will result in erroneous
results.
¬
Always use the disk cover.
¬
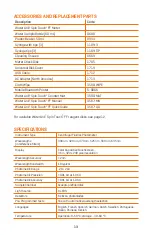
Only the Universal Disk Cover (Code 1719) can be used with the WaterLink
®
Spin
Touch
®
.
¬
Empty syringe of old sample before fi lling with next sample.
¬
Remove fi lled disk from meter after testing. Do not travel with fi lled disks in meter.
They may leak.
¬
Keep the chamber clean and dry. Gently swab LED and photodiode lenses located
around the hub with a cotton swab dampened with streak-free window cleaner. Do
not use alcohol. It will leave a thin fi lm over the lenses when dry.


