20
100% GEOTHERMAL HEAT
20
INSTALLER MANUAL
•
External supply is connected to terminals A1 and A2.
•
Terminals 15 and 16 are connected to geothermal heat pump and
interrupt the heating element’s supply with respect to the phase the
current value of which is exceeded.
•
Each phase must be lead through the relay using the dedicated hole
inside it: L1 for relay 1, L2 for relay 2, L3 for relay 3
No other connections with relay are necessary.
4.3.4. Electrician’s checklist
Check that
•
all phases going to the switchboard are in the correct phase
sequence
•
the master fuse is of sufficient size
•
the ground source heat pump’s fuse size is correct, type: slow (C
curve)
•
if necessary, current monitor has been installed to the building’s
master electrical switchboard (part-power models)
If the ground source heat pump is started for the first time without
pre-heating, compressor will be damaged. Fill the storage tank with
water and prevent the compressor from starting by pressing down the
red compressor motor circuit breaker. Switch on the ground source heat
pump’s power supply, the electric heating element begins to heat the
water contained in storage tank. A regulator alarm goes on and the text
“Compressor 1 circuit 1 some motor protection gone off. Check motor
protection F1, F2 or F3” appears on the display. Later another regulator
alarm goes on and the text “Resistor functioned in full power system”
appears. These alarms do not require taking any measures. Starting of
the compressor is allowed after six hours of pre-heating.
NOTE! A COMPRESSOR STARTED WITHOUT PRE-
HEATING IS NOT COVERED BY WARRANTY!
4.4. Commissioning
Before commissioning, check that:
•
the heating system has been connected, filled and de-aerated
appropriately
•
the ground circuit has been installed, filled and de-aerated
appropriately
•
electrical connections have been made appropriately and the
outdoor sensor (and optional room sensor) has been installed
•
after preventing the compressor from starting, water in the
storage tank has been heated by the electric heating element for
at least 6 hours
Possible problems during startup
Problem
Cause
Solution
Fuses always blow
when the compressor is
started.
You are using the wrong
type of fuse.
Check that the fuse
is automatic: C or D /
ceramic fuse: SLOW or
with a snail icon.
Temporary connections
at the site are causing an
overload of the fuses
Reduce load.
The heat collection
circuit pump does not
start.
The regulator may not be
getting any power.
Check the regulator fuse.
The regulator is not au
-
thorised to start the pump.
Check the measured/set
values.
The shut-off valves are in
the fill position.
Check that the de-
aeration and fill valves
are in the closed position
and that the intermedi
-
ate valve is open.
The heat collection
circuit’s water circulation
pump motor protection
switch has gone off.
Reset the motor protec
-
tion switch and check
the set values from
electrical diagram.
The compressor runs
for a little while and
the evaporator pressure
switch goes off.
There may still be air in
the heat collection circuit.
De-aerate the heat col
-
lection circuit.
There may be a leak in the
refrigerant circuit.
Contact the equipment
installer or dealer.
The fluid level in the
heat collection circuit fill
container drops suddenly
after startup.
There is a leak in the
system (the smell of ethyl
alcohol or glycol is strong),
there is a leak in the heat
collection circuit or there
is still air in the circuit.
Check the condition of
valves in the de-aeration
group, air valve and the
shaft seal on the ground
circuit pump, check the
condition of heat col
-
lection circuit extension
joints, or de-aerate.
Motor protection
switches go off when
starting.
The compressor or the
ground circuit pump is
short-circuited or one
of the phases is not
activated.
Check electrical connec
-
tions.
The fuses in the master
switchboard of the build
-
ing have blown or are
faulty.
Check and replace fuses
as required.
The maintenance menu section Manual control allows manual control of
compressors, pumps and valves. This facilitates troubleshooting process
and may be of help in case of starting problems.
Summary of Contents for VMI 6-17
Page 1: ...L MP SS Vmi 6 17 L MP SS 3 2016 INSTRUCTIONS FOR USE INSTALLATION AND MAINTENANCE...
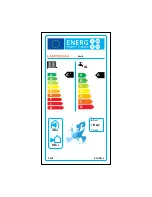
Page 31: ...XL 2015 811 2013 A A A B C D E F G A A A B C D E F G Vmi 6 38 dB 00 dB 8 kW 8 kW 8 kW...
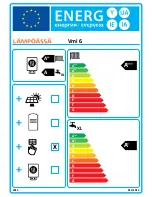
Page 32: ...A A A A A A A A B C D E F G A A A A B C D E F G XL 2015 811 2013 XL X Vmi 6...
Page 35: ...XL 2015 811 2013 A A A B C D E F G A A A B C D E F G Vmi 9 41 dB 00 dB 10 kW 10 kW 10 kW...
Page 36: ...A A A A A A A A B C D E F G A A A A B C D E F G XL 2015 811 2013 XL X Vmi 9...
Page 39: ...XL 2015 811 2013 A A A B C D E F G A A A B C D E F G Vmi 11 36 dB 00 dB 11 kW 11 kW 11 kW...
Page 40: ...A A A A A A A A B C D E F G A A A A B C D E F G XL 2015 811 2013 XL X Vmi 11...
Page 44: ...A A A A A A A A B C D E F G A A A A B C D E F G XL 2015 811 2013 XL X Vmi 11 1x230V...
Page 47: ...XL 2015 811 2013 A A A B C D E F G A A A B C D E F G Vmi 14 38 dB 00 dB 14 kW 14 kW 14 kW...
Page 48: ...A A A A A A A A B C D E F G A A A A B C D E F G XL 2015 811 2013 XL X Vmi 14...
Page 52: ...A A A A A A A A B C D E F G A A A A B C D E F G XL 2015 811 2013 XL X Vmi 14 1x230V...
Page 55: ...XL 2015 811 2013 A A A B C D E F G A A A B C D E F G Vmi 17 42 dB 00 dB 17 kW 17 kW 17 kW...
Page 56: ...A A A A A A A A B C D E F G A A A A B C D E F G XL 2015 811 2013 XL X Vmi 17...
Page 60: ......
Page 61: ......
Page 62: ......
Page 63: ......
Page 64: ......
Page 65: ......
Page 66: ......
Page 67: ......
Page 68: ......
Page 69: ......
Page 70: ......
Page 71: ......
Page 72: ......
Page 73: ......
Page 74: ......
Page 75: ......
Page 76: ......
Page 77: ......
Page 78: ......
Page 79: ......
Page 80: ......
Page 81: ......
Page 82: ......
Page 83: ......
Page 84: ......
Page 85: ......
Page 86: ......
Page 87: ......
Page 88: ......
Page 89: ......
Page 90: ......
Page 91: ......
Page 92: ......


