background image

33

Appendix

Safety Instructions

General

This product is for indoor use only.

Read all of these instructions. Save them for future reference.

Follow all warnings and instructions marked on the device.

Do not place the device on any unstable surface (cart, stand, table, etc.).
If the device falls, serious damage will result.

Do not use the device near water.

Do not place the device near, or over, radiators or heat registers.

The device cabinet is provided with slots and openings to allow for
adequate ventilation. To ensure reliable operation, and to protect

against overheating, these openings must never be blocked or covered.

The device should never be placed on a soft surface (bed, sofa, rug, etc.)

as this will block its ventilation openings. Likewise, the device should not be
placed in a built in enclosure unless adequate ventilation has been provided.

Never spill liquid of any kind on the device.

Unplug the device from the wall outlet before cleaning. Do not use
liquid or aerosol cleaners. Use a damp cloth for cleaning.

The device should be operated from the type of power source indicated

on the marking label. If you are not sure of the type of power available,
consult your dealer or local power company.

This equipment is designed to be equipped with 100- 230V alternating

IT power distribution system.

To prevent damage to your installation it is important that all devices are

properly grounded.

Summary of Contents for LIS-0816

Page 1: ...Power Distribution Unit PDU LIS 0816 LIS 0832 User Manual...

Page 2: ...ng from any defect in the software The manufacturer of this system is not responsible for any radio and or TV interference caused by unauthorized modifications to this device It is the responsibility...

Page 3: ...7 Chapter 3 Basic Operation and First Time Setup 9 First Time Setup 9 Network Configuration 10 Changing the Administrator log in 11 Chapter 4 Browser Operation 13 Logging In 13 The PDU Main Page 13 P...

Page 4: ...rowser Operation describes how to log in to the PDU with an internet browser and explains the layout and components of the PDU s user interface Appendix provides specifications and other technical inf...

Page 5: ...f an entire PDU or individual sockets online through TCP IP from any place Can be set separately for each group of socket power state so that users can switch each group of equipment Real time display...

Page 6: ...wer Cord Outlets Monitoring Level Amps Per Port Total LIS 0816 IEC C19 C20 UI socket PDU 10A 16A LIS 0832 32A Connector UI socket PDU 10A 32A Note For complete specifications for each model please ref...

Page 7: ...er on sequence The user can set the power on sequence and the delay time for each socket so that the device can be turned on in the appropriate sequence It can be easily set and operated through the b...

Page 8: ...ances user login security verification You can add and query scheduled tasks to make work plans for PDU port sockets in advance Displays current and voltage alarms on the home page and queries histori...

Page 9: ...lease this switch and restart the device to take effect 2 Reset Switch Hold down the key to restart the PDU 3 LCD Displays LCD used to display PDU status information 4 Interface selection button Used...

Page 10: ...sconnects the power supply to protect the electrical equipment 11 16A power input socket Please insert the power cable to the AC power supply here This power input socket is equipped with a switch set...

Page 11: ...ound the PDU using ground cables Connect one end of the grounding cable to the grounding terminal and the other end to the appropriate grounding object Note Do not omit this step Proper grounding can...

Page 12: ...t is strongly recommended that you use harness straps and cable boxes to secure cables to the front panel of the equipment Prevent loose and poor contact in subsequent time This Page Intentionally Lef...

Page 13: ...must change to your unique user name and password See Changing Administrator Log in for more information 2 To log in to the network remotely please refer to the IP address description After you log in...

Page 14: ...11 following should appear 3 Please fill in the field data according to the information provided in the device setting instructions of Network Setting Such as...

Page 15: ...ers is listed on the left side of the user administrator page with their more detailed information displayed on a large block in the center 2 In the Administrator information section select Edit to re...

Page 16: ...lete the network Settings and change the default administrator account and password you can have other administrator accounts Operation permissions including new users are explained in the next sectio...

Page 17: ...or use a new IP address after the PDU is changed Remember that the new IP address is required for subsequent log in 2 After the security warning dialog box appears please accept the authentication whi...

Page 18: ...ion Column This option column contains the main operation categories of THE PDU The items that appear in the option column vary according to the user type This authorization option is set when the acc...

Page 19: ...16 4 PDU operating status Provides real time information about the device such as power voltage current and power consumption...

Page 20: ...s function display the socket status sub menu block Other models only provide PDU status monitoring which allows you to enable disable reset and schedule tasks for corresponding port sockets For detai...

Page 21: ...d task TAB you can add scheduled tasks based on your requirements such as socket port switch type time working day and remarks Select the corresponding option and click the Save button to Save and gen...

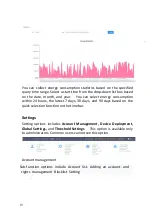
Page 22: ...4 hours the latest 7 days 30 days and 90 days based on the quick selection function on the time bar Settings Setting options includes Account Management Device Deployment Global Settings and Threshold...

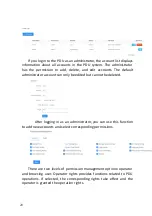
Page 23: ...ator account can only be edited but cannot be deleted After logging in as an administrator you can use this function to add new accounts and select corresponding permissions There are two levels of pe...

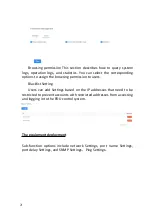
Page 24: ...ing permission to users Blacklist Setting Users can add Settings based on the IP addresses that need to be restricted to prevent accounts with restricted addresses from accessing and logging in to the...

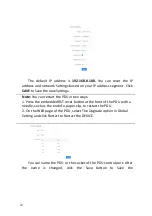
Page 25: ...t the PDU in two ways 1 Press the embedded RST reset button at the front of the PDU with a needle such as the end of a paper clip to restart the PDU 2 On the WEB page of the PDU select The Upgrade opt...

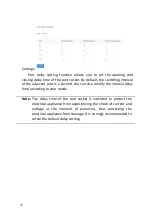
Page 26: ...ort is 1 second You can also modify the interval delay time according to your needs Note The delay time of the port socket is intended to protect the electrical appliance from experiencing the shock o...

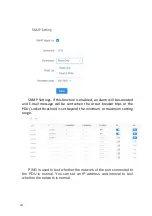
Page 27: ...ge will be sent when the circuit breaker trips or the PDU socket threshold is set beyond the minimum or maximum setting range PING is used to test whether the network of the port connected to the PDU...

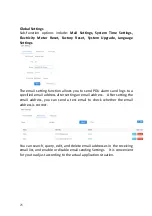
Page 28: ...send PDU alarms and logs to a specified email address after setting an email address After setting the email address you can send a test email to check whether the email address is correct You can sea...

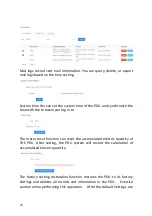
Page 29: ...er you log in to The meter reset function can reset the accumulated electric quantity of THE PDU After setting the PDU system will restart the calculation of accumulated electric quantity The factory...

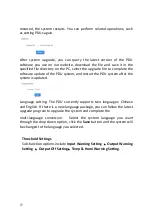
Page 30: ...the PDU system after the system is updated Language setting The PDU currently supports two languages Chinese and English If there is a new language package you can follow the latest upgrade program t...

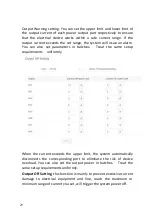
Page 31: ...es of the input current and voltage When the current or voltage exceeds the threshold the PDU automatically sends alarm logs to the specified email box address and an alarm message is displayed on the...

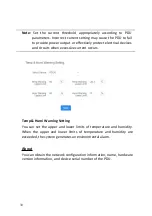
Page 32: ...arameters in batches Treat the same setup requirements uniformly When the current exceeds the upper limit the system automatically disconnects the corresponding port to eliminate the risk of device ov...

Page 33: ...vices and circuits when excessive current occurs Temp Humi Warning Setting You can set the upper and lower limits of temperature and humidity When the upper and lower limits of temperature and humidit...

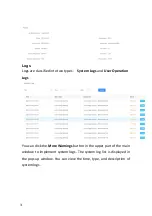
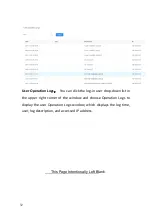
Page 34: ...tem Logs and User Operation Logs You can click the More Warnings button in the upper part of the main window to implement system logs The system log list is displayed in the pop up window You can view...

Page 35: ...og in user drop down list in the upper right corner of the window and choose Operation Logs to display the user Operation Logs window which displays the log time user log description and accessed IP a...

Page 36: ...be blocked or covered The device should never be placed on a soft surface bed sofa rug etc as this will block its ventilation openings Likewise the device should not be placed in a built in enclosure...

Page 37: ...supplies observe the following guidelines Install the power supply before connecting the power cable to the power supply Unplug the power cable before removing the power supply If the system has multi...

Page 38: ...nt of the power of the branch Make sure that all equipment used on the rack including power strips and other electrical connectors is properly grounded Ensure that proper airflow is provided to device...

Page 39: ...e IP address of your PC to 192 168 0 xxx Here XXX represents any number other than 100 192 168 0 100 is the default address of switcher 2 In the network address column of your browser enter the recogn...

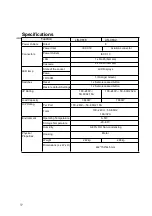
Page 40: ...ange Green Switches Reset 1 x Semi recessed button Restore default Settings 1 x Semi recessed button I P Rating 100 240V 50 60Hz 16A 100 240V 50 60Hz 32A Load Capacity 3840W 7680W O P Rating Per Port...

Reviews: