background image

SAFEGUARDING THE ENVIRONMENT

Safeguarding the environment has directed the design and manufacturing of the Lybra right from

the start. The result is the use of materials and the perfection of devices that can reduce or sweep-
ingly reduce harmful influences on the environment.

The Lybra, equipped with environment safeguarding devices which curtail harmful exhaust gas

emissions, is ready to travel well ahead of the most stringent international pollution control stan-
dards. 

USE OF ENVIRONMENT-FRIENDLY MATERIALS

None of the car’s components contain asbestos. Padding and the climate control system do not

contain CFC (chlorofluorocarbides) - the gases considered responsible for the destruction of the
ozone layer. Other substances that might pollute air and water tables, such as the cadmium in the
rust-proof coating of the bolts and the chromates in some paints, have been completely replaced
with substances that do not harm the environment. 

Summary of Contents for Lybra

Page 1: ......

Page 2: ...s and details you will also find essential information for car care and servicing as well as driving and operat ing safety not to mention the long term wellbeing of your LANCIA The enclosed Warranty Booklet lists the services you have acquired and contains details relating to the following the Warranty Certificate with terms and conditions for maintaining it the range of services offered to LANCIA...

Page 3: ...V and release it as soon as the engine starts diesel engines turn the ignition key to MAR and wait for the instrument panel warning lights and m to go out then turn the ignition key to AVV and release it as soon as the engine starts PARKING OVER INFLAMMABLE MATERIAL When functioning normally the catalytic converter reaches high temperatures For this reason do not park the car over inflammable mate...

Page 4: ...electronic code written on the CODE card with you in case you need to carry out an emergency start up procedure SCHEDULED SERVICING Correct maintenance of the car is essential for ensuring it stays in tip top condition and safeguards its safety features its environmental friendliness and low running costs for a long time to come THE OWNER HANDBOOK CONTAINS information tips and important warnings r...

Page 5: ...lp safeguard the environment makes the Lybra and car to imitate for this reason as well All versions are in fact equipped with environmental protection devices that reduce harmful exhaust fumes in compliance with the limits provided for by current legislation What is more every single component of the Lybra is fully recyclable At the end of your car s life span any LANCIA dealership would be pleas...

Page 6: ...emissions is ready to travel well ahead of the most stringent international pollution control stan dards USE OF ENVIRONMENT FRIENDLY MATERIALS None of the car s components contain asbestos Padding and the climate control system do not contain CFC chlorofluorocarbides the gases considered responsible for the destruction of the ozone layer Other substances that might pollute air and water tables suc...

Page 7: ...minute particles of precious metals on the ceramic core enclosed in a stainless steel container Lambda sensor All petrol versions are fitted with this device It ensures that air and fuel are constantly mixed in the correct proportion This is a fundamental condition for proper engine and catalytic converter operation Fuel evaporation canister As it is impossible to stop the build up of petrol fumes...

Page 8: ... associated with diesel engine exhaust fumes The catalytic converter consists of a stainless steel case containing a honeycomb ceramic core in which there is precious metal which carries out the catalysing action Exhaust Gas Recirculation E G R Cooled system This system recirculates or reuses part of the exhaust gas in a proportion which varies according to engine operation conditions When necessa...

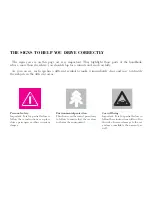
Page 9: ... easy to identify the subjects in the different areas Personal safety Important Total or partial failure to follow these instructions can place driver passengers or others in serious danger Environmental protection This shows you the correct procedures to follow to ensure that the car does not harm the environment Car wellbeing Important Total or partial failure to follow these instructions will r...

Page 10: ... is given below with the name of the component to which it re lates at the side of it These symbols are divided into the following four categories danger pro hibition warning and obligation DANGER SYMBOLS Battery Explosion Fan May cut in automatically even when the engine is turned off Expansion tank Do not remove the cap when the coolant is hot Coil High voltage Belts and pulleys Moving parts kee...

Page 11: ... converter Do not park over inflam mable materials See Chap ter Protecting the emis sion control devices WARNING SYMBOLS Engine Use only the oil specified in the section Capacities Unleaded petrol vehicle Use only unleaded petrol with a rated octane number RON of 95 Windscreen wiper Only use fluid of the type specified in the section Ca pacities Brake circuit Do not exceed the maxi mum fluid level...

Page 12: ... Diesel engines Use diesel fuel only DIESEL Expansion tank Only use fluid of the type specified in the section Ca pacities Battery Protect your eyes Battery Jack See the Owner handbook OBLIGATION SYMBOLS ...

Page 13: ......

Page 14: ...13 GETTING TO KNOW YOUR CAR DRIVING YOUR CAR IN AN EMERGENCY CAR MAINTENANCE LYBRA STATION WAGON TECHNICAL SPECIFICATIONS ACCESSORY INSTALLATION INDEX CONTENTS ...

Page 15: ...E ELECTRONIC ALARM 21 INDIVIDUAL SETTINGS 28 SEAT BELTS 34 TRANSPORTING CHILDREN IN SAFETY 37 PRETENSIONERS 42 FRONT AND SIDE AIRBAGS 43 INSTRUMENT PANEL 50 INSTRUMENTS 51 WARNING LIGHTS 53 CHECK CONTROL 59 LANCIA ICS WITH MULTIFUNCTIONAL DISPLAY 62 SOUND SYSTEM 73 CLIMATE CONTROL SYSTEM 103 AUTOMATIC CLIMATE CONTROL SYSTEM 105 SUPPLEMENTARY HEATER 115 STEERING COLUMN STALKS 115 CONTROLS 118 MANUA...

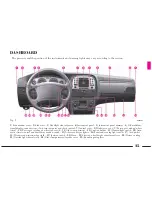
Page 16: ...8 Windscreen vent 9 Passenger s airbag where fitted 10 Passenger s airbag deactivation switch 11 Glove compartment 12 Cup can holder 13 Hazard light switch 14 Auto matic climate control and heated rear window switch 15 Ashtray and cigar lighter 16 Front and rear fog light switch 17 Card pocket 18 Windscreen wiper washer stalk 19 Ignition switch 20 Horn 21 Steering wheel height adjustment lever 22 ...

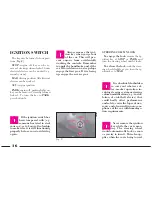
Page 17: ... your car get a Lancia Dealership to make sure it is still functioning properly before you start driving again Always remove the igni tion key when you get out of the car This will pre vent anyone from accidentally working the controls Remember to apply the handbrake and if the car is faced down on a steep slope engage the first gear If it is facing up engage the reverse gear Never remove the igni...

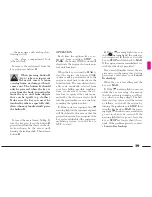
Page 18: ...ises the key can the engine be started KEYS Together with the car are delivered 2 keys A fig 3 with incorporated remote control if the car is fitted with an electronic alarm 1 key with incorporate remote con trol plus 1 mechanical type key if the car is not fitted with an electronic alarm The CODE card fig 4 is also sup plied with the keys and bears the fol lowing A The electronic code to be used ...

Page 19: ... where fitted and to lock the fuel filler cap button E to open the boot tailgate when the alarm is on led F which indicates the remote control operation and the internal battery status Pressing down for more than 2 sec onds button C will open all door win dows to aerate the passenger com partment window opening is inter rupted when the button is released Similarly door windows can be completely cl...

Page 20: ...itch off the engine by turning the ignition key to STOP then turn the key back to MAR the warn ing light should come on and then go out in about one second If the warning light fails to go out leave the key at STOP for longer than 30 sec onds If the problem persists contact a Lancia Dealership To insert the metal insert A fig 5 into the key grip keep the button B pressed and turn the insert in the...

Page 21: ...D and the car s ownership papers Copies of the CODE card can be ordered from your Lancia Dealership IMPORTANT The codes of any keys that are not available when the new storage procedure is carried out will be deleted from the memory to prevent any lost or stolen keys being used to start the engine Used batteries pollute the environment Dispose of them in the special con tainers as specified by cur...

Page 22: ...nsors which can be deactivated built into the front ceil ing lamp an anti lifting sensor a bonnet opening switch boot tailgate opening switch door opening switches warning LEDs The electronic alarm is controlled by the receiver and is switched on by pressing button D fig 8 and switched off by pressing button C Both buttons are built into the ignition key which sends the secret and variable code Th...

Page 23: ...ly once when button D is pressed The LED will work normally after button D is pressed for the second time after re placing the batteries SWITCHING THE ALARM ON The alarm can only be switched on with the ignition key at STOP PARK or removed To switch the alarm on press and release button D fig 8 on the igni tion key With the exception of certain markets a beep will be heard the direction indi cator...

Page 24: ...tric surveil lance function take the key to MAR and hold it there for longer than 30 seconds If you want to operate an electrical device which runs when the key is at MAR e g the electrical window winders when the volumetric sur veillance function is cut out turn the key to MAR operate the required control and turn the key back to STOP within 30 seconds In this way the the volumetric surveillance ...

Page 25: ...ft hand door 3 flashes rear right hand door 4 flashes rear left hand door 5 flashes volumetric or anti lifting sensors 6 flashes bonnet 7 flashes boot tailgate 8 flashes tampered wires to start en gine 9 flashes tampered battery wires 10 flashes three or more causes of alarm VOLUMETRIC PROTECTION Do not leave passengers or pets in the parked car and completely close the windows and the sunroof whe...

Page 26: ...s and the direction indicators for approximately four or five minutes only where this is al lowed The intervention modality and the number of cycles can vary ac cording to the markets A maximum number of acoustic vi sual cycles is foreseen in all cases After the alarm cycle the system re turns to its normal surveillance func tion STOPPING THE ALARM To stop the alarm press button C fig 8 on the rem...

Page 27: ... the metal insert A to the open posi tion by means of a fine tip screwdriver turn the opening device G to and remove the battery holder H replace the battery I observing the proper bias refit the battery holder into the key and secure it by turning the device G to REPLACING THE BATTERIES Replace the batteries with equivalent batteries which can be purchased at common stores if the key led F flashe...

Page 28: ...ne else programming the control unit to acknowledge other re mote controls If therefore you ever need a new re mote control go directly to a Lancia Dealership taking with you all the keys in your possession the CODE card personal identification and the car ownership papers MINISTERIAL HOMOLOGATION In the respect of the legislation in force in each country in the matter of radio frequency devices p...

Page 29: ...ck fore aft adjustment the height adjust ment and seat back adjustment Use controls A and B fig 15 to adjust the seat forwards and backwards control A Only adjust the driver s seat when the car is sta tionary MANUALLY ADJUSTABLE FRONT SEATS fig 13 14 Moving the seat backwards or forwards Lift lever A fig 13 and push the seat backwards or forwards you are in the correct position for driving when yo...

Page 30: ...d recall two different driver s seat and exter nal rearview mirror positions The seat and rearview mirror posi tion can only be stored when the ig nition key is at MAR Adjust the driver s seat position and the external rearview mirrors as de scribed Press button MEM and either but ton 1 2 or 3 corresponding to each of the stored positioned at the same time until two confirmation beeps are heard Th...

Page 31: ... event of a rear end shunt fig 19 P4T0232 fig 20 P4T0701 fig 21 P4T0702 HEAD RESTRAINTS fig 19 To improve passenger safety the height of the front and rear side head restraints can be adjusted so that the head rests on them properly Front seats fig 20 To adjust the front head restraint height move it upwards to the re quired position To lower the front head restraint keep button A de pressed and r...

Page 32: ...tally press button A otherwise you will open the object tray cover and the contents will fall out REAR ARMREST fig 25 Lower the armrest to the position shown for use by lowering the lever on the armrest To close lift the armrest into its housing fig 24 P4T0808 fig 25 P4T0014 fig 23 P4T0735 fig 22 P4T0012 To raise it easily grip the head re straint from the back To bring it back to the original po ...

Page 33: ...AL REARVIEW MIRROR Manually adjustable fig 28 This mirror can be adjusted in four directions by means of lever A 1 normal position 2 anti dazzle position The mirror is also fitted with a safety device that releases the mirror in the event of an impact Automatically adjustable where fitted fig 29 This mirror is automatically set to day and night position fig 27 P4T0809 fig 28 P4T0272 fig 29 P4T0016...

Page 34: ...rs accidentally fig 30 P4T0056 fig 31 P4T0029 fig 32 P4T0017 The mirrors are automatically demi sted defrosted when the heated rear window is operated IMPORTANT The curve of the mir ror surface makes objects seem fur ther away than they actually are Storing rearview mirror positions where fitted The external rearview mirror posi tion is stored along with the driver s seat position in versions fitt...

Page 35: ... car is parked on a steep slope the reel mechanism may block this is normal Only adjust seat belt height when the car is sta tionary The reel mechanism prevents the webbing coming out when it is jerked or if the car brakes sharply is in a collision or when cornering at high speed ADJUSTING THE HEIGHT OF THE SEAT BELTS fig 34 Always adjust the height of the front seat belt to fit the person wearing...

Page 36: ...move loop A downwards at the same time to the required position After adjustment always check that the slider is an chored in one of the posi tions provided To do this with the button released exert a further pressure to allow the anchor de vice to catch if release did not take place at one of the preset positions fig 35 P4T0703 FRONT SEAT BELT LOAD LIMITING DEVICE In order to increase passive saf...

Page 37: ...ly hooked on both sides to prevent seat back being thrown forwards and injuring passengers should you brake sharply GENERAL INSTRUCTIONS FOR THE USE OF THE SEAT BELTS The driver is responsible for re specting and enforcing the local rules and laws regarding the use of seat belts Make sure the seat belts of the front and rear pas sengers are fastened at all times You increase the risk of se rious i...

Page 38: ...the shade Do not use strong deter gents bleach colourings or any other chemical substance that could weaken the fibres 4 Do not allow the reel mechanisms to get wet they are only guaranteed to work properly if they remain dry fig 37 P4T0043 fig 38 P4T0044 Never travel with a child sitting on the passenger s lap with a single belt to protect them both fig 38 fig 36 P4T0042 The webbing must not be t...

Page 39: ...engers must be seated and wearing adequate restraint systems This is even more important for chil dren According to 2003 20 EC Directive this prescription is compulsory for all European Community countries Compared with adults their head is proportionally larger and heavier than the rest of the body while the muscles and bone structure are not completely developed Therefore correct restraint syste...

Page 40: ...aint systems children are considered as adults and wear the seat belts normally GROUP 1 Starting from 9 kg to 18 kg in weight children may be carried fac ing forwards with seats fitted with front cushion fig 41 through which the car seat belt restrains both child and seat Lineaccessori Lancia offers seats for each weight group which are the rec ommended choice as they have been designed and experi...

Page 41: ...ts with a cushion Carefully follow the instructions for installation provided with the seat GROUP 3 For children from 22 kg up to 36 kg the size of the child s chest no longer requires a support to space the child s back from the seat back Fig 43 shows proper child seat po sitioning on the rear seat Children taller than 1 50 m can wear seat belts like adults correctly in relation to the belts so t...

Page 42: ...ferent car seats ac cording to the following tables SEAT Group Range of weight Front Side Central passenger rear rear passenger passenger Group 0 0 fino a 13 kg U U U Group 1 9 18 kg U U U Group 2 15 25 kg U U U Group 3 22 36 kg U U U Key U suitable for child restraint systems of the Universal category according to European Standard ECE R44 for the specified Groups ...

Page 43: ...uster to make sure that it has actually been deactivated 4 Attain to the instructions for fas tening the specific child restraint sys tem which you are using These in structions must be provided by the manufacturer Keep the child re straint system installation instructions with the car documents and this Handbook Never use a child restraint system without installation instruc tions PRETENSIONERS Y...

Page 44: ...er ventions should be carried out by qualified and authorised person nel Always contact a Lancia Dealer ship Operations involving bang ing vibrations or heating exceeding 100 C for a maximum of six hours in the area around the pretensioner may trig ger or damage the device Vibra tions from rough road surfaces or accidental jolting caused by mounting pavements etc do not have any effect on the pret...

Page 45: ...tween the pas senger and the steering wheel or the dashboard In a collision an electronic control unit processes the signals from a de celeration sensor and where required inflates the airbag The bag inflates instantly and acts as a soft protective barrier between the front seat passengers and the structures in front of them that could cause injury The bags deflates im mediately afterwards Please ...

Page 46: ...and may even be undesirable The fact that the airbag is not trig gered in these situations this does not signify a malfunction PASSENGER S FRONT AIRBAG The passenger s airbag was designed and calibrated to protect a person wearing seat belts When fully inflated the bag will fill most of the space between the dash board and the passenger SEVERE DANGER If the car has a passenger s airbag do not plac...

Page 47: ...bag is reactivated Only turn the switch when the engine is not running and the ignition key is re moved The passenger s front airbag deactivated warn ing light will signal airbag warning light faults In this case the situation on the in strument panel is airbag warning light off passenger front airbag deacti vated warning light flashing past the normal four seconds Stop the car and contact Lancia ...

Page 48: ...the car falls into large pot holes or dips in the road surface IMPORTANT When the airbag is fired it emits a small amount of pow ders and smoke This is not harmful and does not indicate the beginning of a fire Furthermore the surface of the inflated bag and the passenger com partment may be covered with pow dery residues This powder may irri tate skin and eyes In the event of ex posure wash with m...

Page 49: ... in the system GENERAL NOTES If the warning light does not turn on when turning the ignition key to MAR or if it stays on when travel ling this could indicate a failure in safety retaining systems under this condition air bags or preten sioners could not trigger in the event of collision or in a restricted number of cases they could trig ger accidentally Stop the car and contact Lancia Dealership ...

Page 50: ...ationary if it is hit by another ve hicle travelling at suitable speed As a consequence hever sit children in the front seat even if the car is not moving On the contrary the airbags will not be fired if the car is crashed into when the key is not inserted or turned Consequently in this case the fact that the system is not fired does not indicate a fault The airbag is set to be fired in the event ...

Page 51: ...3 fig 51 P4T0635 A Engine coolant temperature gauge with overheating warning light B Speedometer C Kilometre counter and trip me ter D Engine rev counter E Fuel gauge and reserve warning light F Warning lights G Trip meter reset button DIESEL VERSIONS ...

Page 52: ...t shows your car s engine is over revving Do not travel with the needle in this sector When the engine is idling the rev counter may show a gradual or sud den increase in engine speed accord ing to the case This is normal and in dicates the operation of the climate control compressor or fans etc In particular a gradual variation in en gine revolution speed safeguards bat tery charge IMPORTANT The ...

Page 53: ... come on to indicate that there are ap proximately eight litres of fuel in the tank Do not travel with the fuel tank al most empty the gaps in fuel delivery could damage the catalyser fig 55 P4T0051 fig 56 P4T0052 The warning light will come on to indicate that the coolant temperature is too hot In this case stop the engine immediately and contact a Lancia Dealership IMPORTANT The needle may ap pr...

Page 54: ... the right hand direction indicator warning light Ÿ Δ KILOMETRE COUNTER AND TRIP METER fig 57 58 The following information is shown on display fig 57 the total number of kilometres dri ven six digits on the first line the trip meter reading four digits on the second line Press button B fig 58 for at least one second seconds to reset the trip meter IMPORTANT The trip meter read ing will be deleted ...

Page 55: ...ature Start the engine as soon as the warn ing light goes out If after starting the engine the warning light flashes for approxi mately 30 seconds you can run the engine but you should contact a Lan cia Dealership as soon as possible to have the problem solved m OUTSIDE LIGHTS green When the side taillights are switched on or the ignition key is turned to PARK MAIN BEAM HEADLIGHTS blue When the ma...

Page 56: ...n the failure disappears In any case the system will store the error Flashing light warning that the catalyser can be damaged see EOBD system in this chapter If the warning light starts flashing release the accelerator pedal and slow the engine down until the warning light stops flashing Continue driving at moderate speed preventing the warning light from coming on again Contact a Lancia Dealershi...

Page 57: ...lership to have the system checked x LOW HANDBRAKE BRAKE FLUID AND OR HANDBRAKE ENGAGED red The warning light should come on when the ignition key is turned to MAR and should go out after ap proximately four seconds The warning light will come on af ter the check phase when the brake fluid level in the reservoir drops un der the minimum level due to a pos sible leakage in the system or when the ha...

Page 58: ...ning the key to MAR position the warning lamp on the dashboard will light up and go out af ter about 4 seconds If the warning lamp does not go out or stays on when the vehicle is run ning contact your Lancia Dealer ship The flashing of the warning lamp when the vehicle is running indicates the actuation of the ESP system and or the ASR function The simultaneous lighting up of warning lamp á on the...

Page 59: ...n the undersized spare wheel is fitted to the vehicle do not exceed a speed of 80 km h and avoid manoeuvres that might cause the vehicle to go out of control For correct operation of the ESP system the tyres must absolutely be of the same brand and type on all wheels in perfect conditions and above all of the specified type brand and size HILL HOLDER amber where required By turning the key to MAR ...

Page 60: ...ed by the check control func tion are shown on the screen regard less of the operative status of the ICS The display will light up if the check control only versions with Lancia I C S system with navigator where fitted function sends a message when the ICS system is off and standing by The corresponding symbol will ap pear on the last selected screen 1 External light fuse system bulb failure warni...

Page 61: ... CHECK message will also appear if the external light bulb failure warning light 1 comes on The external light bulb failure warn ing light 1 will always come on in the event of a rear fog light bulb left hand brake light bulb or right hand brake light bulb failure along with the respective warning lights 2 3 4 5 IMPORTANT The warning lights will continue to be displayed also when a different scree...

Page 62: ...rol function is running Any faults will be signalled by the respective warning lights and by the CHECK warning light The LED will go out after approximately ten seconds Green LED B this LED is used for lighting the Lancia ICS controls at night It will light up when the key is turned to MAR approximately two seconds after the red LED A Warning light 9 only will appear in the lower left hand part of...

Page 63: ...r adjusting volume and audio settings 3 ICS function selection and con firmation knob 4 Sound system settings display button 5 Language clock functions and speed limit button 6 Trip computer functions button 7 Display brightness button P4T0708 fig 61 The Lancia ICS Integrated Control System features a multifunctional 5 LCD which is directed so that it can also be read by the passenger The multifun...

Page 64: ...um and maximum brightness conditions will be held for approxi mately one second IMPORTANT The display will be illegible when set to minimum bright ness The display will automatically be dimmed when the outside lights are switched on The buttons will be set according to the brightness of the other instruments The last set brightness will be auto matically restored whenever the en gine is started re...

Page 65: ...ital clock when the analogue clock is not displayed to make room for the warning lights and the warning messages ABS LED KO EBD LED KO and LIGHT FAIL URE will be shown in area C These messages will be displayed for ap proximately five seconds when the system is switched on and will then be replaced by the respective warning lights in area B The car icon with the open door boot tailgate warning lig...

Page 66: ... when the sound system is off The RETURN function represented by the symbol in some screens will either take you back to the ICS main menu fig 61 or to the previ ous page of a menu from a sub menu page The symbol RETURN in some screens will turn white when it is se lected DISPLAY SETTINGS fig 64 Press the button SETUP 5 fig 61 with the key at MAR A screen with the following functions will appear a...

Page 67: ...to confirm Select RETURN C after adjusting the settings by turning knob 3 and pressing to confirm This will take you back to the SETUP menu fig 64 The digital clock will be automati cally adjusted with the analogue clock Switching the summer saving time on and off The SUMMER SAVING TIME ON OFF function allows to switch to summer saving time and back with out changing the clock settings Select SUMM...

Page 68: ...usting the settings by turning knob 3 and press ing to confirm This will take you back to the SETUP menu fig 64 Switch the alarm function on and off Select the ALARM function fig 64 by turning knob 3 fig 61 and press the knob to confirm A screen with the following fields will appear on the display fig 67 Hours A Minutes B RETURN C Select field A hours by turning knob 3 and pressing it to confirm T...

Page 69: ... A Set speed limit warning on off B Buzzer on off C RETURN D Select field A set speed by turning knob 3 and pressing it to confirm Then turn knob 3 clockwise to in crease the speed and anticlockwise to decrease it Press knob 3 when the re quired speed is shown to confirm Select field B ON or OFF to switch the SPEED LIMIT function on or off as required and press knob 3 to con firm Select field C ON...

Page 70: ...ction pro vides the prescribed value and not the actual tyre inflation pressure Check the tyre inflation pressure on a regu lar basis TRIP COMPUTER fig 69 Press the TRIP button 6 fig 61 with the key at MAR A screen with the following functions will appear af ter the LANCIA trademark screen RANGE AVG CONSUMPTION TRIP MODE FLASH CONSUMPTION KEY MODE TRAV DISTANCE kilometres driven since last reset A...

Page 71: ...has not yet reached the reserve level the value 50 will appear and not change Select RETURN after adjusting the settings by turning knob 3 fig 61 and pressing to confirm This will take you back to the main menu fig 69 Average consumption visible with the TRIP function on fig 71 Select the AVG CONSUMPTION function by turning knob 3 fig 61 and press the knob to confirm The mean consumption for the l...

Page 72: ...m h and rounded up or down by 0 1 km h The mean speed is computed by the system only when the engine is run ning The mean speed value is updated by the system every second The calcula tion accuracy is lower than 0 1 km h Select RETURN after adjusting the settings by turning knob 3 fig 61 and pressing to confirm This will take you back to the trip computer main menu fig 69 Time elapsed trip time fi...

Page 73: ...means of the TRIP RESET function and the trip computer screen can be displayed by pressing the button TRIP 6 fig 61 Select KEY or TRIP by turning knob 3 fig 61 and press the knob to confirm Press knob 3 again to switch between one modality and the other Resetting the trip computer The trip computer data can be reset by selecting the TRIP RESET func tion fig 75 by turning knob 3 fig 61 and pressing...

Page 74: ...The sound system is fitted with au tomatic functions for volume ad justment should it be required to change their parameters see para graph EXPERT FUNCTIONS CUS TOMISING OPERATING PARAME TERS EXP 14 If you drive with the vol ume too high you put both your own life and that of others in jeopardy ...

Page 75: ...CAN function automatic ra dio station scanning and MSS Mu sic Search System function for skip ping or repeating a track button 13 IS function button to seek the best received radio stations 14 EXP function button to cus tomised sound system settings 15 Function and setting selection and confirmation knob 16 Radio waveband selection but ton LW MW FM and tape AU TOREVERSE function In some ver sions ...

Page 76: ...Lancia ICS Mute function Radio Tape CD selection SRC function Repeatedly press the MODE E but ton to cyclically select the functions Radio Tape if a tape is in the deck CD if a CD player is fitted and Phone if a cellular telephone free hands kit is fitted The operation of the E button is identical to that of the SRC 7 button fig 76 on the sound system Radio Tape CD settings Buttons D and F impleme...

Page 77: ...e Get in touch with a Lancia Dealership if anything goes wrong Do not leave tapes in direct sunlight or expose them to excessive heat Put the cassettes back into their boxes af ter use Use good quality tapes no longer than C 90 to ensure optimal play back Only clean the front panel with a soft anti static cloth Cleaning or pol ishing agents could damage the sur face Dirt on the player head from ta...

Page 78: ...re set station 1 6 PTY select PTY programme type Select pre set station 1 6 PTY select PTY programme type Select pre set station 1 6 PTY select PTY programme type Select pre set station 1 6 PTY select PTY programme type Select pre set station 1 6 PTY select PTY programme type Select pre set station 1 6 PTY select PTY programme type Store PTY Store Store PTY Store Store PTY Store Store PTY Store St...

Page 79: ... selections FM1 FM2 FM3 MW LW AUDIO MUTE ON OFF ON OFF Turn left volume down Turn right volume up AF function ON OFF EXPERT MODE ON FM AUTOSTORE AM AUTOSTORE CD RADIO PHONE TAPE BASS TREBLE BALANCE FADER VOLUME ON OFF Turn left volume down Turn right volume up Select LOUDNESS ON OFF TP function ON OFF Select MSS ON OFF Manual tape REVERSE AUDIO MUTE ON OFF EXPERT MODE ON RADIO PHONE TAPE CD BASS T...

Page 80: ...d With MSS on Skip track seek next track Rewind With MSS on Skip track seek start of track Select Dolby B ON OFF Adjust display brightness Open flap Eject tape Adjust display brightness Select next track Select previous track Adjust display brightness Open flap Eject tape Fast forward Rewind Adjust display brightness Rewind Adjust display brightness Open flap Eject tape Adjust display brightness ß...

Page 81: ...e cret code and set the time and the date For instruction on setting the clock and adjusting the device brightness see Lancia ICS with multifunctional display Operation with cellular phone The sound system can be connected to a free hand cellular phone kit The sound will be muted when the cellular phone is in use SWITCHING THE SOUND SYSTEM ON AND OFF The sound system will be automati cally switche...

Page 82: ...he EXPERT functions which can be accessed by means of the EXP 14 button Setting the switch on volume Use the ONVOL function for this purpose see the EXPERT functions which can be accessed by means of the EXP 14 button Setting the volume according to car speed Use the SCVOL function for this purpose see the EXPERT functions which can be accessed by means of the EXP 14 button Muting the volume z MUT...

Page 83: ... AUDIO z 8 button to cyclically switch from one function to the other The active function is shown in the right hand part of the display while the settings are shown by a bar sym bol in the left hand part of the dis play Turn knob 9 fig 76 to adjust the settings BASS to adjust the bass tones from 6 to 6 TREBLE to adjust the treble tones from 6 to 6 BALANCE to balance the sound between the speakers...

Page 84: ...a poorly recorded tape to reduce the background noise The symbol M will appear on the displace when the function is on The Dolby noise reduction device is made under licence from the Dolby Laboratories Licensing Corporation Dolby and double D M symbol are registered trademarks of the Dolby Laboratories Licensing Corporation SELECTING A FUNCTION RADIO TAPE CD Press the SRC 7 button to display the v...

Page 85: ...started Interrupting traffic announcements Press the TP AF 11 button briefly The traffic announcement function will however be kept on The sound system features the EON function which allows the system to automatically tune to another station providing traffic announcements in the same network as the one you are listening to only when the TP func tion is on It will automatically switch back to the...

Page 86: ...nce Use the IS memory function to re programme pre set station buttons or when you are in a new reception area but you do not want to delete the pre viously stored stations Starting the IS LEARN automatic station search Select either FM1 FM2 or FM3 by means of the BAND 16 button fig 76 Press the IS 13 button the message IS will appear on the display while the tuner is searching wave band IMPORTANT...

Page 87: ...the selected waveband e g FM1 is stored at one of the pre set station buttons numbered from 1 to 6 the respective digit will appear on the display e g 3 for pre set station 3 Storing RDS stations programmes Press a pre set station button num bered from 1 to 6 for longer than two seconds until you hear the station again The AF tuning function will be stored with the station Recalling stored RDS sta...

Page 88: ...described in the previous paragraph Pre set station buttons Manual frequency tuning 1 Select the waveband FM1 FM2 FM3 MW or LW by means of the BAND 16 button 2 Press either button 17 or 18 for approximately six seconds until the message MAN appears on the dis play with the frequency e g MAN 100 60 Hold either button 17 or 18 pressed to fast forward 3 Tune in the required direction by pressing eith...

Page 89: ... with the pre set PTY code e g POP Programme types The programme types offered by a radio station can change NEWS News bulletins and current affairs AFFAIRS Politics and events INFO Special information programmes SPORT Sports programmes EDUCATE Educational and trai ning programmes DRAMA Drama and literature CULTURE Culture church and religion SCIENCE Science VARIED Variety POP Pop music hits ROCK ...

Page 90: ...1 to 6 briefly The automatic PTY search will start from the first station offering the se lected programme type The pro gramme type will be shown briefly e g POP followed by the station code and the message PTY Alternatively Repeatedly press either button 17 or 18 until the required programme type appears on the display Press either button 17 or 18 for ap proximately two seconds to start the PTY a...

Page 91: ... scans the stations stored with the IS function Each station will be played for ten seconds Press the SCAN 12 button to switch the function on Maximum reception sensitivity DX function 20 The DX function is used to obtain the maximum radio station sensitiv ity allowing to automatically tune to local stations regardless of the other radio functions Press DX 20 to switch the function on and off The ...

Page 92: ...ode The information concerning the set tings is given in the right hand part of the display function description buttons 4 5 fig 76 for adjusting the setting buttons to select the new function 17 for the following function 18 for the previous function fig 76 The current function setting is shown in the left hand side of the dis play The last selected setting is recalled with the EXPERT function Se...

Page 93: ...he vol ume up During setting the volume heard is that selected for traffic announce ments Automatically traffic announcement programmes search With LRN OFF standard the sound system remains tuned to the se lected station until it is basically il legible With LRN ON the sound system tunes to a new station as soon as the received signal quality decreases If you are travelling in an area where the re...

Page 94: ...amme tuning is not possible Setting the maximum switch on volume Select the RADIO ON MAXIMUM VOLUME ON VOL setting value from to 31 fig 84 button 5 VALUE to turn the volume up button 4 VALUE to turn the volume down Volume is limited only if the volume of the sound system is higher than the set volume when it is switched off Setting the booster switch on delay where fitted Select the BDLY ON OFF se...

Page 95: ...ersation can be heard by means of the car speakers The PHONE IN is active provid ing your cellular phone is connected to the free hand control unit where fitted If the sound system is off telephone calls incoming or outgoing are how ever possible the sound system will switch on automatically the sound system will set to the same sound conditions as the last tele phone call BASS TREBLE FADER BALANC...

Page 96: ...higher speeds press either buttons 4 or 5 to set the required vol ume button 5 VOL to turn the vol ume up button 4 VOL to turn the vol ume down 5 Press the EXP 14 button for longer than two seconds Activating the safety code If the message CODE appears on the display the code is not on If the message SAFE appears on the display the code is on IMPORTANT For more detailed in structions see the follo...

Page 97: ...n times The message 1 7 0 will appear on the display Finally complete the code by press ing button 5 three times The message 1 7 0 3 will appear on the display Press the button longer to decrease the digit by one unit 4 To confirm the code press the EXP 14 button briefly The message SAFE will appear on the display The code is on To quit the EXPERT function press the EXP 14 button for approximately...

Page 98: ...If an incorrect code is entered the message SAFE will re main on the display and the sound system will not work Repeat the en tire procedure Respect stand by times between at tempts see Stand by times Stand by times Specific stand by times between at tempts are featured to avoid entering and deactivating the code by at tempts During the stand by time the sound system can be switched on and off but...

Page 99: ...tion skips or repeats a track The MSS function works with over three second pauses between tracks without announcements Musical tracks with very low sec tions e g classical music are not suited for this function as the system mistakes the sections for pauses Switching the MSS function on Press the SCAN MSS 12 button during tape playback The message MSS ON will appear on the display MSS will start ...

Page 100: ...art automati cally Switching the tape off Press button 23 fig 76 the tape will be ejected Alternatively Press the SRC 7 button The sou rce will change from TAPE to CD if the CD CHANGER is fitted or RADIO Source selection is sequential RA DIO TAPE CD IMPORTANT The source is switched immediately but the tape player will end the current function if the tape fast forward rewind function is on General ...

Page 101: ...ne in the CD player Proceed as follows Move the sliding flap A fig 94 completely to the right until it locks Check that switch B is in position 1 fig 92 P4T0252 fig 94 P4T0254 fig 93 P4T0253 Insert the magazine C fig 95 in the CD player with the labelled side see arrow facing upwards Close the sliding flap D fig 96 after inserting the magazine to avoid grit and dust from getting inside the player ...

Page 102: ...appear briefly on the display To stop the function press the SCAN MSS 12 button briefly The message SCAN OFF will appear on the display briefly Removing the CDs from the magazine Remove the CDs in order after re moving the respective supports from the magazine CD PLAYER OPERATION Seleting the CD CHANGER source Briefly and repeatedly press SRC 7 button until the message CD ap pears on the display S...

Page 103: ...To stop the function press button 2 The message RPT MAG will appear on the display Playing the tracks in random order TRACK RANDOM To play the tracks in random order press button 3 The message RND ON will appear on the display The selected CD tracks will be played in random order To end random track playback press button 3 The message RND OFF will appear on the display IMPORTANT The TRACK RAN DOM ...

Page 104: ...103 CLIMATE CONTROL SYSTEM P4T0812 fig 98 ...

Page 105: ...means of the control panel buttons automatically by means of the system electronic control unit The air is let into the passenger compartment through a set of vents on the dashboard on the front door panels on the central unit and on the floor as shown in fig 98 Fixed vents C fig 100 for defrost ing or demisting the front side win dows are located in the front door panels fig 99 P4T0035 fig 101 P4...

Page 106: ...or adjusting internal tem perature passenger s side 5 Buttons for selecting air distrib ution 6 Buttons for adjusting fan speed 7 Set air distribution 8 Set fan speed 9 Outside temperature in degrees centigrade 10 Button for switching on off maximum defrosting demisting of windscreen and front side windows heated rear window and external rearview mirrors 11 Button for switching on off the heated r...

Page 107: ...sor which can automatically switch the air recirculation function on to re duce the unpleasant effects of pol luted air in cities queues tunnels and when the windscreen washer is oper ated with the characteristic smell of alcohol The air quality is controlled by an active carbon dust pollen filter which has the double function of mechani cally filtering the particles dispersed in the air and atten...

Page 108: ...function ac tivation in case of hard fogging To guarantee sensor fog proper operation license tag parking disc or labels shall not be stuck on the moni toring area between sensor and windscreen Keep sensor and windscreen clean preventing any accumulation of dust or other sub stances In addition to this function the fil ter efficaciously reduces the concen tration of pollutants thanks to a layer of...

Page 109: ...ate con trol compressor off where fitted air recirculation function to switch the function on and off con stantly Z for faster window demisting defrosting for demisting defrosting the heated rear window and the external rearview mirrors The temperature settings can be changed at any time during auto matic system operation The system will automatically adjust to the new request Furthermore the fan ...

Page 110: ...ction can be switched on to speed up heating in the passenger compart ment by exploiting the system poten tial to the maximum The function employs the maximum coolant tem perature while the air distribution and fan speed are set by the system ac cording to environmental conditions In particular if the coolant tempera ture is not sufficient the function does not switch the fan on at top speed to li...

Page 111: ...entral and side dashboard vents and the rear vent cooler air This air distribution pattern is par ticularly useful in the middle seasons spring and autumn when it is sunny NAir flow to the front and rear footwells The air distribution pattern due to the natural tendency of heat to move upwards allows to heat the passenger compartment up as fast as possible Furthermore it offers a prompt feel ing o...

Page 112: ...ron mental conditions the windows could mist up fast because the air is no longer dehumidified The setting will be stored when the engine is stopped Either press the ECON button again or press the AUTO button to reset automatic con trol of the compressor in the latter case the manual settings will be can celled The LED on the ECON but ton will go out The automatic compressor is auto matically swit...

Page 113: ... during windscreen operation due to the characteristic smell of alcohol When the recirculation function is controlled manually green LED re circulation on amber LED external air taken in the LED on the auto button will come on if all the other functions air distribution air flow etc are controlled automatically by the system In the same way recircu lation will be controlled by the user when the AU...

Page 114: ...sting defrosting button again or the air circulation button ECON AUTO or OFF to switch the fast demisting defrosting function off and reset the previous system operation conditions as well as the last set function On certain versions the system is completed by a sensor fog fitted be hind the driving mirror and able to monitor a section of the windscreen internal surface and to operate the system a...

Page 115: ...and off normally when the system is off IMPORTANT The windows may mist up fast when the climate control system is off and in certain environ mental conditions The climate control system elec tronic control unit stores the system settings made before the system was switched off and restores them as soon as a button is pressed with the exception of the heated rear window button The function which th...

Page 116: ...olant temperature consequently can be cut out or reduced according to the bat tery voltage At the end of the operation cycle de veloped according to the temperature of the engine coolant and the battery voltage the supplementary heater is automatically switched off It will not come on again until the following en gine start up even if the coolant tem perature drops to under 65 C 115 STEERING COLUM...

Page 117: ...wards towards the dashboard Instrument panel warning light 1 will come on To return to dipped beams pull the stalk back towards the steering wheel Direction indicators fig 105 Move the stalk as follows up to switch on the right hand in dicators down to switch on the left hand in dicators Instrument panel warning light Ÿ or Δ will flash The direction indicators automati cally return to the neutral ...

Page 118: ...nsitivity 2 Slow continuous wipe 3 Fast continuous wipe 4 Temporary fast function when you release the stalk it returns to po sition 0 and automatically turns the windscreen wiper off Windscreen washer When you pull the lever towards the steering wheel fig 108 a jet of liq uid shoots out from the windscreen washer and the windscreen wiper will be operated for a few seconds and af ter a pause of ap...

Page 119: ...ff continu ous slow and fast wipe temporary fast wipe windscreen washer and headlight washer are unvaried The rain sensor is automatically switched on when the stalk is taken to position 1 fig 107 and has the pur pose of adjusting the range of opera tion from stationary no flick when the windscreen is dry to second con tinuous speed continuous fast wipe when the rain is heavy When the windscreen w...

Page 120: ...he rear fog light will automatically be switched off when the engine is stopped or when switching from dipped beam headlights and or front fog lights to side taillights Press the button again to switch the light on after starting the engine again or switching to dipped beam head lights in the fog You will need to press the button to switch the rear fog light on again af ter stopping the engine or ...

Page 121: ... reset the switch If you cannot see any fuel leaks and the car is in a fit state to continue its journey press button A to reactivate the fuel supply system HANDBRAKE fig 116 The handbrake lever is located be tween the two front seats Pull the handbrake lever upwards until the car cannot be moved Four or five clicks are generally enough when the car is on level ground while nine or ten may be requ...

Page 122: ...the gears press down the clutch and put the gear lever into one of the positions shown in the diagram in fig 117 the diagram is also on the gear lever knob To engage reverse R wait for the car to come to a standstill and from neutral position shift the lever to the right and then back In some versions lift ring A fig 117 under the knob with the fingers of the hand operating the lever Re lease the ...

Page 123: ...f switch A ring B and but ton C Switch A has two position OFF in this position the device is off ON this is the normal device op erating position The CRUISE warn ing light D will come on when the de vice starts governing the engine Ring B is used to set and maintain the car speed or decrease the set speed Turn ring B to position to set the speed reached or to increase the stored speed Turn ring B ...

Page 124: ...r all least three seconds and release it The car speed will be stored and you can now re lease your foot from the accelerator The car will continue at constant speed until one of the following events occur the brake pedal is pressed the clutch pedal is pressed IMPORTANT If required e g for overtaking you can accelerate simply by pressing the accelerator The car will return to the previously set sp...

Page 125: ...vice is cities or in heavy traffic Reducing the stored speed The stored speed can be decreased in two ways by switching the device off e g by pressing the brake pedal and then storing the new speed turning ring B to for longer than three seconds or by turning ring B to until the new speed is reached The new speed will automatically be stored Deleting the stored speed The stored speed is automatica...

Page 126: ...s will switch the lights on separately Press switch B to the left position 1 to switch on the left hand light Press the switch to the right position 2 to switch on the right hand light The lights will not come on when switch B is in central position 0 IMPORTANT Before getting out of the car make sure that the switch A is pressed to the left and switch B is in central position In this way the ceili...

Page 127: ...ed with a lock Versions with lock to lock unlock use the ignition key to open turn the ignition key to position 1 then pull handle A to lock close the lid and turn the key to position 2 Never drive with the glove compartment flap open it could injure the person sitting in the passenger seat in the event of an accident fig 121 P4T0714 fig 122 P4T0715 fig 123 P4T0716 Versions without lock to open si...

Page 128: ...hter are protected by a single flap Press the flap at point A to open Press button B to work the cigar lighter After approximately 15 sec onds it will return to its initial posi tion and be ready for use IMPORTANT The cigar lighter will only work when the ignition key is at MAR The cigar lighter gets very hot Be careful how you handle it and make sure it is not used by children danger of fire or b...

Page 129: ...e The cup can holder will open automatically Push it fully to close the holder COIN TRAY fig 129 The tray A is located in the central dashboard unit 128 fig 127 P4T0066 fig 128 P4T0067 fig 129 P4T0068 SUN VISORS fig 130 The sun visors can swing up or down or be pivoted sideways Release the visors from hooks A to move them sideways A courtesy mirror with sliding cover B and light C is fitted on the...

Page 130: ...t A with light and a side compartment B on the dashboard Rear oddment compartment fig 133 An oddment compartment A can be found in the rear part of the central dashboard unit fig 132 P4T0070 fig 131 P4T0063 fig 133 P4T0071 Door pockets fig 134 Pockets A are located on the front door panels fig 134 P4T0072 ...

Page 131: ...res sively takes them back to home posi tion 130 fig 135 P4T0074 fig 136 P4T0717 FRONT ARMREST fig 137 The armrest can be adjusted up or down To use the armrest lower it as shown in the figure An oddment compartment is con cealed inside the armrest Press but ton A to lift the cover IMPORTANT When the armrest has been lifted completely take care not to accidentally press button A otherwise you will...

Page 132: ...dangerous Be fore and during its opera tion ensure that any passengers in the car are not at risk from the moving roof either by personal ob jects getting caught in the mecha nism or by being injured by it di rectly Always remove the ignition key when you get out of the car to prevent the sunroof being operated accidentally and constituting a danger to the people left in the car fig 138 Do not ope...

Page 133: ... of sun rays in the passenger compartment when the sunroof is closed or partially open Use handle A to open and close the sunshade by hand The sunshade slides back into the roof when the sunroof when it is com pletely opened When the roof is closed the sun shade slides out partially to make the handle accessible fig 141 P4T0078 IMPORTANT With ignition key at STOP sunroof open is indicated by a tim...

Page 134: ...er sounding when opening a front door Insert the screwdriver in C and turn it In this way you can manually open and close the sunroof When the roof is in the required po sition turn the screwdriver half a turn backwards until you hear a click Then remove the screwdriver fig 142 P4T0079 fig 144 P4T0081 fig 143 P4T0080 EMERGENCY PROCEDURE fig 143 144 If there is an electrical fault in the sunroof re...

Page 135: ...d locks are not engaged Pull the handle B to open the door All doors are unlocked when a front door handle is operated A light C where fitted is located near each door handle to make it easy to find the handle in the dark fig 146 P4T0802 fig 147 P4T0083 fig 148 P4T0084 134 DOORS CENTRAL DOOR LOCKING SYSTEM From the outside Close the doors and either press but ton A fig 145 on the key grip or in se...

Page 136: ...once more CHILD LOCK fig 149 To prevent opening the rear doors from the inside Engage by inserting the tip of the ig nition key in A to turn the lock Position 1 engaged Position 2 disengaged The device will be engaged even if the doors are unlocked by means of the centralised system 135 Always use the lock when transporting children This will prevent them opening a door by themselves when travel l...

Page 137: ...the end of its travel 2 release the control button then close the window completely keep ing the button pulled up for at least 3 seconds after the window has reached the end of its travel 3 proceed in the same way for all the other windows avoiding to per form these operations on more than one window at the same time At the end of this procedure the system is reset to its original oper ating condi...

Page 138: ...ate the rear window windows from the driver s seat Switch E fig 151 disables the con trols on door handles when the switch is up fig 152 P4T0262 Improper use of the elec trical window winders can be dangerous Before and during their operation ensure that any passengers in the car are not at risk from the moving glass ei ther by personal objects getting caught in the mechanism or by be ing injured ...

Page 139: ...cifications chapter Also ensure the items in the boot are arranged properly and fastened with straps to the specific hooks to prevent them be ing thrown forwards and injuring passengers should you brake sharply OPENING THE BOOT WITH THE REMOTE CONTROL The boot can be opened from the out side by pressing the button D fig 155 on the ignition key grip The boot can be opened also when the central door...

Page 140: ...only You can sit one passenger in the rear seat on the left hand side To totally extend the boot fig 158 Fold both side of the seat to obtain maximum boot capacity fig 156 P4T0088 fig 157 P4T0089 fig 158 P4T0090 fig 159 P4T0091 To extend the boot 1 Pull handle A fig 159 located in the middle of each cushion in the direction of travel and fold it forwards in the direction of the arrow 2 Remove the ...

Page 141: ...sted in the hidden stretches be tween the cushions and the seat back 3 Refit the head restraints IMPORTANT If there is a fairly heavy load in the boot and you are travelling at night it is a good idea to check and adjust the height of the dipped beam headlights see Head lights in this chapter fig 161 P4T0092 fig 160 P4T0737 ANCHORING THE LOAD fig 162 163 164 The load can be secured with belts atta...

Page 142: ...he boot to close it It will lock automatically Heavy loads which are not securely anchored could seriously injure pas sengers in the event of an accident fig 164 P4T0095 fig 163 P4T0094 fig 165 P4T0200 BONNET To open the bonnet 1 Pull the red lever A fig 166 in the direction of the arrow fig 166 P4T0096 This should only be done when the car is stationary 2 Lift lever B fig 167 and release the bonn...

Page 143: ...he engine compartment when this is still hot be careful not to burn yourself and keep away from the electric fan as this may cut in at any time even if the key is re moved from the ignition switch Wait until the engine has cooled To close the bonnet 1 Lower the bonnet until it is about 20 cm above the engine compart ment Let it fall the bonnet will lock automatically 2 Make sure that the bonnet is...

Page 144: ...uite normal When centrally unlocked the flap will be in line with the body To open the flap press the front part in point B fig 171 where there is a slight ridge on the surface Then pull the back of the flap back wards and turn it outwards at the same time as shown by the arrow un til the flap is fully open fig 171 P4T0100 fig 170 P4T0317 fig 169 P4T0279 fig 172 P4T0646 Do not put naked flames or ...

Page 145: ...itted IMPORTANT When installing the cellular telephone set the input vol ume as shown in the Sound system chapter Possible expert settings list PHONE SETTING and PHONE AMPLIFICATION RADIO TRANSMITTERS AND CELLULAR TELEPHONES Cellular telephones and other radio transceiver equipment e g HAM ra dio systems shall not be used inside the car unless a separate aerial is mounted on the roof IMPORTANT The...

Page 146: ...est along the sides of the roof ski rack uprights fig 174 P4T0103 Never exceed the permit ted weight refer to the Technical specifications chapter HEADLIGHTS GAS DISCHARGE HEADLIGHTS where fitted Gas discharge headlights Xeno work with electric arc in an environ ment saturated with pressurised xenon gas instead of incandescent fil ament Obtained lighting is significantly higher than that of tradit...

Page 147: ...rly Have the headlight position checked and adjusted if required at a Lan cia Dealership SLANT COMPENSATION excluding versions with gas discharge headlights A loaded car slopes backwards This means that the headlight beam rises In this case a compensation is re quired Improved side zone lighting im proves significantly driving safety since It enables the driver to better iden tify the presence of ...

Page 148: ...he light position checked and adjusted if required at a Lan cia Dealership fig 176 P4T0105 EOBD SYSTEM The EOBD European On Board Diagnosis system fitted in this car complies with Directive 98 69 CE EURO 3 This system continuously monitors the engine emission system compo nents Furthermore the system warns the driver of deterioration concerning the emission system components by means of the U warn...

Page 149: ... locking sys tem prevents wheel locking and con sequent slipping in all road surface conditions This ensures greater con trol as it is possible to steering and brake at the same time and reduces braking space If the road surface conditions de crease the friction coefficient i e due to the presence of water ice snow etc a wheel may slip Furthermore a wheel which is not locked can ab sorb the latera...

Page 150: ...ncia Dealer ship avoiding sudden braking to have the system checked Stop the car immediately and contact a Lancia Deal ership if the low brake fluid warning light x comes on Fluid leakage will compromise ef ficiency of both the traditional brake system and the ABS wheel anti locking system ESP SYSTEM where required ASR HILL HOLDER HYDRAULIC BRAKE ASSIST Electronic Stability Program ESP is an elect...

Page 151: ...ses the signals received from the various sensors and performs the most adequate actions a sensor that detects the steering wheel position four sensors that detect the re volving speed of each wheel a sensor that detects the vehicle ro tation around the vertical axis and an integrated sensor that detects lateral acceleration centrifugal force The stabilizing action of the ESP system is based on th...

Page 152: ...the flashing of warning lamp á on the dashboard this in forms the driver of the vehicle s criti cal stability and grip conditions ESP system fault warning In case of faults the ESP system is automatically switched off this causes warning lamp á on the dashboard to light up and stay on In case of ESP system faults the ve hicle s behaviour will be the same as the models not equipped with this sys te...

Page 153: ...P sys tem and facilitates starting on an up hill slope It is automatically activated in the following conditions Uphill vehicle stationary on a road with gradient above 2 engine run ning clutch and brake pedals pressed and gearbox in neutral position or gear engaged reverse excluded Downhill stationary on a road with gradient above 2 engine running clutch and brake pedals pressed and reverse engag...

Page 154: ...system the tyres must absolutely be of the same brand and type on all wheels in perfect conditions and above all of the type brand and size specified HBA FUNCTION Hydraulic Brake Assist where provided HBA The function which cannot be cut out recognizes emergency braking on the ground of the brake pedal op eration speed and considerably in creases the pressure in the braking circuit Hydraulic Brake...

Page 155: ...per ating the specific sound system are provided in the supplement attached to this Owner Handbook for cars where this system is fitted SPEAKERS Front speakers fig 178 The front speakers are housed in the front door panels A Tweeter excluding versions with BOSE HI FI system B Woofer Rear speakers fig 179 The rear speakers C are housed in the rear door panels versions with BOSE HI FI system only Sp...

Page 156: ...on the right hand side of the boot Station Wagon versions a high power HI FI amplifier with 6 channels each with 37W two of which for class D subwoofer or bass box with digital signal equalization Overall musical power 220W fig 181 P4T0282 The HI FI sound system was specif ically designed for the Lybra to offer the best acoustic performance and the musical realism of a live concert in each seat in...

Page 157: ...exclusive Lybra feature You are therefore strongly recommended to pay the closest attention to this section for helpful hints on optimum driving practices and usage of the car that will help you get the most out of your car STARTING THE ENGINE 157 PARKING 160 AT THE FILLING STATION 160 SAFE DRIVING 164 CONTAINING RUNNING COSTS AND POLLUTION 168 CHEAP RUNNING THAT RESPECT THE ENVIRONMENT 170 TOWING...

Page 158: ...f you are still unable to start the en gine perform the emergency start up procedure see In an emergency and call your Lancia Dealership IMPORTANT Never leave the igni tion key at MAR when the engine is off It is dangerous to let the engine run in a garage of other closed area The en gine consumes oxygen and gives off carbon dioxide carbon monox ide and other poisonous gases The engine may be more...

Page 159: ...gher than usual when the engine is cold The warning light m will flash for approxi mately 60 seconds at start up or during prolonged cranking to signal a fault in the glow plug heating system You can use the car as usual if the engine starts but you should contact a Lancia Deal ership as soon as possible to have problem seen to If the engine does not start at the first attempt return the ignition ...

Page 160: ...PPING THE ENGINE Turn the ignition key to STOP while the engine is idling IMPORTANT After a taxing drive you should allow the engine to catch its breath before turning it off by let ting it idle to allow the temperature in the engine compartment to fall 159 Never bump start the en gine by pushing towing or coasting downhill as this could cause fuel to flow into the catalytic exhaust system and dam...

Page 161: ...ediately if the handbrake is accidentally re leased Block the wheels with a wedge or a stone if the car is parked on a steep slope Do not leave the ignition key at MAR to prevent draining the battery Always remove the key when you leave the car PETROL VERSIONS The car s pollution control devices make it essential to use unleaded petrol only However to avoid errors the diam eter of the fuel filler ...

Page 162: ...e tank If on the other hand the engine has run even for a very short time you will need to drain the fuel lines as well as emptying the tank Diesel fuel fluidity decreases at low temperatures due to the paraffin it contains and can clog up the fuel fil ter To avoid possible problems fuelling stations usually sell summer or win ter fuel according to the period of the year In spring or autumn howeve...

Page 163: ...W 10W 21W 2 3W 21W 21W 21W 5W 5W 10W 10W 5W 5W 10W 5W BULBS TYPE POWER Main beam headlights Dipped beam headlights Gas discharge main beam and dipped beam headlights Front sidelights Front direction indicators Side direction indicators Rear direction indicators Front fog lights Taillights Brake lights Third brake light saloon Third brake light SW Reversing light Rear fog light Number plate light F...

Page 164: ...1V 2 2 2 2 2 2 2 4 4 2 205 55 R16 91V 2 3 2 3 2 5 2 5 4 2 Station Wagon 1 6 195 65 R15 91H 2 0 2 0 2 2 2 4 2 7 4 2 205 60 R15 91V 2 0 2 0 2 2 2 4 2 7 4 2 1 8 195 65 R15 91V 2 0 2 0 2 2 2 4 2 7 4 2 205 60 R15 91V 2 0 2 0 2 2 2 4 2 7 4 2 2 0 195 65 R15 91V 2 2 2 2 2 2 2 4 2 7 4 2 205 60 R15 91V 2 2 2 2 2 2 2 4 2 7 4 2 205 55 R16 91V 2 3 2 3 2 5 2 5 2 8 4 2 1 9 jtd 195 65 R15 91H 2 2 2 2 2 2 2 4 2 7 ...

Page 165: ...aint systems child seats carriers etc are properly fixed on the rear seat Place any objects in the boot in such a way that they cannot be thrown forwards in the event of an ac cident Avoid placing light coloured ob jects or sheets of paper on the dash board to prevent reflections on the windscreen Light eating will help keep your reflexes prompt Above all do not have anything alcoholic to drink Ce...

Page 166: ... lose the aid of engine braking and power brakes so that braking requires greater effort Never coast downhill i e with the engine off if you do you lose the aid of engine braking DRIVING AT NIGHT There are the main rules to follow when you are driving at night Drive especially carefully it is harder to drive at night Slow down especially if the road is not lit At the first signs of sleepiness stop...

Page 167: ...ion of the windscreen wiper blades DRIVING IN FOG If the fog is thick do not start out on a journey unless you absolutely have to If driving in mist blanket fog or when there is the danger of fog patches Keep your speed down Turn on the dipped headlights rear fog lights and front fog lights if fitted even during the day Do not drive with your headlights at main beam IMPORTANT On stretches of road ...

Page 168: ... patches Be care ful therefore when driving over stretches that do not get much expo sure to the sun or are lined with trees or rocks where ice might not have melted Keep a good distance from the ve hicles in front DRIVING WITH ABS The ABS is a braking system that es sentially offers two advantages 1 It prevents wheel lock and conse quent skidding in emergency stops particularly when the road does...

Page 169: ... is in creased and handling suffers which will effect safety Unnecessary loads Do not travel with too much load in the boot The weight of the car and its trim greatly effects consumption and stability Roof rack ski rack Remove the roof or ski racks from the car as soon as they are no longer needed These accessories reduce the aero dynamic penetration of the car and will increase consumption When t...

Page 170: ...increases consumption In the same way improper use of the higher gears will increase consump tion emissions and wear and tear on the engine Top speeds Fuel consumption increases consid erably as speed increases For exam ple when accelerating from 90 to 120 km h fuel consumption increases up to approximately 30 Your speed should be kept as even as possible and superfluous braking and acceleration a...

Page 171: ... is to follow the Service Schedule to the letter Only use unleaded petrol for petrol engines If you have trouble starting do not keep turning the ignition key for long periods Be especially careful to avoid bump starting the car by pushing towing or rolling downhill these are all manoeuvres that can damage the catalytic exhaust Use an auxiliary battery for start ups only Environmental protection h...

Page 172: ...s When functioning nor mally the catalytic con verter reaches high tem peratures For this reason do not park the car over inflammable material grass dry leaves pine needles etc fire hazard Do not install other heat shields and do not remove those already fitted to the catalytic converter and exhaust pipe Do not allow anything to be sprayed onto the catalytic converter lambda sensor and exhaust pip...

Page 173: ...using snow chains you should contact a Lancia Dealership for advice Check the tautness of the chains af ter driving some ten metres The ABS system will not control the trailer braking system Great care should therefore be taken when driving on slippery road surfaces Under no circumstances modify the car s braking system for trailer braking control The trailer s braking sys tem must be completely i...

Page 174: ...d for several months Park the car in covered dry and if possible well ventilated premises Engage a gear Make sure the handbrake is not engaged Remove the cables from the bat tery terminals first remove the cable to the negative terminal and check the battery charge If the car is to be stored for long periods the battery charge should be checked every three months and recharged if it falls below 12...

Page 175: ...ms equipping the car to malfunction This could compromise safety in addition to constituting a potential hazard for the passengers In addition trans mission and reception of these de vices may be affected by the shielding effect of the car s body RADIO TRANSMITTERS AND CELLULAR TELEPHONES Cellular telephones and other radio transceiver equipment e g HAM ra dio systems must not be used inside the c...

Page 176: ...ld like to remind you that in addition to the Owner Handbook you have also been provided with the Warranty Booklet where you will find details of all the services LANCIA can provide should you find yourself in difficulty We nevertheless recommend you read these pages If in need you will be able to find the information you require much more quickly EMERGENCY START UP 176 JUMP STARTING 177 BUMP STAR...

Page 177: ...CODE card then press the accelerator pedal and keep it down until the U warning light comes on for four seconds and then goes out release the accelerator pedal 5 The U warning light will start flashing again after it has flashed the number of times that corresponds to the second figure on the CODE card press the accelerator pedal to the floor and keep it there 6 Do the same for the remaining digts...

Page 178: ...vent acciden tal contact between the metal parts of the two vehicles 3 Start the engine 4 When the engine has been started remove the leads in the re verse order i e D and C B and fi nally A If the engine fails to start after a few attempts do not keep turning the key but have the car seen to at a Lancia Dealership Do not carry out this pro cedure if you lack experi ence if it is not done cor rect...

Page 179: ...Never use the wheel on other models Never use other models of spare wheels on your car IF A TYRE IS PUNCTURED Follow the instructions on this and the following pages to use the jack and spare wheel or space saver spare wheel where fitted correctly The space saver spare wheel is narrower than a standard wheel and must only be used to reach a service sta tion where to have the punctured tyre repaire...

Page 180: ... on the label attached to the jack itself Do not fit snow chains on space saver spare wheels where fitted If a front wheel drive wheel is punctured and you require snow chains to proceed take a standard wheel from the rear axle and fit the space saver spare wheel in its place Having fitted two standard wheels on the drive axle you can use snow chains thus solving the emergency situation The wheel ...

Page 181: ...ing device B fig 4 Take the tool kit C and the spare wheel D and go to the wheel to be changed 6 For cars with steel rims remove the clipped on wheel cap E fig 5 by grasping it from the slots and pulling it outwards Alternatively use the flat tip screwdriver provided as a lever on the edge 7 For cars with alloy rims remove the clipped on wheel hub cap levering in the specific housing with the flat...

Page 182: ...e underbody cor rectly 12 Warn anyone nearby that the car is about to be lifted They must stay clear and not touch the car until it is back on the ground 13 Work the jack with handle L fig 10 until the car is a few cen timetres off the ground Make sure that the handle turns freely and is far enough from the ground so that you do not scrape your hands Do not touch moving parts of the jack screws or...

Page 183: ...ng loose 16 Put the spare wheel on making sure that centring pins M fig 12 on the hub coincide with the holes on the wheel 17 Tighten the four fastening bolts IMPORTANT Use the hexagonal re cess on the upper part of the screw driver grip provided to facilitate this operation Insert the screwdriver blade in the hole in the grip to handle fig 11 18 Turn the handle to lower the car and remove the jac...

Page 184: ...the carpet as shown fig 16 before refitting the carpet on the floor IMPORTANT Do not fit the hub cap or the wheel cap to the space saver wheel REFITTING THE STANDARD WHEEL 1 Follow the procedure described above Raise the car and remove the spare wheel 2 Make sure the parts of the wheel that comes into contact with the hub are clean and that there is no grit which could cause the wheel bolts to wor...

Page 185: ...le fig 19 6 Lower the car and remove the jack 7 Tighten up the wheel bolts in a criss cross fashion following the order shown fig 20 8 Position the cap on the wheel rim with the inflation valve C fig 21 co inciding with the recess Press all round the cap starting from the valve until it is fitted properly 9 For cars fitted with alloy rims ex ert a light pressure to refit hub cap IMPORTANT Failure ...

Page 186: ...rce it slightly so that it does not vibrate when the car is moving 3 Put the tools back into the con tainer 4 Position the tool kit inside the spare wheel and fix everything with device B fig 4 5 Reposition the shim fig 3 IF A BULB BURNS OUT You should where possi ble have your bulbs chan ged at a Lancia Dealer ship The correct operation and slant of headlights is essential for safe driving and co...

Page 187: ...r a slight coat of fogging this does not show a defect since it is a natural oc currence due to low temperature and to the degree of humidity in the air it will soon disappear as soon as the lights are turned on The presence of drops inside the headlight shows water seepage refer to the Lancia Dealership TYPES OF BULBS Several types of bulbs are installed in the car fig 22 A Glass bulbs Snapped in...

Page 188: ...hts Brake lights Third brake light saloon Third brake light SW Reversing light Rear fog light Number plate light Front ceiling light Courtesy lights Rear side Glove compartment where fitted Boot saloon Boot SW Doors E E A B A B D B B B B B C C C C C C C A H7 H7 D2R W5WB PY21W PY5W PY21W H1 R10W P21W 2 3W H21W P21W P21W C5W W5W C10W C10W C5W C5W C10W W5W 55W 55W 35W 5W 21W 5W 21W 55W 10W 21W 2 3W 2...

Page 189: ...as follows fig 24 1 Dipped beam headlight 2 Main beam headlight 3 Front side light Dipped beam headlight fig 25 To replace the halogen E 12V H7 60W bulb 1 Remove the connector from the bulb 2 Release the fastening clip A and remove the bulb 3 Insert the new bulb Make the tab B on the metal part of the bulb coin cide with the specific groove on the headlight dish 4 Refit the fastening clip and refi...

Page 190: ...side light fig 27 To replace the bulb 1 Remove the bulb holder A by holding the tab and turning it slightly 2 Remove the bulb B by pressing it slightly and turning it anticlockwise 3 Replace the bulb and refit the clipped in bulb holder FRONT DIRECTION INDICATORS To replace the bulb 1 Turn the bulb holder A fig 28 anticlockwise and remove it 2 Remove the bulb B by pressing it lightly and turning i...

Page 191: ...n the dish 5 Fasten clip C and insert the con nector B in the bulb 6 Refit the cover A by turning it clockwise SIDE DIRECTION INDICATORS fig 32 To replace the bulb 1 Press the lens in direction 1 press tab A and remove the cluster from the front 2 2 Turn the arrow anticlockwise and remove bulb holder B 3 Remove bulb C and replace it 4 Refit the arrow in the bulb holder and refit the cluster by fas...

Page 192: ...ove the bulb holder D 3 Remove the bulbs pushing them slightly and turning them anticlock wise E Taillight bulb F Brake light bulb G Direction indicator bulb or ange H Reversing light right hand clus ter only Rear fog light left hand cluster only 4 After replacing the bulbs refit the bulb holder D and fasten with screw C 5 Lower the cover B and fasten by turning knob A fig 33 P4T0138 fig 34 P4T013...

Page 193: ...tor C from the housing on the rear window shelf 3 Disconnect the connector by holding the retainer pressed 4 Remove the additional brake light cluster D from cover E by releasing the side retainers F 5 Insert a new additional brake light cluster in cover E so that it clips in the side retainers F 6 Connect the electrical connector C and insert it in its housing on the rear window shelf 7 Repositio...

Page 194: ... fig 43 from the contact and replace 6 Close the cover E by fastening it in the recess 7 Refit the ceiling light by fastening clip D first and then press on the front part to engage the tabs G fig 42 IMPORTANT When refitting the ceiling light check that the electrical wires are positioned correctly 8 Fasten screws C 9 Refit cover B by fitting the front part first and then press on the back until i...

Page 195: ... ceiling light using a screwdriver as a lever in point A 2 Remove bulb B by releasing it from the side contacts and replace it 3 Refit the ceiling light by inserting side C first and pressing the other side to engage clip D COURTESY LIGHT fig 45 To replace a bulb 1 Remove the ceiling light using a screwdriver as a lever in point A 2 Remove bulb B by releasing it from the side contacts and replace ...

Page 196: ...sing the other side to en gage clip A DOOR LIGHTS fig 48 49 To replace an bulb 1 Remove the lens by using a screwdriver as a lever on clip A 2 Press the two sides of shield B at the fastening clips and turn it 3 Replace the clipped in bulb C 4 Close shield B by clipping it into its housing 5 Refit the lens by inserting side D first and pressing the other side to en gage clip A fig 49 P4T0153 fig 4...

Page 197: ... to the positive bat tery terminal see Fuses in the engine compartment If the fuse blows again have the car inspected at a Lancia Dealership To locate the fuse refer to the table on the following pages GENERAL fig 50 If an electrical device is not working check whether the respective fuse is blown The conductor should not be broken If it is replace it with another with the same amperage same colou...

Page 198: ...he right side of the fusebox The spare fuses present various amper ages Remember to replace the spare fuses after replacing a fuse The devices protected by the fuses in the fusebox are listed in the tables on the following pages You will need to remove the fusebox to reach the relays fig 52 Have this done by a Lancia Dealership D Horn relay E Heated rear window relay F Ignition cut off powered dev...

Page 199: ...54 To reach the fuses and the relays re move the clipped on cover A B Engine cooling fan 1st speed re lay C Engine cooling fan 2nd speed re lay excluding 1 6 version with heater and 1 8 version with heater In the fusebox over the battery fig 55 56 To reach the fuses open cover A move clips B forwards and open the clipped on cover C Tong D for removing the fuses can be found in the fusebox Should f...

Page 200: ...A In the service area fig 58 59 To reach the fuses and relays re move cover A clipped on by releas ing the tabs B To refit the cover insert the tabs in recesses B first and then press the lower edge to clip it on Climate control compressor relay 20A Headlight washer timer relay Direction indicator double contact and centralised door locking system relay versions without electronic alarm Diesel fue...

Page 201: ...rd 7 10 fig 52 Left right taillights on dashboard 6 10 fig 52 Reversing light 1 10 fig 53 Reversing light control 1 10 fig 53 Rear foglight 6 10 fig 52 Right hand brake light 6 10 fig 52 Left hand brake light 6 10 fig 52 Third brake light 13 10 fig 52 Hazard lights 14 10 fig 52 Foglight 9 15 fig 53 Number plate light 7 10 fig 52 Direction indicators 13 10 fig 52 Foglights relay control on dashboar...

Page 202: ...ABS control unit key 13 10 fig 52 Cigar lighter 9 20 fig 52 Cigar lighter enable relay 10 7 5 fig 53 Air bag 3 10 fig 53 Diagnostic socket power 12 10 fig 52 Electronic injection utilities power 1 8 1 9 jtd 2 4 jtd versions 2 7 5 fig 57 Electronic injection utilities power 1 15 fig 57 Electronic injection utilities power 2 0 versions 2 15 fig 57 Electronic alarm key 1 10 fig 53 Electronic alarm co...

Page 203: ...l unit 1 10 fig 53 Cruise control 13 10 fig 52 Engine cooling fans relay enable 4 7 5 fig 53 BOSE HI FI system 11 25 fig 53 Clutch switch 1 9jtd 2 4jtd versions 1 10 fig 53 Windscreen washer 10 20 fig 52 Headlight washer 5 20 fig 52 Headlight washer enable 8 10 fig 52 Headlight washer relay enable 10 7 5 fig 53 Rear window washer relay enable 10 7 5 fig 53 Heated rear window relay enable 10 7 5 fi...

Page 204: ...12 14 15 power in fusebox fig 52 1 80 fig 56 MAXI FUSE fuse no 3 4 8 power in fusebox fig 52 and fuse no 6 7 8 9 11 12 13 14 on auxiliary fuse bracket fig 53 3 70 fig 56 MAXI FUSE climate control system power 4 40 fig 56 MIDI FUSE additional heater power 1 9jtd 2 4jtd versions 10 70 fig 56 MIDI FUSE ABS system power 9 60 fig 56 Navigator display 1 10 fig 53 Current socket in passenger compartment ...

Page 205: ... display 14 10 fig 52 Lancia CODE system 4 7 5 fig 53 7 5 fig 59 Automatically adjustable internal rearview mirror 1 10 fig 53 External rearview mirrors defroster relay enable 10 7 5 fig 53 External rearview mirrors movement 1 10 fig 53 External rearview mirrors defrosting 15 30 fig 52 Instruments 13 10 fig 52 Cellular phone set up 3 20 fig 52 1 10 fig 53 Windscreen wiper washer and headlight wash...

Page 206: ... emergency key to OFF see Electronic alarm in Getting to know your car 2 Connect the charger cables to the battery terminals 3 Turn on the charger 4 When you have finished turn the charger off before disconnecting the battery 5 Reconnect the cables to the bat tery terminals Make sure the polarity is correct The jack should only be used to change a wheel on the car for which it was designed It shou...

Page 207: ...y careful not to squeeze the brake pipes the fuel pipes or the side member ribbing fig 61 P4T0163 IMPORTANT Respect the local rules for towing the car Thecarisprovidedwithafront fig 62 and rear fig 63 attachments for fas tening the tow ring To fit the tow ring remove the bumper cover by using a screwdriver as a lever in point A fig 62 P4T0164 fig 63 P4T0165 Carefully clean the threading before fas...

Page 208: ...gency lane with your car Turn off the engine and turn on the hazard lights At night illuminate the scene of the accident with your headlights Act carefully you must not risk being run over Mark the accident by putting the red triangle at the regulatory distance from the car where it can be clearly seen Call for rescue making the infor mation you give as accurate as you can On the motorway use the ...

Page 209: ...nic Unfasten or cut seat belts holding injured parties Do not give an injured person any thing to drink Do not move an injured person un less the following situations arise Pull the injured person from the car only if it risks catching fire it is sinking in water or is likely to fall over a cliff or similar Do not pull his her arms or legs do not bend the head and as far as possible keep the body ...

Page 210: ...feguard its performance and safety features while respecting the envi ronment and keeping running costs down Also remember that the following servicing regulations marked with the symbol are essential to ensure the warranty remains valid SCHEDULED SERVICING 210 SERVICE SCHEDULE 211 ANNUAL INSPECTION SCHEDULE 213 ADDITIONAL CHECKS 213 CHECKING FLUID LEVELS 215 AIR CLEANER 221 POLLEN FILTER 222 DIES...

Page 211: ...ar ranty being cancelled for those defects that can be attributed to such failure Scheduled Servicing is performed at all Lancia Dealership and there is a set time scale for such operations If it is seen that further replacements or repairs are necessary in addition to the work being carried out these will only be done after the customer has given his her consent IMPORTANT You are recom mended to ...

Page 212: ...ns of outside bodywork underbody protection piping hosing exhaust fuel lines brake lines rubber parts boots sleeves bushings etc Check for bonnet and boot lock cleanness lever cleanness and lubrication Check conditions of accessory drive belts and or poly V belts Check handbrake lever stroke Check adjust tappet clearance jtd versions Check diesel engine smokiness in exhaust jtd versions Replace fu...

Page 213: ...rol systems via diagnostic socket through diagnosis socket Check gearbox oil level Change engine oil Replace engine oil filter Change brake fluid or every 2 years Replace dust pollen filter or every year Or every three years in the event of demanding use cold climate use in cities long idling dusty areas Or every five years regardless of the distance travelled 20 40 60 80 100 120 140 160 180 thous...

Page 214: ...d lubri cation Inspect conditions of engine gear box transmission piping exhaust fuel feed brakes rubber parts boots sleeves bushings etc brake and fuel line hoses Check battery charge status Check conditions of various con trol belts Check and top up fluid levels en gine coolant brakes windscreen washer battery etc Change engine oil Replace engine oil filter Replace pollen filter ADDITIONAL CHECK...

Page 215: ...lement more frequently It should be changed es pecially if the amount of air intro duced into the passenger compart ment is introduced IMPORTANT Engine oil Change the engine oil more fre quently than shown in the Service Schedule is the car is normally driven in one of the following particularly se vere conditions towing a trailer on dirty roads for short repeated trips less than 7 8 km with outsi...

Page 216: ...steering fluid fig 1 1 6 version P4T0651 fig 2 1 8 version P4T0652 Be careful not to mix up the various types of fluids when you are topping up they are all mutually incompatible and could damage the car Do not smoke while working in the engine compartment the presence of flammable gas and vapour could cause a fire ...

Page 217: ...ke fluid 4 Windscreen washer fluid 5 Engine coolant 6 Power steering fluid fig 3 2 0 version P4T0653 1 Engine oil 2 Battery 3 Brake fluid 4 Windscreen washer fluid 5 Engine coolant 6 Power steering fluid fig 4 1 9 jtd version P4T0654 ...

Page 218: ...217 1 Engine oil 2 Battery 3 Brake fluid 4 Windscreen washer fluid 5 Engine coolant 6 Power steering fluid fig 5 2 4 jtd version P4T0655 ...

Page 219: ...nd MAX reference lines on the dipstick If the oil level is near or even below the MIN line pour in oil through the filler hole until it reaches the MAX line The oil level must never exceed the MAX line fig 6 1 6 version P4T0656 fig 7 1 8 version P4T0657 fig 8 2 0 version P4T0658 fig 9 1 9 jtd version P4T0659 fig 10 2 4 jtd version P4T0660 In 1 6 version lift the upper part of the cap and remove it...

Page 220: ...ained in the cool ing circuit PARAFLU UP cannot be mixed with other fluids Should this take place do not start the en gine and contact Lancia Dealer ship IMPORTANT After topping up or changing the oil let the engine turn for a few seconds and wait a few min utes after stopping it before you check the level Check coolant level when the engine is cold The level should be included between the MIN and...

Page 221: ...an ex ceed the MAX reference line To top up loosen cap A and pour oil into the reservoir IMPORTANT Make sure that the oil has the same specifications as the oil in the system Oil consumption is extremely low If the oil level needs topping up again a s short period of time have the sys tem checked for leakage at a Lancia Dealership BRAKE AND HYDRAULIC CLUTCH FLUID fig 15 Check that the level of the...

Page 222: ...ot carried out correctly Replace the air cleaner more frequently than shown in the Service Schedule if the car is used on dusty roads The cleaner can be dam aged if it is cleaned and consequently the engine can be damaged The symbol π on the container indicates syn thetic brake fluid distin guishing it from mineral fluid Us ing mineral type fluid would dam age the special rubber braking system gas...

Page 223: ...dusty or extremely polluted environments you should change the filter element more frequently It should be changed es pecially if the amount of air intro duced into the passenger compart ment is introduced DIESEL FILTER 1 9 jtd 2 4 jtd versions DRAINING THE CONDENSE fig 18 fig 17 P4T0175 BATTERY The battery is located in the engine compartment in point 2 fig 1 2 3 4 5 The battery is of the limited...

Page 224: ...ccessories e g sound system hazard lights etc switched on for a long time when the engine is not running IMPORTANT A battery which is kept at a charge of less than 50 for any length of time will be damaged by sulphation leading to a reduction in cranking power and a higher risk of the battery electrolyte freezing this may even occur at 10 C If the car is inactive for a long period of time refer to...

Page 225: ...e devices such as bottle warmers vacuum cleaners cellular phones etc will speed up battery discharging when powered when the engine is not running IMPORTANT Please note that when installing additional systems in the car incorrect wiring can be dan gerous especially when concerning safety systems BATTERY WITH HYDROMETER Description For versions markets where applic able the battery can be fitted wi...

Page 226: ... ups with a battery charger Always use an auxiliary battery Be particularly careful when con necting the battery to the electrical system Make sure that the polarity is correct and that the connection is ef ficient Bright white colour Dark colour without green central area Dark colour with green central area Top up electrolyte Low battery charge Electrolyte level and charge sufficient Contact a La...

Page 227: ...a problem even if it has nothing to do with the ignition system Therefore if the engine has problems it is important to have the spark plugs checked at a Lancia Dealership Modifications or repairs to the electrical system carried out incorrectly and without bearing the features of the system in mind can cause mal functions with the risk of fire fig 19 P4T0240 The spark plugs must be changed at the...

Page 228: ...ageing A Correct pressure tyre wears evenly B Under inflated tyre shoulder tread wear C Over inflated tyre centre tread wear fig 20 P4T0239 If the pressure is too low the tyre overheats and this can cause it serious dam age WHEELS AND TYRES TYRE PRESSURE Check the pressure of each tyre in cluding the spare every two weeks or so every month anyway and before long journeys The pressure must be check...

Page 229: ...n expert who can judge whether they are still fit for use Remember to check the spare tyre particularly carefully too If a replacement is necessary always use new tyres and avoid using ones the origin of which you are not certain about The car fits tubeless tyres Under no circumstances use an inner tube with these tyres If you replace a tyre it is a good idea to change the inflation valve too To e...

Page 230: ...t operate the windscreen wipers on dry glass Checking the blades Before checking clean the wind screen and rubber blades carefully with warm water and TUTELA PROFESSIONAL SC 35 windscreen washing fluid The windscreen should be perfectly clean and not greasy If required complete the cleaning oper ation with degreasing products am monia based or degreasing polishes The blades must also be perfectly ...

Page 231: ... operated and the headlights are on CLIMATE CONTROL SYSTEM During the winter the climate con trol system must be turned on at least once a month for about ten minutes Before summer have the system checked at a Lancia Dealership SPRAY NOZZLES fig 22 If there is no jet of liquid first make sure that there is liquid in the reser voir see Checking fluid levels in this chapter Then make sure that the h...

Page 232: ... pro tective capacity Spraying plastic coating materials to protect the most exposed points under the door inside the wings the edges etc The use of open box sections to prevent condensation and water from building up and rusting the inside of the parts BODY AND UNDERBODY WARRANTY Your Lybra is covered by warranty against any original structural or body part being perforated by rust Refer to the W...

Page 233: ...Do not wash the car after it has been parked in the sun or while the bonnet is hot it could take the shine off the paint Outside plastic parts must be cleaned following the usual car wash ing procedure Where possible avoid parking the car under trees the resinous sub stances that certain species of tree shed dull the paintwork and increase the possibility of rust forming IMPORTANT Bird droppings m...

Page 234: ...Brush the seats with a damp sponge with water and a neutral soap CLEANING LEATHER AND IMITATION LEATHER SEATS Remove the dry dirt with a chamois leather or very slightly moist loth without exerting too much pressure Remove liquid or grease stains with a dry absorbent cloth without rubbing Then wipe with a chamois leather or soft cloth moistened with water and neutral soap If the stain does not com...

Page 235: ...all the features of safety driving pleasure and environmental friendliness with the Lybra saloon offers you the extra possibility of having an extensive loading capacity permanently at your disposal REAR WINDOW WASHER WIPER 235 INTERIOR LIGHTS 236 SOUND SYSTEM 236 REAR TRIM AUTOMATIC CONTROL SYSTEM 237 BOOT 238 ROOF RACK SKI RACK 245 TOWING THE CAR 245 IF A TYRE IS PUNCTURED 246 IF A BULB BURNS OU...

Page 236: ...erated for some seconds when the windscreen wiper is work ing and reverse gear is engaged REPLACING THE BLADES fig 2 Replace the entire rear window wi per blade and arm assembly 1 Lift the cover A and remove the arm by loosening the nut B fastening it to the pin 2 Position the new arm correctly and fasten the nut 3 Lower the cover SPRAY NOZZLES fig 3 If there is no jet of liquid first make sure th...

Page 237: ...eft open with the switch in position 0 SOUND SYSTEM REAR SPEAKERS fig 5 The rear speakers A are housed in the side boot shelves AERIAL The aerial is located on the car roof Remember to remove the aerial from the roof before washing the car in an automatic car wash to prevent dam aging it CD PLAYER CD ROM DRIVE FOR LANCIA ICS WITH NAVIGATION SYSTEM fig 6 7 where fitted The CD player A and the CD RO...

Page 238: ...NTROL SYSTEM where fitted The car is equipped with a rear sus pension self bearing hydraulic pneu matic system with built in self level ling functions thanks to an active de vice fitted in the shock absorber and dampening functions in the place of the traditional shock absorber system The trim is lowered when the car is loaded passengers boot according to the stiffness of the spring system and the...

Page 239: ...of the load in the boot OPENING THE TAILGATE fig 10 11 Lift switch A or insert the key in lock B at turn it to position 1 to open the tailgate The tailgate is locked by the central door locking system Use handle C over the lock to open the tailgate fig 11 P4T0805 fig 10 P4T0249 When using the boot make sure the load you are carrying does not exceed the maximum allowed weight see the Technical Spec...

Page 240: ...y volumetric protection off anti lift sensor off boot sensor off The surveillance functions will be re stored when the tailgate is closed CLOSING THE TAILGATE fig 13 Use a handle A to close the tailgate CEILING LIGHT fig 14 Ceiling light B on the right hand side of the boot comes on when the tailgate is opened The light goes out either when the tailgate is closed or after a few minutes if the tail...

Page 241: ...o refit insert the lower part first and then clip the flap back The left hand compartment is set up to house the CD player and the CD ROM drive for the Lancia ICS with navigator system where fitted The subwoofer for cars with HI FI sound system is housed in the right hand compartment LUGGAGE COVER fig 17 18 19 The semi rigid luggage cover A can be rolled up and removed To roll it up remove the two...

Page 242: ... forwards until the red triangle ap pears Lift the right hand side of the reel first and then the left hand side Remove the reel from the boot fig 23 To reposition the reel insert the left hand side first and then the right hand side Turn the knob backwards until it locks To remove the cover roll it up and remove the two front pins E To refit the cover insert the front pins then extend it and inse...

Page 243: ...e B and lower flap C 3 Remove the cover where fitted Push flap C towards the boot to close it It will lock automatically Heavy loads which are not securely anchored could seriously injure pas sengers in the event of an accident ANCHORING THE LOAD fig 24 25 The load can be secured with belts attached to the specific rings in the boot corners The rings can also be used to fasten the luggage net opti...

Page 244: ...e the luggage cover the tilting oddment tray and the passenger compartment separa tion net where fitted as shown in the specific paragraphs To partially extend the boot one third fig 27 Fold the left hand seat only You can sit two passengers in the rear seat on the right hand side To partially extend the boot two thirds fig 28 Fold the right hand seat only You can sit one passenger in the rear sea...

Page 245: ...y heavy load in the boot and you are travelling at night it is a good idea to check and adjust the height of the dipped beam headlights see Head lights To extend the boot 1 Pull handle A fig 30 located in the middle of each cushion and pull it forwards in the direction of the arrow 2 Remove the head restraints from the rear seat see Head restraints and insert them in the housings on the cushion fi...

Page 246: ...fit caps A insert tab C and then press on the other side to fasten the caps in their housing After travelling a few kilometres check that the screws securing the rack are tight Never exceed the permit ted weight refer to the Technical specifications chapter TOWING THE CAR OR ANOTHER VEHICLE To fit the tow ring remove the bumper cover A fig 35 by using a screwdriver as a lever in the specific reces...

Page 247: ...C fig 38 Take the tool kit D and the spare wheel E and go to the wheel to be changed IMPORTANT For instructions on how to change a wheel correctly and for the warnings and the precautions to be adopted see In an emergency When you have finished put the re moved wheel the jack and the tool kit back in the boot and fasten then cor rectly Reposition the shim B fig 37 Before lowering the floor carpet ...

Page 248: ...lace it 3 Refit the ceiling light by inserting side C first and then pressing on the other side until it clips BOOT LIGHT fig 43 To replace a C 12V C10W bulb 1 Remove the lens by using a screwdriver as a lever on clip A 2 Remove bulb B by releasing the side contacts and replace it 3 Refit the lens by inserting side C first and then pressing on the other side to engage clip A fig 40 P4T0212 fig 41 ...

Page 249: ...move the three covers A fig 44 using a screwdriver as a lever in the specific recesses 2 Loosen the screws B fig 45 and remove the additional brake light C 3 Turn the bulb holder D fig 46 anticlockwise and remove it 4 Press and turn bulb E fig 46 anticlockwise and remove it 5 Fit the new bulb by pressing and turning it clockwise 6 Insert the bulb holder D fig 46 and turn it clockwise 7 Reposition ...

Page 250: ...p by inserting the lower part first and then clipping it back 2 Remove the light cluster by loos ening the nuts C fig 48 with end A fig 49 of the tool supplied with the car and pull it outwards without dis connecting the connector Use end B fig 49 of the tool in versions with HI FI sound system to loosen the right hand light cluster fastening nuts Fit the adapter C fig 49 pro vided 3 Loosen screw ...

Page 251: ...nt that introduces the car and explains in technical jargon all the features that go together to make it a model designed to give you superlative driving satisfaction IDENTIFICATION DATA 251 ENGINE CODES BODYWORK VERSIONS 253 ENGINE 254 TRANSMISSION 258 BRAKES 260 SUSPENSIONS 261 STEERING 261 WHEEL GEOMETRY 261 WHEELS 262 ELECTRICAL SYSTEM 265 DIMENSIONS 266 PERFORMANCE 268 WEIGHTS 269 CAPACITIES ...

Page 252: ...E MARKING The marking is stamped on the cylinder block and includes the model and the chassis number MODEL PLATE The plate fig 2 is fastened to the front crossmember in the engine com partment and bears the following identification information fig 3 A Manufacturer s name B Homologation number C Car model code D Chassis number E Maximum vehicle weight fully loaded F Maximum vehicle weight fully loa...

Page 253: ...axle I Engine type L Body version code M Spare part code N Smoke opacity index for diesel engines BODYWORK PAINT IDENTIFICATION PLATE The plate fig 4 is applied on the inner boot tailgate panel It bears the following data A Paint manufacturer B Colour name C Lancia colour code D Re spray and touch up code ...

Page 254: ...C 839BXF1A 13C 1 8 839A7000 839A7000 839AXG1A 14D 839BXG1A 15D 2 0 185A8000 185A8000 839AXH1A 16C 839BXH1A 17C 1 9 jtd 937A2000 937A2000 839AXN1A 22C 839BXN1A 23C 2 4 jtd 841C000 841C000 839AXP1A 24C 839BXP1A 25C EURO 3 D4 APPROVAL for specific markets Engine code Bodywork code Saloon Station Wagon 1 8 839A7000 839AXG1A 14E 839BXG1A 15E ...

Page 255: ... 3 1 10 7 1 Maximum power EEC kW 76 96 110 HP 103 130 150 corresponding ratio rpm 5750 6300 6500 Maximum torque EEC Nm 140 156 181 kgm 14 9 15 8 18 5 corresponding ratio rpm 4000 3800 3750 TIMING Intake opens BTDC 0 opens ATDC 3 9 closes BTDC closes ABDC 34 41 49 Exhaust opens ATDC opens BBDC 24 32 40 opens BTDC 0 closes ATDC 0 2 Tappet clearance for timing check intake mm 0 45 0 45 0 45 exhaust m...

Page 256: ...ession ratio 18 5 1 18 45 1 Maximum power EEC kW 85 110 HP 115 150 corresponding ratio rpm 4000 4000 Maximum torque EEC Nm 275 305 kgm 28 31 1 corresponding ratio rpm 2000 1800 TIMING Intake opens BTDC 0 0 opens ATDC closes BTDC closes ABDC 32 32 Exhaust opens ATDC opens BBDC 40 40 closes BTDC 2 2 closes BTDC Tappet clearance for timing check intake mm 0 50 0 50 exhaust mm 0 50 0 50 Cold tappet cl...

Page 257: ...gine rpm and absolute pressure in intake mani fold sensors Closed loop information on con sumption for petrol metering provided by the lambda sensor Firing order 1 3 4 2 Spark plugs LANCIA RC10YCC LANCIA BKR5EZ Champion RC10YCC NGK BKR5EZ 1 8 version Integrated electronic injection and ignition system A single control unit governs both function and processes injection time for fuel metering and sp...

Page 258: ...tric air to fuel metering of the basis of Preventive metering of intake air directly measured by means of a hot film flow meter Closed loop information on con sumption provided by the lambda sensor FUEL FEED 1 9 jtd 2 4 jtd versions Modifications or repairs to the fuel feed system that are not carried out prop erly or do not take the system s technical specifications into ac count can cause malfun...

Page 259: ...for oil purification COOLING Cooling system with radiator cen trifuge pump and expansion reservoir Controlled by pass thermostat on secondary circuit for recirculating coolant from the engine to the radia tor Electrical fan for cooling the radia tor controlled by the engine control unit TRANSMISSION CLUTCH Hydraulically controlled self ad justing pedal without idle stroke MECHANICAL GEARBOX AND DI...

Page 260: ...ear 1 156 1 156 1 156 0 971 0 971 5th gear 0 971 0 971 0 946 0 707 0 763 reverse 3 909 3 909 3 909 3 545 3 545 Station Wagon 1 6 1 8 2 0 1 9 jtd 2 4 jtd 1st gear 3 909 3 909 3 909 3 800 3 800 2nd gear 2 238 2 238 2 238 2 235 2 235 3rd gear 1 520 1 520 1 520 1 360 1 360 4th gear 1 156 1 156 1 156 0 971 0 971 5th gear 0 971 0 971 0 946 0 707 0 763 reverse 3 909 3 909 3 909 3 545 3 545 ...

Page 261: ...s Four sensor four channel ABS Automatic take up of friction liner wear Brake force distributor governed by the ABS system HANDBRAKE Controlled by a lever it works me chanically on the rear brakes DIFFERENTIAL Final drive gear and differential as sembly built into the gearbox Drive transmission to the front wheels by means of drive shafts con nected to the differential and to the wheels with CV jo...

Page 262: ...bing jointed steering column with angular adjust ment system Permanently lubricated rack and pinion Hydraulic power steering Permanently lubricated joints Minimum steering circle 1 6 1 8 1 9 jtd versions 10 5 m 2 0 2 4 jtd versions 10 9 m Number of steering wheel turns lock to lock approximately 2 5 WHEEL GEOMETRY Toe in measured from rim to rim front wheels 1 1 mm rear wheels 2 2 mm The values re...

Page 263: ...R15 91V 1 8 6J x 15H2 195 65 R15 91V 61 2J x 15H2 37 v 6J x 15H2 37 205 60 R15 91V 2 0 2 4 jtd 6J x 15H2 195 65 R15 91V 61 2J x 15H2 37 v 6J x 15H2 37 205 60 R15 91V 61 2J x 16H2 37 205 55 R16 91V v For some versions Optional SNOW TYRES Rim Tyre 1 6 1 9 jtd 6J x 15H2 195 65 R15 91T M S 1 8 2 0 2 4 jtd 6J x 15H2 195 65 R15 91H M S SNOW CHAINS Use only low profile chains with maximum height off the ...

Page 264: ...2 265 kg 63 272 kg 64 280 kg 65 290 kg 66 300 kg 67 307 kg 68 315 kg 69 325 kg 70 335 kg 71 345 kg 72 355 kg 73 365 kg 74 375 kg 75 387 kg 76 400 kg 77 412 kg 78 425 kg 79 437 kg 80 450 kg 81 462 kg 82 475 kg 83 487 kg 84 500 kg 85 515 kg 86 530 kg 87 545 kg 88 560 kg 89 580 kg 90 600 kg 91 615 kg 92 630 kg 93 650 kg 94 670 kg 95 690 kg 96 710 kg 97 730 kg 98 750 kg 99 775 kg 100 800 kg 101 825 kg...

Page 265: ...eaning of the markings on the rim 6 1 2 rim width in inches 1 J rim drop centre outline side projection where the tyre bead rests 2 15 rim nominal diameter in inches corresponds to diam eter of the tyre to be mounted 3 H2 hump shape and number relief on the circumference holding the tubeless tyre ead on te rim fig 5 P4T0800 ...

Page 266: ...irs to the system that are not carried out properly or do not take the system s technical specifications into account can cause malfunctions leading to the risk of fire 20 hour discharge Cold cranking capacity discarge current 18 C 1 6 50Ah 60Ah 250A 380A 1 8 2 0 50Ah 60Ah 250A 380A 1 9 jtd 60Ah 70Ah 380A 450A 2 4 jtd 70Ah 450A Alternative for versions markets where applicable Voltage 12 Volts ALT...

Page 267: ...266 DIMENSIONS Height is intended for an unladen car Dimensions in mm Boot volume as per VDA standards 420 dm3 fig 6 P4T0027 ...

Page 268: ... intended for an unladen car Dimensions in mm Boot volume under luggage cover as per VDA standards normal conditions 420 dm3 extended 800 dm3 Overall volume 1 300 dm3 fig 7 Height including roof bars 1578 mm P4T0028 ...

Page 269: ...8 84 123 161 185 48 1 8 54 94 137 180 201 54 2 0 55 96 141 186 210 35 1 9 jtd 36 62 102 143 190 39 2 4 jtd 39 65 108 151 214 41 Station Wagon 1st 2nd 3rd 4th 5th R 1 6 48 84 123 161 185 48 1 8 54 94 137 180 201 54 2 0 55 96 141 186 210 55 1 9 jtd 36 62 102 143 190 39 2 4 jtd 39 65 108 151 214 41 ...

Page 270: ... 1 050 1 050 1 050 1 050 1 050 total 1 770 1 815 1 820 1 865 1 870 1 915 Towable loads trailer with brakes 1 200 1 200 1 400 1 400 1 400 1 400 trailer without brakes 400 400 400 400 400 400 Maximum load on roof 50 80 50 80 50 80 Maximum load on tow hitch trailer with brakes 75 75 75 75 75 75 If special equipment is fitted sunroof tow hitch etc the unladen car weight increases thus reducing the spe...

Page 271: ... 050 1 050 1 050 1 050 total 1 830 1 875 1 890 1 935 Towable loads trailer with brakes 1 400 1 400 1 400 1 400 trailer without brakes 400 400 400 400 Maximum load on roof 50 80 50 80 Maximum load on tow hitch trailer with brakes 75 75 75 75 If special equipment is fitted sunroof tow hitch etc the unladen car weight increases thus reducing the specified payload Loads not to be exceeded The driver i...

Page 272: ...er than 20 C we recommend SELENIA PERFORMER SAE 5W 30 Prescribed fuel Recommended products Premium unleaded petrol with a RON not lower than 95 Mixture of distilled water and PARAFLU UP at 50 SELENIA 20K TUTELA CAR MATRYX TUTELA GI A TUTELA MRM 2 TUTELA TOP 4 TUTELA PROFESSIONAL SC 35 TUTELA PROFESSIONAL SC 35 1 6 litres kg 60 8 8 0 3 5 3 1 3 8 3 4 1 98 1 8 0 9 0 095 0 52 4 5 5 1 8 litres kg 60 8 ...

Page 273: ...cavities and joints each Hydraulic brake circuit with ABS Windscreen rear window washer reservoir SW Windscreen rear window headlight washer reservoir SW For temperatures lower than 15 C we recommend SELENIA WR DIESEL SAE 5W 40 Prescribed fuel Recommended products Diesel fuel for motor vehicles EN590 specifications Mixture of distilled water and PARAFLU UP at 50 SELENIA TURBO DIESEL TUTELA CAR MAT...

Page 274: ...SIONAL SC 35 undiluted NOTES ON FLUID USE Oil Do not add oil with different speci fications from the oil already in the engine Engine coolant A 50 50 mixture of PARAFLU UP and distilled water gives freeze pro tection to 35 C ENGINE OIL CONSUMPTION During the beginning of the car s life the engine is be tuned in Engine oil consumption can only be considered stabilised after the first 5 000 6 000 km...

Page 275: ... for diesel engines For temperatures lower than 20 C we recommend SELENIA PERFORMER MULTIPOWER SAE 5W 30 SELENIA 20K SELENIA PERFORMER MULTIPOWER SELENIA WR DIESEL SAE 10W40 synthetic based multigrade oil exceeding ACEA A3 96 CCMC G5 and API SJ specifications SAE 5W 30 synthetic based multigrade oil exceeding ACEA A1 and API SJ specifications SAE 5W 40 synthetic based multigrade oil exceeding ACEA...

Page 276: ...lybdenum disulphide lithium soap based grease water re sistant NLGI 2 consistency Synthetic fluid NTHSA no 116 DOT 4 ISO 4925 SAE J 1703 CUNA NC 956 01 Protective red colour with antifreeze action ethylene glycol and organic inhibitor based Diesel fuel additive providing engine protection Mixture of alcohol and surfactants CUNA NC 956 II Mechanical gearbox and differential CV joints Hydraulic brak...

Page 277: ...conditions weather general con ditions of the vehicle driving style fittings and accessories use of the climate control system load roof racks and other situations penal ising aerodynamic penetration and effecting rolling resistance will in fluence fuel consumption rates which can be different from the values shown in the table see Cheap running that respects the environment in Driving your car ch...

Page 278: ...wing tables refers to the combined consumption CO2 EMISSIONS AS PER DIRECTIVE 1999 100 EC g km 277 1 6 1 8 2 0 1 9 jtd 2 4 jtd Saloon Station Saloon Station Saloon Station Saloon Station Saloon Station Wagon Wagon Wagon Wagon Wagon 194 197 198 206 233 238 157 162 176 179 ...

Page 279: ...2 2 4 4 2 205 60 R15 91V 2 0 2 0 2 2 2 4 4 2 2 0 195 65 R15 91V 2 2 2 2 2 2 2 4 4 2 205 60 R15 91V 2 2 2 2 2 2 2 4 4 2 205 55 R16 91V 2 3 2 3 2 5 2 5 4 2 1 9 jtd 195 65 R15 91H 2 2 2 2 2 2 2 4 4 2 205 60 R15 91V 2 2 2 2 2 2 2 4 4 2 2 4 jtd 195 65 R15 91V 2 2 2 2 2 2 2 4 4 2 205 60 R15 91V 2 2 2 2 2 2 2 4 4 2 205 55 R16 91V 2 3 2 3 2 5 2 5 4 2 Optional 0 3 bar should be added to the values given if...

Page 280: ... 2 2 2 2 2 2 4 2 7 4 2 205 60 R15 91V 2 2 2 2 2 2 2 4 2 7 4 2 205 55 R16 91V 2 3 2 3 2 5 2 5 2 8 4 2 1 9 jtd 195 65 R15 91H 2 2 2 2 2 2 2 4 2 7 4 2 205 60 R15 91V 2 2 2 2 2 2 2 4 2 7 4 2 2 4 jtd 195 65 R15 91V 2 2 2 2 2 2 2 4 2 7 4 2 205 60 R15 91V 2 2 2 2 2 2 2 4 2 7 4 2 205 55 R16 91V 2 3 2 3 2 5 2 5 2 8 4 2 Optional 0 3 bar should be added to the values given if the pressure is measured while t...

Page 281: ...t are fully in keeping with the car s line making it more personal and aggressive To ensure child safety the child safety seats offered by Lineaccessori LANCIA meet the requirements of the European standards cur rently in force You can find the LANCIA accessories described in a catalogue available from Lancia Dealerships Just ask the staff to give you all the details The following pages show diagr...

Page 282: ...or the elec trical connections The coupling is generally fitted on a specific mount fastened to the tow hitch For the electric connection a 7 or 13 pole 12VDC coupling must be used CUNA UNI and ISO DIN standards Follow the instructions provided by the manufacturer of the car and or the tow hitch TOW HITCH 281 The electrical brake where relevant or other device electrical winch etc must be powered ...

Page 283: ...st 6 mm thick After assembly seal the holes to prevent exhaust fumes from entering the passenger compartment fig 1 P4T0633 80 2 0 313 496 5 442 5 M10 242 87 25 5 4 A A 2 3 2 1 3 N 2 M8 1015 10 65 313 496 5 26 5 70 35 N 3 M12 87 5 107 5 100 N 4 M8 M10 100 98 385 35 Existing nuts Standard ball hitch Rear wheel axlei Load A A cross section Existing hole IMPORTANT Fasten a tag in a clearly visible pos...

Page 284: ...239 extending saloon 139 extending SW 243 opening and closing 138 238 Boot light saloon replacing a bulb 195 Boot light SW replacing a bulb 247 Brake and clutch fluid level 220 Brake light replacing a bulb saloon 191 replacing a bulb SW 248 Brakes fluid level 220 service and emergency 260 Bulbs replacement 185 bulb types 162 186 187 general 186 Capacities 271 272 Car maintenance 209 additional che...

Page 285: ...warning lights 61 Checking fluid levels 215 Child lock 38 Children transporting in safety 38 Cigar lighter 127 Climate control system 105 maintenance 230 Clutch specifications 252 CO2 emission in exhaust 277 Coin tray 128 Containing running costs and pollution 168 conditions of use 169 driving style 169 general 168 Controls 118 Cooling 103 Courtesy lights 124 Cruise Control 122 Dashboard 15 Diesel...

Page 286: ...9 Flashing the headlights 116 Fog Sensor 113 Front foglights controls 119 replacing a bulb 190 slant compensation 146 Fuel at the filling station 160 fuel consumption 276 fuel cut off switch 120 fuel filler cap 143 gauge 52 Fuel consumption 276 Fuel cut off switch 120 Fuel filler cap 143 Fuel level gauge 52 Fuel tank cap 143 capacity 271 272 Fuses 196 Gas discharge headlights 146 Gearbox transmiss...

Page 287: ...m adjustment 147 compensating the slant 145 front foglight slant adjustment 145 gas discharge headlights Xeno 145 Heated rear window 120 Identification data 251 If an accident occurs 207 Ignition switch 16 In an emergency 175 Instrument panel 48 dimmer 119 Instruments 51 dimmer 119 Interiors maintenance 233 Jack saloon 179 180 Jack SW 246 Jacking the car 205 Keys 17 Kilometer counter 53 Lancia COD...

Page 288: ...omologation 290 Repeated checks and check before long trips 173 Rev counter 51 Reversing light replacing a bulb saloon 191 replacing a bulb SW 248 Roof rack ski rack fasteners saloon 145 fasteners SW 245 Rubber tubing 228 Safe driving before getting behind the wheel 164 driving at night 165 driving in fog 166 driving in the mountains 167 driving in the rain 166 driving on snow and ice 167 driving ...

Page 289: ...dure for petrol engines 157 stopping the engine 159 warming up a recently started engine 159 Steering wheel adjusting 32 Steering wheel lock 16 Steering wheel stalks left hand stalk 117 right hand stalk 117 Steering 261 Storing the car 173 Sun visors 128 Sunroof 131 Supplementary heater 115 Suspensions 261 Symbols 9 Technical specifications 250 Third brake light replacing a bulb saloon 192 replaci...

Page 290: ...79 replacement SW 246 specifications 262 Window winders electric 136 Window winders rear 137 Window winders centralised window system 136 Windows cleaning 232 Windscreen washer controls 117 fluid 219 nozzles 230 rain sensor 118 Windscreen wiper blades replacement 228 controls 117 nozzles 230 Windscreen rear window headlight washer fluid level 219 ...

Page 291: ...GR Greece H Hungary I Italy L Luxembourg NL Netherlands P Portugal BG Bulgaria P 14 540 2001 CRO Croatia SRD 162 01 CZ Czech Republic CCZ JOR Jordan TRC LPD 2001 01 KWT Kuwait OM Oman OMA 1150 075 01 PL Poland 211 2001 Q Qatar QTEL DR 2001 R 215 RL Lebanon 6731 OM RO Romania ATR Nr 67 SLO Slovenia C231 0989 01 SK Sloval Republic R287 2001 N SX Saudi Arabia UAE United Arab Emirates 5 10 2 2309 3806...

Page 292: ...291 ...

Page 293: ......

Page 294: ... Always ask your mechanic for ...

Page 295: ...t guaranteees a reduction in fuel consumption Energy conserving SELENIA TD Oil for aspirated turbocharged or multivalve diesel engines guarantees maximum engine cleanliness and stability at high temperatures SELENIA WR Oil which has been specifically designed for use in common rail andMultijet diesel engines Effective dur ing cold starts it offers maximim wear protection hydraulic tappets control ...

Page 296: ...NOTES ...

Page 297: ... 2 3 2 3 2 5 2 5 2 3 2 3 2 5 2 5 2 8 4 2 0 3 bar should be added to the values given if the pressure is measured while the tyre is hot Maximum load in boot with seats folded 1 person 350 kg 1 6 1 8 2 0 1 9 jtd 2 4 jtd litres kg litres kg litres kg litres kg litres kg Engine sump 3 5 3 1 3 9 3 5 4 3 3 8 4 2 3 75 4 8 4 3 Engine sump and filter 3 8 3 4 4 3 3 85 5 0 4 45 4 8 4 25 5 5 4 9 Dispose of wa...

Page 298: ......

Reviews: