66
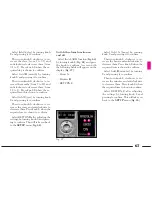
Setting the clock
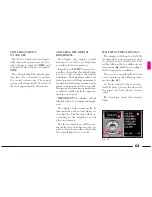
Select the SET TIME function (
fig. 64
)
by turning knob
3
(
fig. 61
) and press
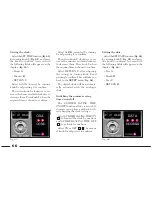
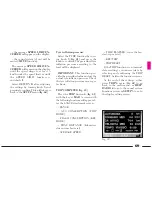
the knob to confirm. A screen with
the following fields will appear on the
display (
fig. 65
):
– Hours
A
– Minutes
B
– RETURN
C
.
Select field
A
(hours) by turning
knob
3
and pressing it to confirm.
Then turn knob
3
clockwise to in-
crease the hours and anticlockwise to
decrease them. Press knob
3
when the
required time is shown to confirm.
Select field
B
(minutes) by turning
3
and pressing it to confirm.
Then turn knob
3
clockwise to in-
crease the minutes and anticlockwise
to decrease them. Press knob
3
when
the required time is shown to confirm.
Select RETURN
C
after adjusting
the settings by turning knob
3
and
pressing to confirm. This will take you
back to the
SETUP
menu (
fig. 64
).
The digital clock will be automati-
cally adjusted with the analogue
clock.
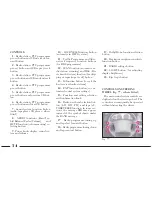
Switching the summer saving
time on and off
The SUMMER SAVING TIME
ON/OFF function allows to switch to
summer saving time and back with-
out changing the clock settings.
Select SUMMER SAVING TIME ON
(
✓
) to forward the clock by one hour
and SUMMER SAVING TIME OFF
( ) to go back by one hour.
Select ON or OFF (
✓
/ ) by means
of knob
3
and press it to confirm.
Setting the date
Select the SET DATE function (
fig. 64
)
by turning knob
3
(
fig. 61
) and press
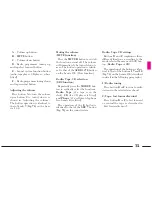
the knob to confirm. A screen with
the following fields will appear on the
display (
fig. 66
):
– Day
A
– Month
B
– Year
C
– RETURN
D
.
fig. 65
P4T0605
fig. 66
P4T0606
A
B
C
A
B
C
D
Summary of Contents for Lybra
Page 1: ......
Page 13: ......
Page 104: ...103 CLIMATE CONTROL SYSTEM P4T0812 fig 98 ...
Page 292: ...291 ...
Page 293: ......
Page 294: ... Always ask your mechanic for ...
Page 296: ...NOTES ...
Page 298: ......

