background image

22

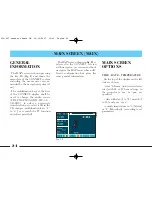
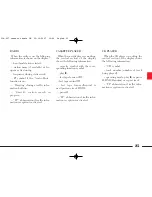
LOADING THE MAGAZINE

The magazine contains 6 trays for

one CD each.

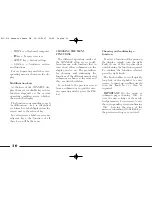
To playback a CD, extract a tray 

D

(

fig. 7

) from the magazine and insert

the CD (

fig. 8

).

IMPORTANT

Make sure the CD la-

bel is facing the right way, i.e. to-
wards the tray. If not, the player will
not work.

The player cannot be used to play 8

cm CDs unless a specific adapter
(which can be purchased at HI-FI
stores) is fitted.

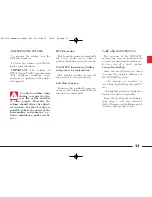
CD-CHANGER

LOADING CDS

The CD-changer is housed in the

glove compartment and is fitted with
a magazine for 6 Compact Discs.

On multimedia CDs in

addition to sound tracks
also data tracks are

recorded. Playing one of these CDs
may cause rustling and such a vol-
ume as to compromise road safety,
as well as causing damage to the
final stages and speakers.

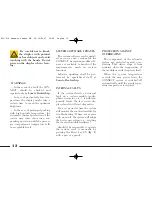
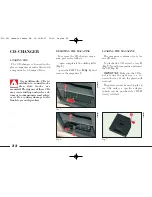
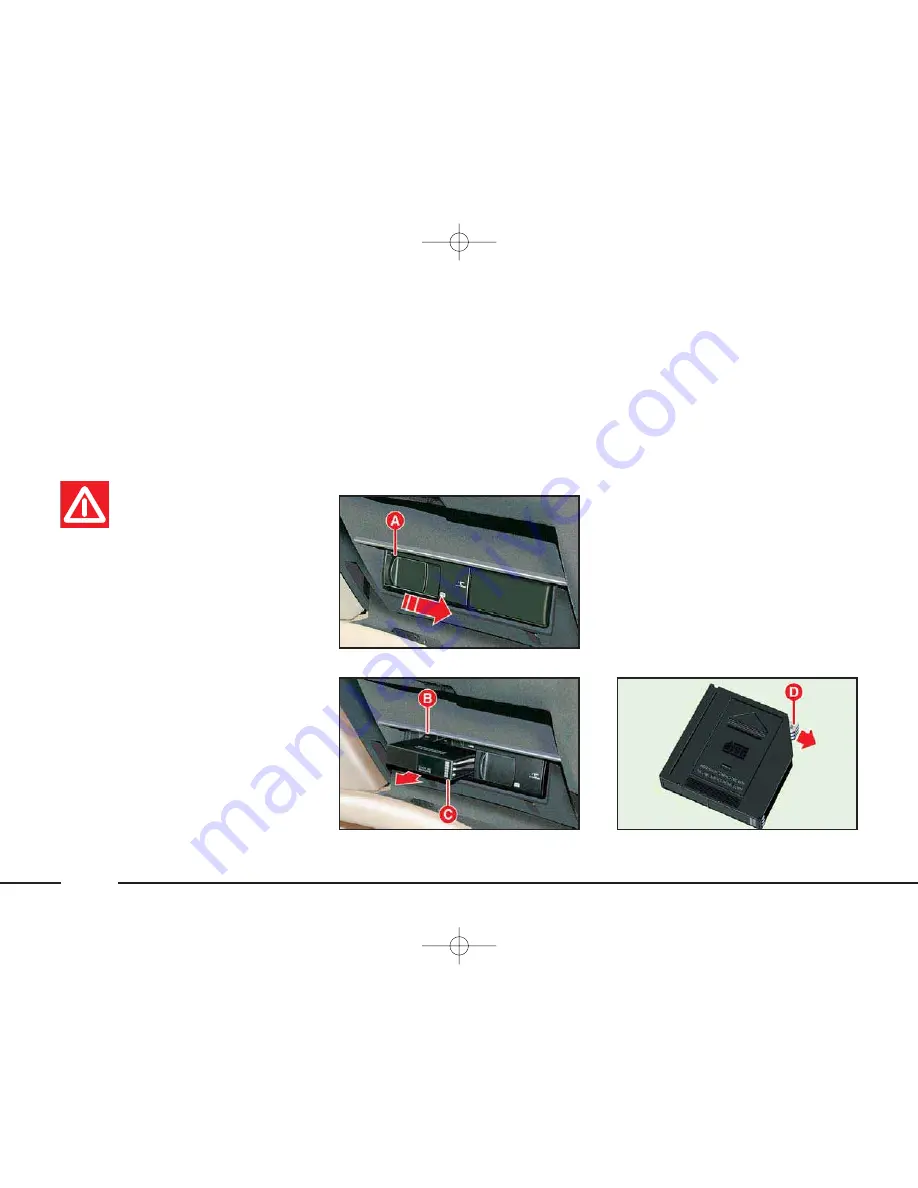
REMOVING THE MAGAZINE 

To remove the CD-changer maga-

zine, proceed as follows:

– open completely the sliding lid 

A

(

fig. 5

);

– press the EJECT key 

B

(

fig. 6

) and

remove the magazine 

C

.

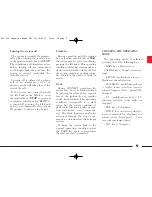
fig. 6

L0A6034c

fig. 5

L0A6042c

fig. 7

L0A6035c

013-023 connect thesis GB  22-10-2007  10:39  Pagina 22

Summary of Contents for THESIS CONNECT

Page 1: ......

Page 2: ...commands for certain phone audio and navigator functions designed in accordance with the specific features of the passenger compartment and with a personalised design The system is installed in a use...

Page 3: ......

Page 4: ...OLS REMOTE CONTROL CD CHANGER MAIN SCREEN MAIN SOUND SYSTEM AUDIO CELL PHONE TEL NAVIGATOR NAV VOICE COMMANDS AND OUTPUTS ON BOARD COMPUTER TRIP SETUP TARGASYS SERVICES ASSISTANCE SERVICES AND FUNCTIO...

Page 5: ...tion through the traffic and indicates to you any change of route memorised on the navigation CD ROM In fact the sys tem takes account of all information concerning the roads when calculat ing the rou...

Page 6: ...istortions or labels detached Never leave the cassette inside the CONNECT when not in use Never insert other objects in the cassette slot Do not expose cassettes to the sun or high temperatures Put ca...

Page 7: ...isc from its container press on the centre and raise the disc holding carefully from the edges To remove fingerprints and dust use a soft cloth starting from the centre of the Compact Disc towards the...

Page 8: ...mpact Disc or write on the surface with pens or pencils Do not use highly scratched cracked or distorted Compact Discs This could damage the player or prevent it from working properly Do not expose Co...

Page 9: ...rvices and functions The interface is the multifunction information display for all the inte grated components TURNING THE SYSTEM ON OFF AND STAND BY FEATURE The system may be in one of the following...

Page 10: ...is ready to receive Dark During CONNECT operation the system may be set to Dark condition by pressing the relevant key regard less of the ignition key or ignition switch knob position This operating...

Page 11: ...simply turn the knob fast or slow as required IMPORTANT On the menu or submenu pages showing OK to store the new settings or the modi fied parameters it is necessary to exit the corresponding screen...

Page 12: ...volume when driving can put the dri ver s life at risk and that of other people Therefore the volume should always be adjust ed in such a way that it is always possible to hear the noises of the surr...

Page 13: ...ncil PROTECTION AGAINST OVERHEATING The components of the telematic system are protected against over heating This device stops it from working when the temperature of the module exceeds the preset li...

Page 14: ...CC 6 Press briefly less than 2 seconds Assistance services and functions Navigation CD ROM or Audio CD slot Cassette slot Eject navigation CD ROM or Audio CD Eject cassette Radio mode seeking the firs...

Page 15: ...ter screen Audio mode on and or specific screen selection Select audio source FM1 FM2 FM3 AS MW LW CC CD CDC TV Select MAIN screen DARK mode on dark screen Forwarding the phone call set Accepting the...

Page 16: ...tifunction keys whose function depends on the system operating condition active which is shown on the display The function corresponding to each multifunction key is identified each time by a label di...

Page 17: ...mode select next track TV mode seeking the first channel that can be tuned with higher frequency F Radio mode seeking the first station that can be tuned with lower frequency Cassette mode fast tape r...

Page 18: ...e lowering C Volume highering D Radio mode brief press seeking the first station that can be tuned with higher frequency long press Scan function on Station scanning in the band tuned starting from th...

Page 19: ...mode seeking the first channel that can be tuned with higher frequency G Radio mode brief press seeking the first station that can be tuned with lower frequency long press Scan function on Station sca...

Page 20: ...ng press on keys 1 6 Brief press on key Brief press on key Steering wheel keys Press the SOURCE key Press the VOL keys Brief press on the SCAN key Brief press on the SCAN key Remote control keys Press...

Page 21: ...ey Long press on key Press key Brief press on key Long press on key Brief press on key Long press on key Press the Play Pause multifunction keys Short press on key Steering wheel keys Long press on th...

Page 22: ...e screen CONNECT keys Brief press on key Press keys 1 to 6 Press keys 1 to 6 Brief press on key Brief press on key Press OFF multifunction key Steering wheel keys Brief press on the SCAN key Press the...

Page 23: ...CDS The CD changer is housed in the glove compartment and is fitted with a magazine for 6 Compact Discs On multimedia CDs in addition to sound tracks also data tracks are recorded Playing one of thes...

Page 24: ...the CD changer with the chamfered edge facing rightwards close the sliding lid A fig 10 af ter inserting the magazine to avoid grit and dust from getting inside the player EJECTING CDS FROM THE MAGAZ...

Page 25: ...month 1 to 12 and year yyyy outside temperature in C Celsius or F Fahrenheit according to set parameter GENERAL INFORMATION The MAIN screen is shown pressing the key 13 fig 1 and shows the main data...

Page 26: ...king the central section of the display shows the following information cassette symbol with the corre sponding function symbol play fast tape forward fast tape rewind fast tape forward rewind to next...

Page 27: ...name of telephone network provider and reception signal inten sity name or telephone number and duration of conversation min sec during a telephone connection symbols and wordings associated with pho...

Page 28: ...figuration installed on the car If the system is not provided with the navi gation function the display area ded icated to the on board computer will show the following information Average speed in k...

Page 29: ...tion keys waveband selection FM AM through the corresponding multi function keys name of broadcaster if available and stored station number storage of 30 stations 18 in the FM band and 12 in the AM ba...

Page 30: ...erted CD Compact Disc player if the CD is inserted CDC CD changer if installed TV TV tuner if installed Select and confirm the audio source turning and pressing the right knob 21 fig 1 The selected so...

Page 31: ...ivated AUDIO SETTINGS The audio parameters described in this paragraph can be activated and adjusted with all the audio sources Radio CASSETTE CD CD Changer for TV audio settings see the relevant para...

Page 32: ...e knob right to increase the bass tones or left to reduce them Then press the knob to confirm set ting and continue with the other pa rameter settings Pressing Cancel resumes the set tings stored prev...

Page 33: ...e speakers in the car The sound distribution be tween front and rear speakers is rep resented by a small round cursor To adjust sound distribution pro ceed as follows select and confirm the Fader func...

Page 34: ...the right knob 21 fig 1 turn the knob right or left to select a setting or turn the function off then press the knob to confirm Pressing Cancel resumes the set tings stored previously START VOL FUNCT...

Page 35: ...ertain Countries The EON system groups together several sta tions enabled to broadcast traffic in formation interrupting temporarily the programme of the station being listened to When the station tun...

Page 36: ...e Audio Mute function can be enabled only if the TP function is on symbol 3 near TP TP FUNCTION traffic information Certain stations in the FM band are also enabled to broadcast information about the...

Page 37: ...ansmitted If the station selected does not broadcast traffic information an enabled station is sought automatically If you wish to interrupt a traffic an nouncement turn off the TP func tion while the...

Page 38: ...ur With RDS AF on the RDS sys tem activates automatic tuning of the optimum frequency of the station chosen with the stations enabled therefore the radio is automatically tuned to the station with the...

Page 39: ...knob 21 fig 1 To choose a type of programme press the knob after choosing the type IMPORTANT The PTY function can only be turned on in the FM band If the station does not broadcast in the PTY mode the...

Page 40: ...econds the display will show NO PTY To exit the screen with the list of PTY programmes choose a type of programme or None if you do not wish to set a programme type AUTOSTORE FUNCTION automatic statio...

Page 41: ...tostore is tuned and the function as sociated with the key pressed is run selecting and activating one or both TP and AF functions dur ing the automatic storage process au tomatic storage will be inte...

Page 42: ...matic search for tuning the next station that can be received in the di rection chosen respectively lowering or highering the frequency If the TP function traffic infor mation is on the tuner only see...

Page 43: ...he bottom of the display or by directly inserting the tape IMPORTANT The CC main func tion page is displayed only if the tape is inserted On the top of the display are shown the time the last selected...

Page 44: ...affic information tape playing will be temporarily stopped and resumed automatically at the end of the message To turn this function on off select the Break for TA function with the right knob 21 fig...

Page 45: ...to display the relevant menu then follow the in structions given in paragraph Audio settings CHANGING THE TAPE PLAYING SIDE Insert the cassette in the slot 3 fig 1 with the tape facing rightwards the...

Page 46: ...cally Press again keys 7 or 6 fig 1 to stop tape forward rewind SCAN FUNCTION The Scan function makes it possi ble to listen to all the cassette tracks for about 12 seconds To turn this function on pr...

Page 47: ...ime the last selected waveband with the relevant frequency or broad caster name and the outside temper ature In the centre of the display are shown the CD the wording Play the number of the track bein...

Page 48: ...paragraph Audio settings BREAK FOR TA FUNCTION to receive traffic information If you wish to receive traffic infor mation while listening to a CD before inserting the CD tune to a station en abled to...

Page 49: ...o turn the function off press again the Random key or the multifunction keys II or Scan or one of the two search for ward rewind keys PLAYING A CD Playing starts automatically after in serting a CD in...

Page 50: ...m CD Scan Settings At the bottom of the display on the multifunction keys are shown the other available functions CD in the magazine 1 to 6 audio sources FM AM CC CD CDC TV The number of the CD being...

Page 51: ...ears in the small square near the wording BREAK FOR TA FUNCTION to receive traffic information If you wish to receive traffic infor mation while listening to CD before selecting the CD changer mode tu...

Page 52: ...knob 21 fig 1 The function is tuned off automatically when turning on Scan Repeat track or Repeat CD function or when pressing one of the search forward backward keys or one of the CD selection multi...

Page 53: ...ing the last CD track press ing key 7 will play the first track on next CD When the Random CD is on a new track not played yet se lected randomly is played PLAYING PREVIOUS TRACK To play the previous...

Page 54: ...r main function page is dis played pressing the SRC key 12 fig 1 and selecting the TV mode or with the TV multifunction key in screens with audio sources FM AM CC CD CDC TV at the bot tom of the displ...

Page 55: ...nction is on the TV tuner automatically stores the 5 chan nels with the strongest signal in de creasing order of intensity of the sig nal in the TV standard set During automatic storage the dis play s...

Page 56: ...nel received before the function was activated pressing Off automatic storage process is interrupted and TV is switched off changing the audio source during the automatic storage process the Autostore...

Page 57: ...ss the knob to confirm set ting and continue with the other pa rameter settings Pressing Cancel resumes the settings stored previously BASS FUNCTION bass adjustment fig 33 Proceed as follows select an...

Page 58: ...ment To adjust sound distribution pro ceed as follows select and confirm the Settings function on the TV tuner main func tion page select and confirm the Balance function with the right knob 21 fig 1...

Page 59: ...t ting cursor turn the knob right to increase the sound from rear speakers or left to in crease the sound from front speakers then press the knob to confirm Pressing Cancel resumes the set tings store...

Page 60: ...on the TV tuner main func tion page select and confirm the Contrast function with the right knob 21 fig 1 to display the screen with the set ting cursor turn the knob 21 left to sharpen contrast and...

Page 61: ...Then press the right knob to con firm setting Pressing Cancel re sumes the settings stored previously TUNING TV CHANNELS Automatic tuning This function automatically seeks TV channels Proceed as foll...

Page 62: ...play shows the number of the key with which the channel has been stored Automatic channel storage The CONNECT TV tuner is pro vided with the Autostore function When this function is on the 5 chan nels...

Page 63: ...ng for a new incoming call holding on a call to switch to an other incoming call or to start a new call automatic number redialling acti vation deactivation call divert activation deactivation GENERAL...

Page 64: ...d if this info is made available by the network provider access to the list of the last 10 numbers dialled to facilitate frequent calls access to the list of the last 10 calls received access and chan...

Page 65: ...erating system is ob tained by pressing the TEL key 16 fig 1 To remove the SIM card press the key 24 fig 1 IMPORTANT Removing the SIM card with the phone on may cause temporary faults before removing...

Page 66: ...display fig 41 with the Emergency 112 function selected To start the call confirm the function by pressing the right knob 21 fig 1 Before placing the call the system will ask again for confirmation fi...

Page 67: ...15 fig 1 to refuse press the left knob 8 fig 1 To end a call press key 15 fig 1 SCREEN OPTIONS When using the phone on the top of the display are shown time audio system info radio frequency tuned ta...

Page 68: ...the call press again key 15 fig 1 or the multifunction key Yes or the relevant key on the steering wheel controls Press the multifunction key No to stop dialling and to go back to the previous condit...

Page 69: ...ing the display left hand side shows information associated with the call in progress the sound system is switched off connection is made and if the called person an swers the call duration counter is...

Page 70: ...he additional handset is fitted with a display showing the phone info and the menu options network provider field strength name and number of the called person name and number of the caller phone book...

Page 71: ...lay the phone menu page to dial the required number manually To dial the number use the multi function keys or the voice commands for voice commands refer to the rel evant section The dialled number c...

Page 72: ...function The Phone book function shall be used to display the phone number stored in the SIM card phone book To dial a phone book number select and confirm it with the right knob 21 fig 1 To store a...

Page 73: ...of the entries in the list simply select it and confirm it with the right knob 21 fig 1 CALL MAILBOX FUNCTION Select and confirm this function with the right knob 21 fig 1 to call the mailbox number...

Page 74: ...twork providers the SMS function must be made operational Process function With this function it is possible to edit a message written or to change the recipient To correct an SMS mes sage confirm Pro...

Page 75: ...fter writing the message To dial the num ber use the multifunction keys Select Phone book to choose the recipient number in the phone book instead of dialling it manually The number chosen will be dis...

Page 76: ...ys the options relevant to SMS settings fig 53 Service Center SMS service cen ter number Validity Code Go back Service Center is used to display the phone function page for choosing the service center...

Page 77: ...rwrite to start copying Edit phone book Edit phone book shall be used to display a page of the phone book to be copied and to edit it as required During this operation the number of items to be cut ye...

Page 78: ...ard is requested proceed as above A new screen will be dis played automatically now select Overwrite to start the copy opera tion to the target SIM card The same screen features also the Go back op ti...

Page 79: ...nes Network PW function allows to enter the password for the call lock Enter the password using the multi function keys and confirm it with the OK option this option is enabled only if the password co...

Page 80: ...case the number to which calls shall be diverted will be demanded Select and confirm delete to cancel the activated set tings Select Number to enter the phone number to which calls shall be di verted...

Page 81: ...one options screen Options available on the Phone set tings 1 screen fig 57 are the fol lowing Netw operator Cell broadcast Pre paid card Mailbox number Own number PIN Other Options available on the P...

Page 82: ...yed The required network can be directly selected among those in cluded in the list Use the Preferred list function to create and edit the network list as pre ferred Netw operator function This functi...

Page 83: ...multifunction keys To store the entered phone number select and confirm Store To correct the entered number use the Correct function press briefly for less than 1 second the right knob to delete the l...

Page 84: ...number select Own number with the right knob 21 fig 1 enter the number with the multi function keys and then store it by Store To correct the entered num ber use the Correct function press briefly for...

Page 85: ...function fig 64 en ter first the old PIN code and then en ter the new PIN code twice on the screen displayed If necessary correct it with Correct At the end of these operations select OK to enable the...

Page 86: ...e Redial function This option displayed on the sec ond phone settings screen when en abled makes it possible to automati cally repeat dialling a busy number up to 10 times Automatic repeat di alling i...

Page 87: ...storing the new settings To adjust the ring tone volume se lect Volume with the right knob 21 fig 1 then turn the knob right to in crease volume or left to lower it fig 67 Move the cursor to Off to m...

Page 88: ...direction of travel The navigation system helps the dri ver while he she drives by suggesting vocally and graphically the optimum routing to reach his her preset desti nation GENERAL INFORMATION The...

Page 89: ...ft odometer from the reverse gear sensor from the GPS antenna and the gyroscope to automatically compensate changes in temperature pressure or any other occurrence that may lead to a false position de...

Page 90: ...l road regulations rest solely with the driver SCREEN OPTIONS AND FUNCTIONS The main information and functions provided and managed by the navi gation system are number and position of received satell...

Page 91: ...t to this arrow the calculated arrival time and the distance still to be covered are also indicated With navigation system on the atlas can be displayed instead of arrows on the MAIN screen To switch...

Page 92: ...insert an audio CD the following two cases may occur the system cannot calculate the re quired route at present the route calculated before remov ing the navigation CD ROM is still valid In the first...

Page 93: ...loaded map section the system prompts for in serting the navigation CD ROM If the user does not insert the CD ROM the system adopts the operating conditions for the above mentioned first case therefor...

Page 94: ...k to display the main navigation menu screen The options that can be activated with the multifunction keys are Street 2 Correct OK Cancel To enter the characters select and confirm them with the right...

Page 95: ...ifunction key after entering a few characters and then select the destination directly in the list displayed In fact when List is selected the system starts a quick search for a city name matching the...

Page 96: ...a new screen fig 74 with the Store Guidance and Cancel options To store the destination select and confirm Store with the right knob 21 fig 1 To start route calculation press Guidance otherwise press...

Page 97: ...destinations press Delete all Press Go back to return to the previous screen 96 Points of interest This function is used to obtain a file containing the location and informa tion on points of general...

Page 98: ...llites are re ceivable for three dimensional po sitioning The car position is also represented graphically on the left hand side of the display fig 77 L0A5131g 97 IMPORTANT If the destination memory a...

Page 99: ...a rameters Select and confirm this function with the right knob 21 fig 1 to display the Select route criteria screen fig 80 The following possibilities of choice are offered Shortest time Shortest dis...

Page 100: ...les e g works in progress on the chosen freeways or motorways Shortest distance This setting allows you to choose the shortest route to reach your destina tion Prefer motorways This setting considers...

Page 101: ...for left right turns To scroll the list use the right knob 21 fig 1 mov ing the cursor to the last street To cut streets from the calculated route select the required streets and then confirm them wi...

Page 102: ...g options Atlas Route and Route Zoom and Zoom Options Press the Atlas multifunction key to move the cursor on the map fol lowing the procedure described in the following paragraphs The multifunction k...

Page 103: ...options available are the follow ing Curr position Destination North up Heading up Pictogram Curr position displays the map section according to the current posi tion of the car Destination displays...

Page 104: ...MMANDS To turn on off the voice control sys tem press briefly less than 2 sec onds the VOICE button A fig 2 lo cated on the steering wheel After turning on the system identifies the current audio func...

Page 105: ...required by the user Words separated by commas are the voice commands that the system recognises to activate the required function Functions Dark mode Show MAIN page Radio Tape CD CDC TV Phone Map Zo...

Page 106: ...the dialog between user and system continues as shown in the following paragraphs Certain voice commands see next table stand valid regardless of the function activated Recognized commands Cancel abo...

Page 107: ...ses insert the SIM card and or enter the PIN code as de scribed in the following paragraph For the third case or after entering the PIN code for the first two cases the system will invite the user to...

Page 108: ...Help Cancel 107 Voice commands to be used for phone options are the following Recognized commands Dial Name call Name Dial mailbox call mailbox Dial number call number Phone book Redial Help Cancel a...

Page 109: ...code entry are the fol lowing Used voice prompts Please enter your PIN and then Please enter your PIN in single digits for example one two three four Please add more digits or modify the number with...

Page 110: ...ish Help Cancel The voice commands the user shall say to enter the PIN code are the fol lowing Recognized commands Modify digits wrong Right finish dial enter Help Cancel abort 103 131 connect thesis...

Page 111: ...ted To operate the telephone you can select from the following commands Dial number Redial number Mailbox Phone book To directly place a call by selecting an entry from your phone book please say Dial...

Page 112: ...say to dial a phone number are the following Required action Correct Delete Finish Help Cancel Recognized commands Modify digits wrong Delete Right finish dial enter Help Cancel abort 103 131 connect...

Page 113: ...ng Used voice prompts Call Name now To call Name say Dial otherwise say Cancel Please repeat the name To operate the telephone you can select from the following commands Dial number Redial number Mail...

Page 114: ...user shall say to start the call are the following Recognized commands Yes dial connect call okay No no that s wrong delete Help Required action Connect Nome No Nome Help 103 131 connect thesis GB 22...

Page 115: ...he system will abort the proce dure To restart the procedure press the VOICE button again Say the number associated to the name figure by figure e g one two three four If the number repeated by the sy...

Page 116: ...Redial number Mailbox Phone book To directly place a call by selecting an entry from your phone book please say Dial and a name for example Dial John Smith Active commands for the phone book are Conn...

Page 117: ...book are the following Required action Continue Dial Dial Name Help Delete Name Delete Cancel Recognized commands Continue reading Dial connect call Dial Name call Name Help Delete Name Delete Cancel...

Page 118: ...rom the following commands Dial number Redial number Mailbox Phone book To directly place a call by selecting an entry from your phone book please say Dial and a name for example Dial John Smith Cance...

Page 119: ...as Frequency ninety nine point five Channel number three Store at number three are also possible To get more help please say Help general The following commands are available Main page Dark mode Show...

Page 120: ...equency Tune to one stored station Store the tuned station Help Help general Cancel Recognized commands Autostore AM medium wave long wave FM 1 2 3 short wave Next channel next station search forward...

Page 121: ...given in the following table Dialog between user and system to activate the Autostore function User System User after the beep System if the user asks for help System if dialog is stopped due to erro...

Page 122: ...re help please say Help general The following commands are available Main page Dark mode Show arrows Zoom in Zoom out Repeat message You can always activate a device with the following commands Radio...

Page 123: ...ast tape rewind Stop playing tape Play Help Help general Cancel Recognized commands Next track next song next title Previous track previous song previous title Side A B change side other side switch s...

Page 124: ...please say Help general The following commands are available Main page Dark mode Show arrows Zoom in Zoom out Repeat message You can always activate a device with the following commands Radio CD playe...

Page 125: ...rack Stop playing CD Play the CD Help Help general Cancel Recognized commands Next track next song next title Previous track previous song previous title Track number 1 25 song number 1 25 title numbe...

Page 126: ...three You can also say Stop and Play To get more help please say Help general The following commands are available Main page Dark mode Show arrows Zoom in Zoom out Repeat message You can always activ...

Page 127: ...Play a CD Stop playing CD Play CD Help Help general Cancel Recognized commands Next track next song next title Previous track previous song previous title Track number 1 25 song number 1 25 title numb...

Page 128: ...ber three are also possible To get more help please say Help general The following commands are available Main page Dark mode Show arrows Zoom in Zoom out Repeat message You can always activate a devi...

Page 129: ...equency Tune to a stored channel Store the tuned channel Help Help general Cancel Recognized commands Autostore Next channel next station search forward Previous channel previousstation search backwar...

Page 130: ...t to se lect the required message and then press the knob The display will show only the mes sages that can be contained in the screen to scroll the entire list turn the knob 21 fig 1 left after selec...

Page 131: ...C key 12 fig 1 when the memory is full pressing the VOICE button on the steering wheel pressing key 15 fig 1 to accept an incoming call making a call turning the CONNECT off This function is not inter...

Page 132: ...ately without beep and without displaying the main screen of the Voice recorder To stop recording press the VOICE button again Recording will be stopped automatically when the call is over or when acc...

Page 133: ...ance covered Consumption Range Speed Limit Historical data Data to destination ON BOARD COMPUTER TRIP To access the on board computer screen press the TRIP key 10 fig 1 The on board computer provides...

Page 134: ...om LOG Settings Press Zoom to enlarge the text and press Zoom to reset its nor mal dimension TRAVEL TIME FUNCTION Select and confirm this function on the main screen of the on board com puter TRIP fig...

Page 135: ...urrent consumption value in dicates the fuel consumption of the car when travelling and it is therefore helpful to learn the fuel consumption in relation to the driving style adopted This value is the...

Page 136: ...ing light on the system will up date the residual range value only if at the end of refuelling the fuel con tained in the tank is equal to or ex ceeds approx 5 litres In case of lower refuelling resid...

Page 137: ...limit speed with the right knob 21 fig 1 then turn the knob right to increase the limit and left to reduce it Confirm the required value by pressing the knob or reset the previous value by pressing th...

Page 138: ...s the Reset multifunction key on the main TRIP screen After pressing the key a new screen with the following options fig 93 will be dis played Reset since hh mm Reset all data Press Go back to return...

Page 139: ...ltifunction key Messages marked with the acronym Servicing messages relevant to scheduled servicing can only be read by pressing the Check key Press New to display the screen fig 94 for entering new m...

Page 140: ...firming the characters with the right knob To speed up character entry the system automatically moves to the beginning or the end of the list by pressing keys To enter a blank space use _ The multifun...

Page 141: ...display the first screen of the menu to be used for entering the characteristic trip data fig 96 To go to the second and third page of the menu press the multifunction key Next page Press Go back to r...

Page 142: ...icence no number plate num ber if available Date Time trip start end date and time these data are entered au tomatically by the system Kind of trip choose Private or Business Purpose of trip choose th...

Page 143: ...stance to drive unit can be se lected only when the navigation sys tem is off or is not installed To change the required unit select and confirm it with the right knob then turn the knob to move the c...

Page 144: ...e The options that can be activated trough the multifunction keys are View Recall and Store With Recall it is possible to acti vate one of the four settings sets or to customize one of the three setti...

Page 145: ...AL to small letters and vice versa To correct the entered name press Correct To enter the set number 1 2 or 3 select and confirm Set Press Go back to return to the previous screen The Edit function is...

Page 146: ...the inserted CD be not rec ognized or be unsuitable for language change the display will show a dedi cated warning message When starting the language change procedure the system requires the user s co...

Page 147: ...ion makes it possible to adjust the volume of the voice com mands To adjust the volume select and confirm the Voice com vol function with the right knob 21 fig 1 Turn the knob right to higher the volu...

Page 148: ...ors while with this option on only the driver door will open When this option is active it is however possible to open all the doors through the but ton set on the driver door panel af ter opening the...

Page 149: ...ed off parked car heater not operating because of cooling down parked car heater not operating because external temperature is higher than 20 C parked car heater not operating because motor is on park...

Page 150: ...er level thus display ing a new screen fig 104 for setting the required level turning the right knob The available heating levels are 1 2 and 3 max After setting the required level to return the main...

Page 151: ...ear select and confirm Date To enter the time select and confirm Time the time hours minutes sec onds will start to be displayed when pressing the knob The option Time offset displays the difference b...

Page 152: ...ng the ignition key as described in the Owner Handbook To deactivate the automatic parking brake select and confirm Automatic parking brake with the right knob 21 fig 1 Press Go back to return to the...

Page 153: ...onfirm it by pressing OK If no key is pressed the call will be forwarded au tomatically after 10 seconds A first message will then warn the user that the call has been forwarded and a second one will...

Page 154: ...difficulty in contacting the user since the number could be busy ROAD ASSISTANCE FUNCTION Selecting and confirming this func tion with the right knob 21 fig 1 displays the screen for forwarding the ca...

Page 155: ...uired If it is not possible to activate the telematic connection the display will show the corresponding warning mes sage Some information will be given only vocally by the operator while oth ers may...

Page 156: ...press No A message will confirm that the de activation request has been sent suc cessfully Using the Settings option de scribed in the relevant paragraph the user can set the frequency for transmittin...

Page 157: ...ecting the message and pressing the Read key the text of the message will be displayed with the following options Drive Me Call Delete Go back If the text of the message is too long use keys Pg and Pg...

Page 158: ...l to delete all the messages Press Go back to return to the previous screen After selecting the message and pressing the Read key the text of the message will be displayed with the following options D...

Page 159: ...at can be dialled directly after pressing the SOS key 1 fig 1 Select and confirm Personal Nr 1 or Personal Nr 2 with the right knob 21 fig 1 to display the screen to b eused for enter the required pho...

Page 160: ...given the activation and deactivation pro cedures of the services offered by Targasys GENERAL NOTES 112 is the emergency call service for all countries in which this public service is available The Em...

Page 161: ...the SOS main screen a message calling for medical assistance is for warded to the Targasys operator completed with the position of the car to allow it to be located The user has approx 10 seconds to i...

Page 162: ...DICAL ADVICE AND ROAD ASSISTANCE For both Road Assistance and Medical Advice calls if transmis sion of the telematic call is not suc cessful the display will show a warn ing message and the user is as...

Page 163: ......

Page 164: ......

Page 165: ......

Reviews: