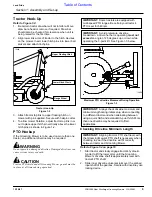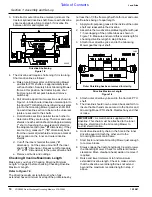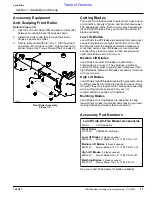
8
Section 1: Assembly and Set-up
FDR3590 Rear Discharge Grooming Mowers 310-229M
12/10/07
Land Pride
Table of Contents
Section 1:
Assembly and Set-up
Tractor Requirements
This mower is designed with a 3-Point category I hitch.
Horse power rating of tractor should not exceed 60 horse
power. Tractor’s rear power take-off (PTO) speed and
spline type must be capable of 540 RPM and 1 3/8”-6
spline rear power take-off.
Upper Hitch Arms
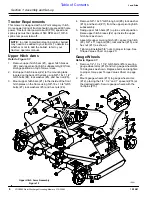
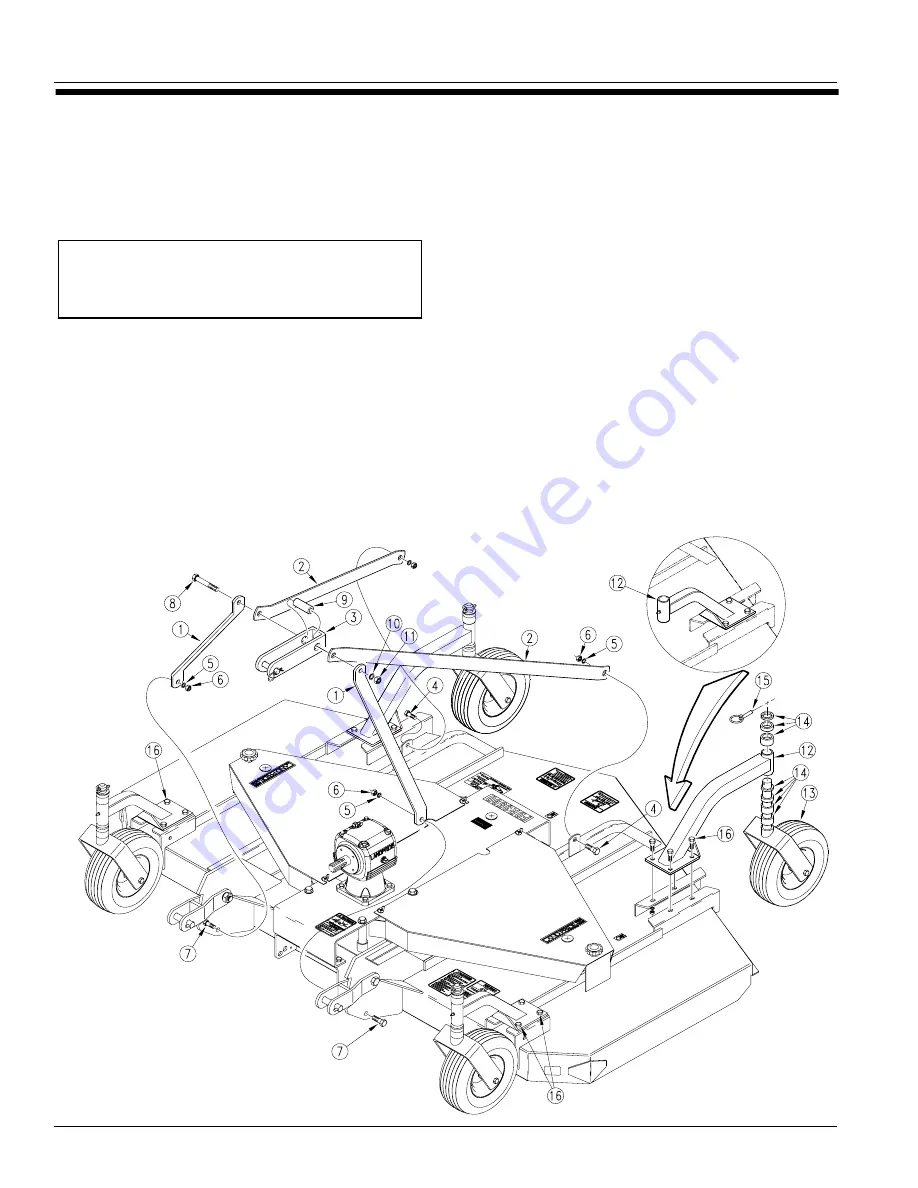
Refer to Figure 1-1:
1.
Remove upper hitch bars (#1), upper hitch braces
(#2), and upper pivoting hitch subassembly (#3) from
storage position on top of mower deck.
2.
Bolt upper hitch braces (#2) to the mounting tabs
located on the back of the deck using 5/8"-18 x 1 1/2”
GR5 bolts (#4), lock washer (#5), and hex nut (#6).
3.
Mount upper hitch bars (#1), to the inside of the front
hitch plates on the frame using 5/8"-18 x 1 3/4" GR5
bolts (#7), lock washers (#5) and hex nuts (#6).
NOTE: In order to maintain steering control, ballast
may need to be added to your tractor. To determine
whether or not to add the ballast, refer to your
tractors’ operator manual.
4.
Remove 5/8"-18 x 5" GR5 long bolt (#8), lock washer
(#10), and hex nut (#11) from the upper pivoting hitch
subassembly.
5.
Swing upper hitch bars (#1) up to a vertical position.
Raise upper hitch braces (#2) up inside the upper
hitch bars as shown.
6.
Assemble upper pivoting hitch (#3), spacer top hitch
(#9), 5/8" x 5" long bolt (#8), lock washer (#10), and
hex nut (#11) as shown.
7.
Tighten all installed 5/8” nuts to proper torque. See
Torque Values Chart on page 25.
Gauge Wheels
Refer to Figure 1-1:
1.
Remove 1/2”-13 x 1 1/4” GR5 bolts (#16) securing
gauge wheel arms (#12) and turn gauge wheel arms
180 degrees as shown. Replace bolts and retighten
to proper torque per Torque Values Chart on page
25.
2.
Mount gauge wheels (#13) to gauge wheel arms
(#12), placing the 1/4”, 1/2” and 1” spacers (#14) at
the desired depth. Secure gauge wheels with the
linchpins (#15).
Upper Hitch Arms Assembly
Figure 1-1
15941


