Section 1: Assembly & Set-Up
10/26/17
10
Section 1:
Assembly & Set-Up
Tractor Requirements
Tractor horsepower rating should be between 15 & 30
PTO horsepower. Tractors outside this horsepower range
must not be used.
The rear power take-off (PTO) speed must be capable
540 RPM and have a 1 3/ 8"-6 spline.
A 3-Point Category I hitch is required. The lower 3-Point
arms must be stabilized to prevent side-to-side
movement. Most tractors have sway blocks or adjustable
chains for this purpose.
The tractor
MUST
be equipped with protective equipment
designed to shield the operator from thrown objects and
from tractor roll over. An enclosed tractor cab with a Roll
Over Protective Structure (ROPS) may qualify. See
tractor’s manual for type of protection your tractor has.
Torque Requirements
Refer to
“Torque Values Chart”
determine correct torque values for common bolts.
Dealer Preparations
This Grooming Mower has been partially assembled at
the factory. Some assembly and preparation are still
required before the mower is ready for operation and can
be attached to the customer tractor.
Make sure that the intended tractor conforms to the
Tractor Requirements stated above. Also, read and
understand the Operator’s Manual for the Grooming
Mower. An understanding of how it works will aid in its’
assembly and setup.
Go through the
Pre-Assembly Checklist
before
assembling the mower. To speed up your assembly task
and make the job safer, have all needed parts and
equipment readily at hand.
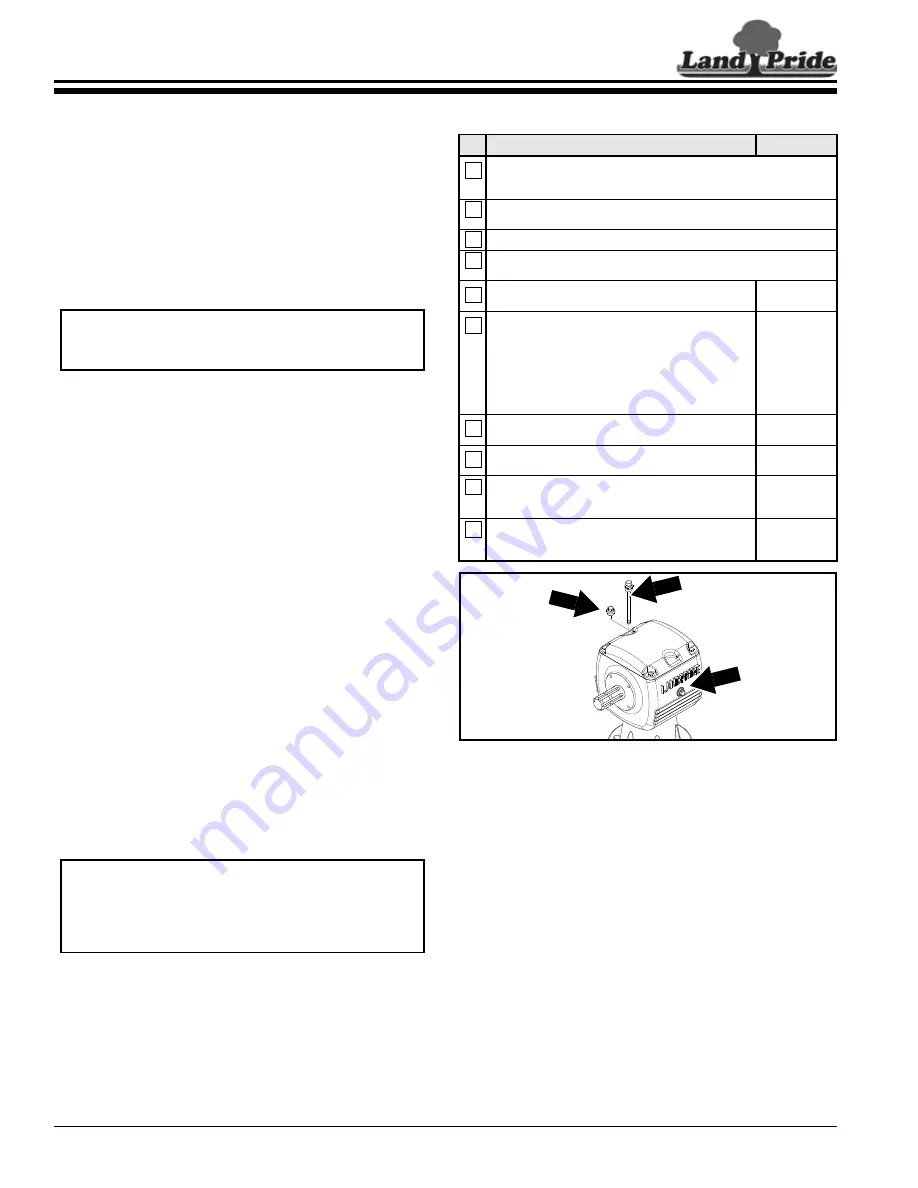
Vented Dipstick Installation
Refer to Figure 1-1:
A vented dipstick for the gearbox is included in a bag with
the manual. See your nearest Land Pride dealer if
dipstick is missing. Remove temporary red plug from top
of splitter gearbox and replace with supplied dipstick.
NOTE:
The tractor may need additional ballast to
maintain steering control. See tractor’s Operator’s
Manual to determine if additional ballast is required.
IMPORTANT:
Gearboxes are shipped with solid
Installation of Vented Dipstick
Figure 1-1
Upper 3-Point Hitch Assembly
Refer to Figure 1-2 on page 11:
1.
Remove angle shipping brackets (not shown) with
gauge wheel assemblies (#4) from mower frame.
2.
Remove rear hitch braces (#1), A-Frame hitch braces
(#2), and clevis hitches (#3) from shipping crate.
3.
Attach rear hitch braces (#1) to hole “A1” inside of
rear hitch mounting plates (#5) with 5/8" bolts and
flanged lock nuts (#6) provided in rear hitch plates.
Do not tighten nuts.
4.
Attach A-Frame hitch braces (#2) to holes “A2” inside
front hitch mounting plates (#7) with 5/8" bolts (#8)
and hex flanged lock nuts (#8) shipped holding rear
hitch braces (#1) together. Do not tighten nuts.
5.
Remove 5/8" x 5 1/2" lg. bolt, lock washer, and
nut (#11) from upper pivoting hitch (#9). Don’t let
spacer tube (#10) fall from upper pivoting hitch.
Pre-Assembly Checklist
Check
Reference
Make sure miscellaneous assembly tools are on hand: Hammer,
tape measure, hacksaw, assortment of wrenches & sockets,
3/8" drill, drill bits and spirit level.
Have a forklift or hoist with properly sized chains and safety
stands on hand capable of lifting 2500 lbs.
Have a minimum of two people available during assembly.
Check to see if auxiliary tractor weights are needed.
See Specifications on page 27 for mower weights.
Make sure all major components and loose parts
are shipped with the implement.
Operator’s
Manual
Double check to make sure all fasteners & pins are
installed in the correct location. Refer to the Parts
Manual if unsure.
NOTE:
All assembled hardware from the factory
has been installed in the correct location.
Remember location of a part or fastener if
removed. Keep parts separated.
Operator’s
Manual &
Parts Manual
Make sure working parts move freely, bolts are
tight & cotter pins are spread.
Operator’s
Manual
Make sure all grease fittings are in place and
lubricated.
Section 5
Page 25
Make sure all safety labels are correctly located
and legible. Replace if damaged.
Important
Safety
Information
Make sure all red reflectors are correctly located
and visible when implement is in transport
position.
30216
DO NOT
OVERFILL!
Oil Level
Plug
Solid
Plug
Vented Dipstick


