Section 3: Adjustments
9/28/18
RB1660, RB1672, RB1684, RB2672, RB2684, & RB2696 Rear Blades 301-375M
14
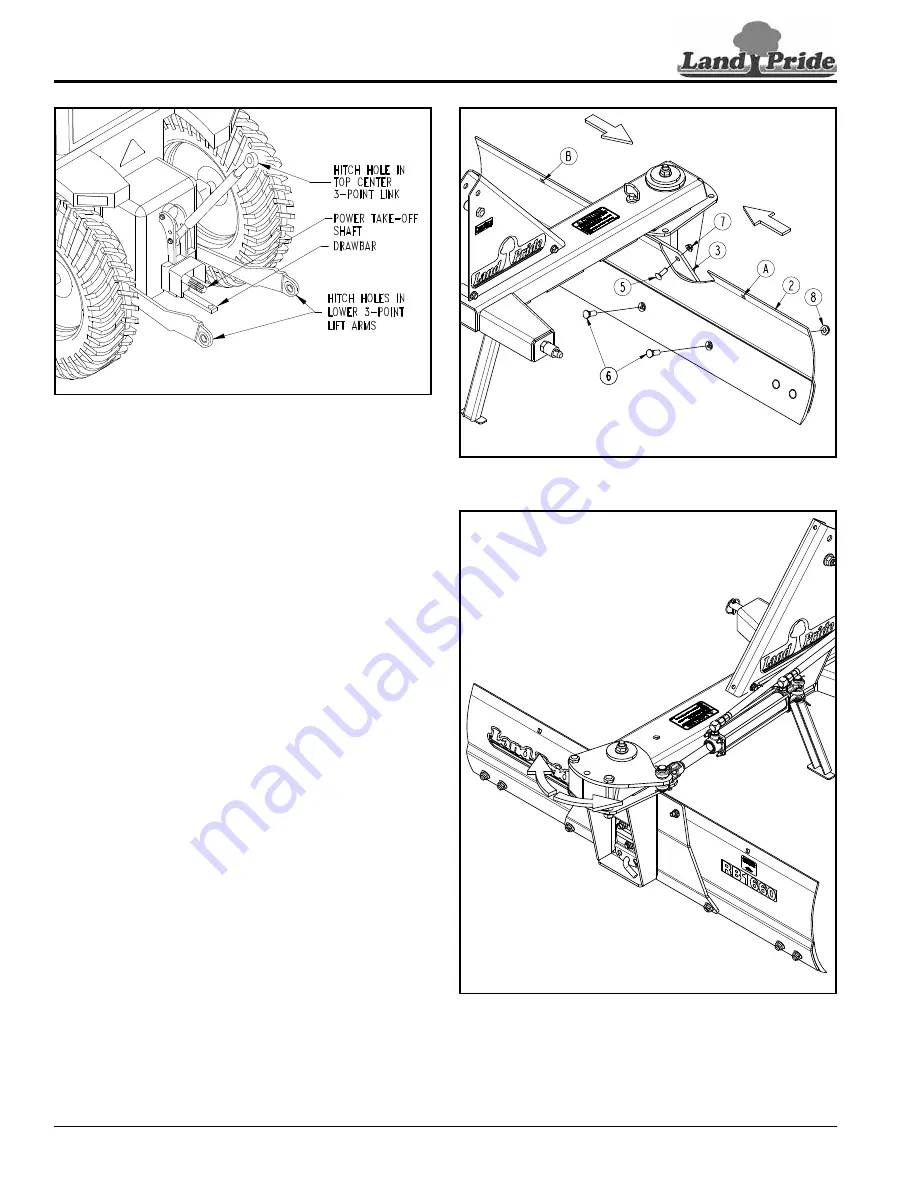
Blade Offsetting
Figure 3-4
Hydraulic Blade Angling
Figure 3-5
33216
33362
Tractor 3-Point Hitch
Figure 3-3
Blade Offsetting
Refer to Figure 3-4:
The blade may be offset 12" right or left by unbolting
moldboard (#1) from moldboard mount (#2) and rebolting
it using alternate holes “A” or “B” depending on which
direction the blade is being offset.
1.
Remove two carriage bolts (#3) and three 1 3/4" long
plow bolts (#4) from center of moldboard (#1) and
moldboard mount (#2).
2. On side to be shortened, remove 1 1/2" long plow
bolt (#4) 12" from removed 1 3/4" long plow bolts.
3. Shift moldboard (#1) 12" to the right or left & reattach
it to moldboard mount (#2) with 1/2"-13 x 1 1/2" GR5
carriage bolts (#3), hex flange locknuts (#5),
5/8"-11 x 1 3/4" plow bolts (#4), and hex flange
locknuts (#6). Tighten locknuts to the correct torque.
4. Install 5/8"-13 x 1 1/2" plow bolt (#4) in the remaining
hole and secure with hex flange locknut (#6). Tighten
locknut to the correct torque.
Hydraulic Angling
Refer to Figure 3-5:
A
“RB16 or RB26 Series Hydraulic Angling Kit”
must
be installed to angle blade hydraulically.
See
“RB16 Series Hydraulic Angling Kit”
See
“RB26 Series Hydraulic Angling Kit”
1.
Mover tractor control lever forward to retract hydraulic
cylinder and rearward to extend hydraulic cylinder.
2. If cylinder operates in the opposite direction, switch
quick disconnect couplings at the duplex outlet.
37298


