Section 1: Assembly & Set-up
RC5610, RC6610, RCM5610, & RCM6610 Series 2 S/N Rotary Cutters 330-539M
5/6/20
29
21. Remove connecting hitch pin or bolt as follows:
a.
For Standard Clevis Hitch, see Figure 1-29 on
Remove hairpin cotter (#2) and hitch
pin (#1) as shown in Detail B.
b.
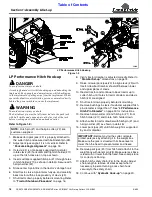
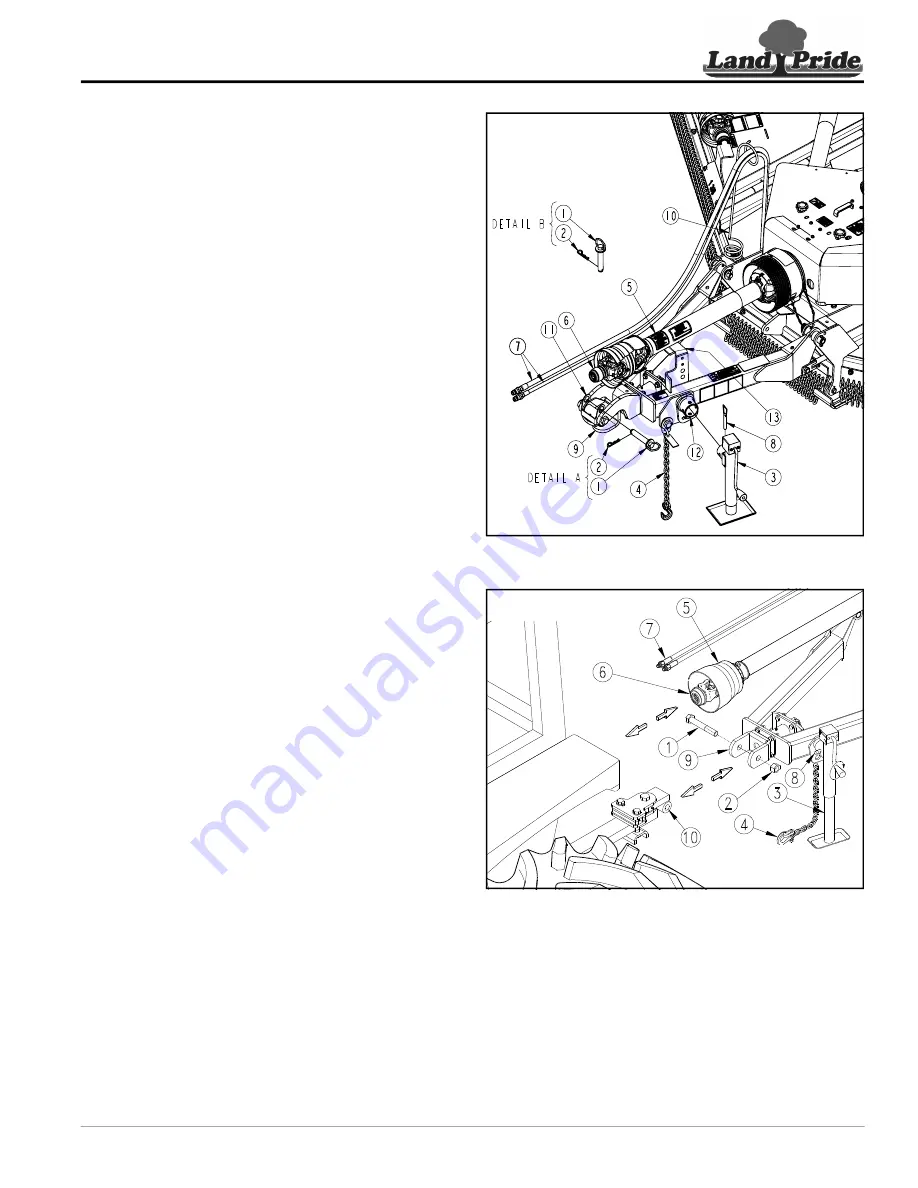
For LP Performance Hitch See Figure 1-30:
Remove hairpin cotter (#2) and hitch pin (#1) As
shown in Detail B.
c.
For Bar-Tite Hitch, See
locknut (#2) and bolt (#1).
22. Restart tractor and drive tractor slowly forward
several feet.
23. Shut tractor down properly before dismounting. Refer
to
24. Lower park jack until skid shoes support the cutter.
25. Replace connecting pin/bolt (#1) as follows:
a.
For Standard Clevis Hitch, See
Replace connecting pin (#1) in clevis
hitch pin holes. Secure with hairpin cotter (#2).
b.
For LP Performance Hitch, See
Refer to Detail A:
Rotate clevis (#9) horizontal
and flip hitch holder (#11) up as shown. Insert
customer-supplied hitch pin (#1) through holes in
hitch holder and secure with hairpin cotter (#2).
c.
For Bar-Tite Hitch, See
Remove hitch (#10) from tractor drawbar and
reattach it to cutter hitch (#9) with removed
bolt (#1) and locknut (#2) Screw locknut on 4 or 5
full turns. Do not torque nut tight.
Unhook LP Performance Hitch
Figure 1-30
Unhook Bar-Tite Hitch
Figure 1-31
37605
37622
26604

