Section 2: Optional Equipment
RCFM4014 Rotary Cutter 326-730M
8/11/14
20
Section 2: Optional Equipment
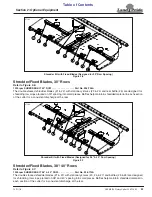
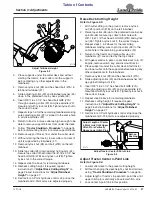
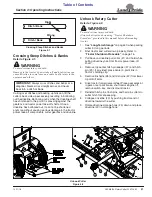
Front Rubber Guards
Figure 2-1
37165
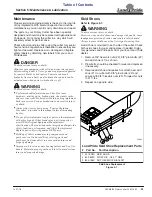
Front Chain Guards
1.
Locate chain guard (#1). It will have an extra chain
strand (#5) hanging down on both ends. Attach chain
guard (#1) to the right-hand side of the deck with
1/2" -13 x 3 1/2" bolts (#3) and hex whiz nuts (#4). Do
not tighten hex whiz nuts at this time.
2. Attach chain guard (#2) to the left-hand side of the
deck with remaining 1/2" -13 x 3 1/2" long carriage
bolts (#3) and hex whiz nuts (#4).
3. Tighten hex whiz nuts (#4) to the correct torque.
Front Safety Guards
DANGER
!
To avoid serious injury or death:
Rotary Cutters have the ability to discharge objects at high
speeds; therefore, the use of front & rear safety guards is
required and should always be used when cutting along
roadways and in areas where bystanders are present. Stop
blade rotation if bystanders are in or around the area.
WARNING
!
To avoid serious injury or death:
Keep all safety guards in place. Rotary Cutters have the
ability to discharge objects at high speeds. Use extreme
caution when cutting in areas where people may be present. It
is best to operate the cutter when no one is nearby. Stop blade
rotation if someone is in or around the area.
Front Rubber Guards
1.
Attach front rubber guards (#1) to the deck front with
1/2" -13 x 3 1/2" GR5 bolts (#2) and whiz nuts (#3).
2. Tighten hex whiz nuts (#3) to the correct torque.
NOTE:
Do not tighten hardware until assemblies
are complete. Refer to
“Torque Values Chart”
on
page 46 for torque instructions.
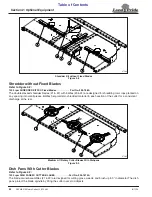
Front Chain Guard
Figure 2-2
37166


