Section 2: Operating Instructions
RCM4610, CA0548 & CA0556 Core Aerators 325-108M
12/11/18
14
Field Set-up
CAUTION
!
To avoid minor or moderate injury:
The following procedures should be carried out by the
operator. Other persons should be cleared of the area when
changing the transport wheels positions.
1.
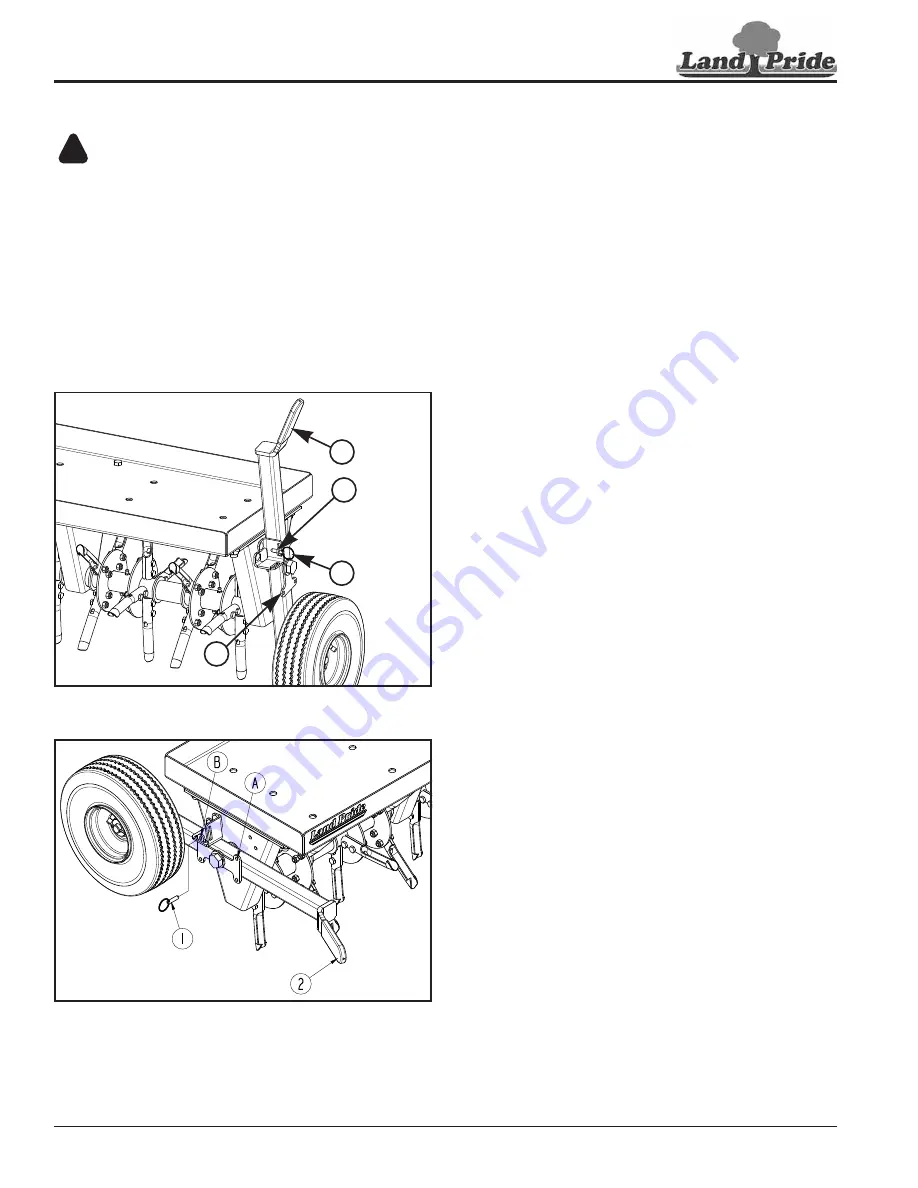
With a secure grip on handle (#2), pull cotterless
hitch pin (#1) from hole “A” and slowly lower transport
arm down to position shown in Figure 2-2.
2. Fully insert cotterless hitch pin (#1) in hole “B”.
3. Repeat Steps 1 and 2 for the other side.
Wheels Set For Transporting
Figure 2-1
Wheels Set For Field Work
Figure 2-2
30012
1
2
A
B
30011
Long-Term Storage
Clean, inspect, service, and make repairs when parking
the Aerator for long periods. This will help ensure that the
unit is ready for field use next time you hook-up to it.
1.
Clean off any dirt and grease that may have
accumulated on the Core Aerator. Scrape off
compacted dirt. Clean out cores lodged in the
spoons. See
2. When finished cleaning and scraping dirt and grease
off, wash the surfaces thoroughly with a garden hose.
3. Repaint parts where paint is worn or scratched to
prevent rust. A coating of oil may also be applied to
the spoons to minimize oxidation.
4. Replace all damaged or missing decals.
5. Store the Core Aerator inside if possible. Inside
storage will reduce maintenance and make for a
longer Aerator life.
6. Inspect Core Aerator for loose, damaged, or worn
parts and adjust or replace as needed.


