background image

11

11/01/11

RTR0542 and RTR0550 Rotary Tillers   311-464M

Section 1: Assembly& Set-Up

Table of Contents

4.

Depending upon size of hole in tractor’s top center
link, attach center link to either the tiller’s lower 5/8

"

hitch holes or its upper 3/4

"

hitch holes with a hitch

pin of the same diameter. Properly secure hitch pin
with a linch pin. (Center hitch pin and linch pin are
supplied by the customer).

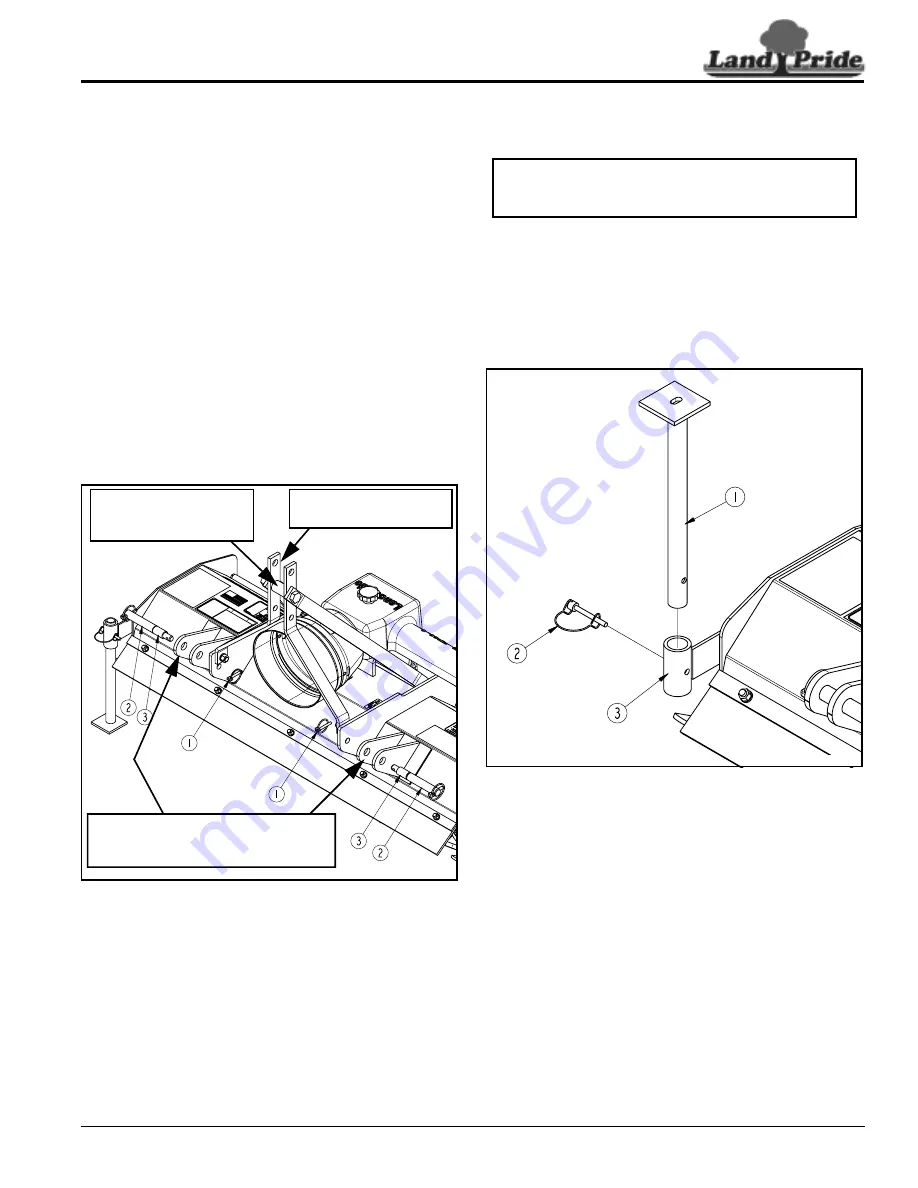
3-Point Category I Hitch

Refer to Figure 1-5:

1.

Remove the two inside 1/4

"

linch pins (#1) and hitch

pins (#2). Do not remove the hitch pin bushings (#3)
from hitch pins (#2).

2.

Slowly back the tractor up to tiller until the lower
3-point arms are aligned with the outside hitch
clevises on the tiller as shown.

3.

Replace the lower hitch pins (#2) and secure with the
two 1/4

"

linch pins (#1).

4.

Attach the tractor’s top center link to the tiller’s lower
3/4

"

hitch holes using a 3/4" diameter hitch pin.

Properly secure hitch pin with a linch pin.(Center
hitch pin and linch pin are supplied by the customer).

3-Point Category I-Limited Hitch

Figure 1-5

3-Point Category I Quick Hitch

Follow all instructions and safety precautions provided in
Land Pride’s QH15 Quick Hitch Operators Manual No.
320-003M. Also available free-of-charge from our
website at www.landpride.com.

Outside Hitch Clevis For Hitching to
the Tractor’s Lower 3-Point Arms or
Land Prides QH15 Quick Hitch hooks

Hitch Location For 3/4"
3-Point Center Hitch Pin

23775

Hitch Location For
Land Pride QH15 Quick
Hitch Center Hook

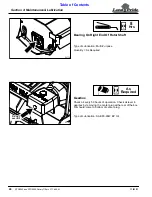
Parking Stand Storage

Refer to Figure 1-6:

1.

Slowly raise tiller with tractor’s hydraulic 3-point lift
until tines are about 1-2

"

above the ground.

2.

Remove wire retaining pin (#2) and parking
stand (#1).

3.

Invert parking stand (#1) upside down and reinsert it
in parking stand mounting bracket (#3) as shown.

4.

Secure parking stand with wire retaining pin (#2).

Parking Stand Storage Position

Figure 1-6

3-Point Hitch Checks

1.

Ensure that the lower arms are blocked to prevent
excessive side movement.

2.

Slowly raise the tiller with the tractor’s hydraulic
3-point lift until the tines are about 1-2

"

above the

ground.

3.

Adjust the tractor's lower lift arms to level the tiller
from left to right. Final leveling adjustments will be
made in 
the Adjustment Section on page 19.

4.

Adjust the top-link so that the tiller is approximately
level from front to rear. Final leveling adjustments
will be made in 
the Adjustment Section on page 19.

5.

Slowly operate the tractor's 3-point hydraulic control
up and down to check for clearance between the
tires, frame, drawbar etc.

IMPORTANT: To keep from bending the parking
stand, always store stand upside down in its bracket
right after hooking-up tiller to a tractor.

23794

Summary of Contents for RTR0542

Page 1: ...t Read the Operator s Manual entirely When you see this symbol the subsequent instructions and warnings are serious follow without exception Your life and the lives of others depend on it Copyright 20...

Page 2: ...8 Further Assistance 8 Section 1 Assembly Set Up 9 Dealer Preparations 9 Tractor Requirements 9 Torque Requirements 9 Parking Stand Adjustment 9 3 Point Hitch Assembly 9 Tractor Hook Up 10 3 Point Cat...

Page 3: ...y read the message that follows it In addition to design and configuration of equipment hazard control and accident prevention are dependent upon the awareness concern prudence and proper training of...

Page 4: ...nts can create a hazard when driven on public roads They are difficult to see especially at night Flashing warning lights and turn signals are recommended whenever driving on public roads Practice Saf...

Page 5: ...d wearing radio headphones while operating machinery These are common practices that may or may not be applicable to the products described in this manual Avoid High Pressure Fluids Hazard Escaping fl...

Page 6: ...ty labels to be affixed to the replaced component as specified by Land Pride When ordering new components make sure the correct safety labels are included in the request To order new labels go to your...

Page 7: ...64M Important Safety Information Table of Contents Reference RTR0550 23770 Reference RTR0542 23895 818 142C Rotating Driveline Hazard Keep Away Reference RTR0550 23770 Reference RTR0542 23895 818 284C...

Page 8: ...able of Contents Reference RTR0542 RTR0550 Shown 23771 818 552C Rotating Driveline Hazard Keep Away ROTATING DRIVELINE KEEP AWAY 818 130C Operate only w 540 rpm PTO Reference RTR0542 RTR0550 Shown 237...

Page 9: ...y Information Table of Contents 818 540C Shield missing Do Not operate 818 552C Rotating Driveline Hazard Keep Away ROTATING DRIVELINE KEEP AWAY Reference RTR0542 RTR0550 23760 Reference RTR0542 RTR05...

Page 10: ...get years of satisfactory use from the machine Application The RTR05 Series Reverse Till Rotary Tillers are designed and built by Land Pride to till soil for seedbed or planting preparation The RTR05...

Page 11: ...ury caused by accidental falling of tiller securely support tiller on safe supporting stands or blocks This unit is shipped almost completely assembled Carefully follow instructions for final assembly...

Page 12: ...Figure 1 3 1 Remove the two inside 1 4 linch pins 1 and hitch pins 2 Remove hitch pin bushings 3 and keep for future use with Category I Limited and Category I tractor hook ups 2 Slowly back the trac...

Page 13: ...landpride com Outside Hitch Clevis For Hitching to the Tractor s Lower 3 Point Arms or Land Prides QH15 Quick Hitch hooks Hitch Location For 3 4 3 Point Center Hitch Pin 23775 Hitch Location For Land...

Page 14: ...ge may result Some tractors are equipped with multispeed PTO ranges Be certain your tractor s PTO is set for 540 rpm IMPORTANT The driveline must be lubricated before putting it into service Refer to...

Page 15: ...dard 3 Point hitch More than one driveline may be required to fit all applications 23758 Shorten Driveline Refer to Figure 1 10 Be sure to first check driveline collapsed length as instructed above If...

Page 16: ...s up or down while operating Exceeding this angle with driveline rotating can break the driveline and cause flying projectiles 3 With PTO off raise implement fully up and make the following checks bel...

Page 17: ...s have been replaced when completed Refer to Gearbox Lubrication Page 24 Check oil level in chaincase Make sure all plugs have been replaced when completed Refer to Chaincase Lubrication Page 23 Check...

Page 18: ...PTO speed See Specifications Capacities for rated PTO speed CAUTION Make certain you are not working over any underground wiring pipes or other obstructions If there is doubt contact your local utilit...

Page 19: ...o prevent that movement 9 See Storage on page 22 for additional information on long term storage of your tiller General Operating Notes Before beginning to till the following inspection should be perf...

Page 20: ...ground conditions warrant Do not make turns or attempt to back up while tiller is in the ground See important note below Travel about 50 ft and then stop to check your results When stopping remember...

Page 21: ...o produce a fine soil texture or can be raised to produce a coarse soil texture Adjust the chain length by repositioning the chain 2 in slot A Rear Deflector Figure 3 1 23778 Skid Shoe Adjustment Refe...

Page 22: ...shown in Figure 4 1 3 Replace cap screws and fasteners 1 2 3 Tighten nuts to proper torque See The Torque Values Chart in the Appendix section on page 28 IMPORTANT When ordering be sure to order genu...

Page 23: ...setting pressure 6 The clutch should be checked during the first hour of tilling and periodically each week An additional set of scribe marks can be added to check for slippage See Clutch Assembly to...

Page 24: ...nt parts where paint is worn or scratched to prevent rust Ask your dealer for Aerosol Land Pride touch up paint They are also available in touch up bottles with brush quarts and gallon sizes by adding...

Page 25: ...and then reassemble Type of grease Multi Purpose Quantity Coat Generously Chaincase Type Recommended Shell Alvania EP00 Oil Alternate SAE 90 wt oil Quantity As required IMPORTANT Tiller should be leve...

Page 26: ...End Of Rotor Shaft Type of Lubrication Multi Purpose Quantity As Required 23770 Gearbox Check oil every 50 hours of operation Check oil level in gearbox by removing the center plug at the rear of the...

Page 27: ...flanges 5 6 Number of tines per flange 4 Tine Construction Alloy steel heat treated C shaped blades Skid Shoes Adjustable Storage Stands Adjustable Rear Deflector Adjustable Driveline Category II Off...

Page 28: ...and Allows for easy hook up and storage Adjustable skid shoes Control depth with seven adjustments Formed rear deflector Keeps dirt in and leaves a level finish Forming gives deflector additional stre...

Page 29: ...ines are incorrectly installed Obstacles are entangled in tines and or rotor Lower hitch clevises are in the wrong position Lower tractor 3 point arms Increase tractor rpm Adjust skid shoes Replace ti...

Page 30: ...45 310 230 405 300 3 4 10 235 170 360 265 510 375 M18 X 1 5 220 165 350 260 485 355 3 4 16 260 190 405 295 570 420 M20 X 2 5 280 205 440 325 610 450 7 8 9 225 165 585 430 820 605 M20 X 1 5 310 230 650...

Page 31: ...cts its performance or reliability or which has been used for a purpose for which the product is not designed Misuse also specifically includes failure to properly maintain oil levels grease points an...

Page 32: ...Corporate Office P O Box 5060 Salina Kansas 67402 5060 USA www landpride com...

Reviews: