Section 2: Operating Instructions
2/10/21
22
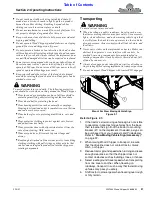
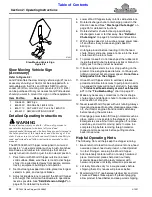
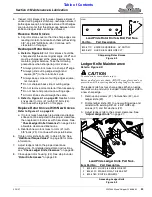
Slow Moving Vehicle Sign
Figure 2-2
Slow Moving Vehicle Sign
(Accessory)
Refer to Figure 2-2:
Land Pride offers the slow moving vehicle sign (#1) as an
accessory should your tractor not be equipped with a
removable sign that fits Land Pride’s SMV mounting
socket (#4). Also, mounting components (#2, #3, & #4)
can be purchased from your nearest Land Pride dealer
should you want to mount this sign on other equipment.
Item Part No.
Description
1
316-362S SMV Sign
2
802-092C RHSNB 5/16-18X3/4 GR5
3
803-177C NUT HEX FLG TP LK 5/16-18ZNYCR
4
890-401C SMV MOUNTING SOCKET
Detailed Operating Instructions
WARNING
!
To avoid serious injury or death: Allow only persons to
operate this implement who have fully read and
comprehended this manual, who have been properly trained in
the safe operation of this implement, and who are age 16 or
older. Serious injury or death can result from the inability to
read, understand, and follow instructions provided in this
The WC1504 Wood Chipper is designed to cut wood
products 4" in size and smaller such as brush, branches,
small trees, and lumber into small chips that can be
quickly turned into mulch or just to aid in decomposition.
1. Park tractor with Wood Chipper outside on a level
solid surface. Make sure there is room to discharge
chips into a pile directed away from people, animals,
tractor, equipment, buildings, and operator.
2. Set tractor engine speed at an idle, place tractor gear
selector in park, and set park brakes.
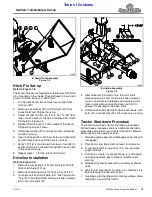
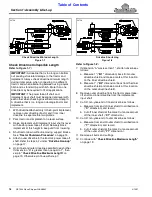
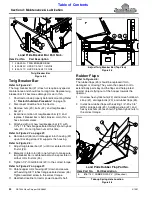
3. Adjust skid extensions to support the Wood Chipper
at a height that will allow the driveline to operate as
level as possible. See
page 24 for detailed instructions.
37431
4. Lower Wood Chipper slowly onto its skid extensions.
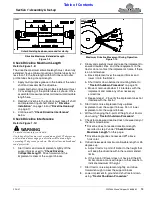
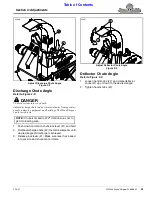
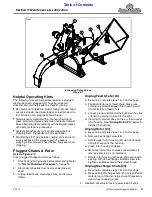
5. Rotate discharge chute to discharge product in the
direction desired. See
page 25 for detailed instructions.
6. Rotate deflector chute to direct product being
discharged closer or farther away. See
on page 25 for detailed instructions.
7.
With engine speed at a low idle, engage
power take-
off and then slowly increase engine speed to
540 rpm.
8. Untangle product before inserting it into the feed
chute. Slowly slide one piece at a time into the feed
chute toward the rotor knives.
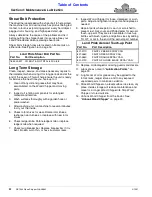
9. To protect oneself, do not reach past the rubber skirt
inside the feed chute. Instead use a stick or branch to
lightly push on the product as needed.
10. If tractor engine starts to slow, stop pushing on the
product. Once engine speed returns, continue push
lightly on product but at a slower speed.
Do not force
feed product into the chipper.
11. Once Wood Chipper starts to self-feed, release
product and allow rotor knives to pull product in at its
own speed. If knives will not pull product in, then refer
to
“Product self-feeds slowly or won’t self-feed at
in the
chart on page 37.
12. Make any necessary corrections to the discharge
chute angle and deflector chute to finalize direction
and location of chip pile.
13. Never leave Wood Chipper with unit running. Always
lower engine speed to an idle, disengage power take-
off, shut tractor engine off and remove switch key
before leaving the work area.
14. Disengage power take-off if foreign material such as
glass, metal, or rocks enters the chipper or if other
emergencies arise. Shut tractor engine off, remove
switch key, and wait for moving parts to come to a
complete stop before removing foreign material.
Inspect and make repairs before putting machine
back into service.
Helpful Operating Hints
The following hints will help keep the chipper running.
1. Be careful not to feed too much product at once, feed
oversize product, feed wet product, or feed product
too fast. Doing so can plug the Wood Chipper.
2. Alternate leafy material with a non leafy hardwood
piece. Hard wood pieces help clean out leafy
material. Keep alternating leafy material with
hardwood pieces until leafy material is processed.
3. Let leafy branches dry for a couple weeks before
chipping them. Dry leaves will process better.
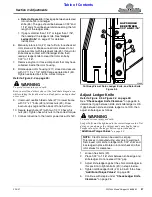
4. Maintaining 1/32" gap between ledger bar and rotor
knives will keep knives wiped off, prevent plugging,
allow product to feed better, and keep wood chipping.

