LANDIS “77”
-9-
TO CHANGE PINION
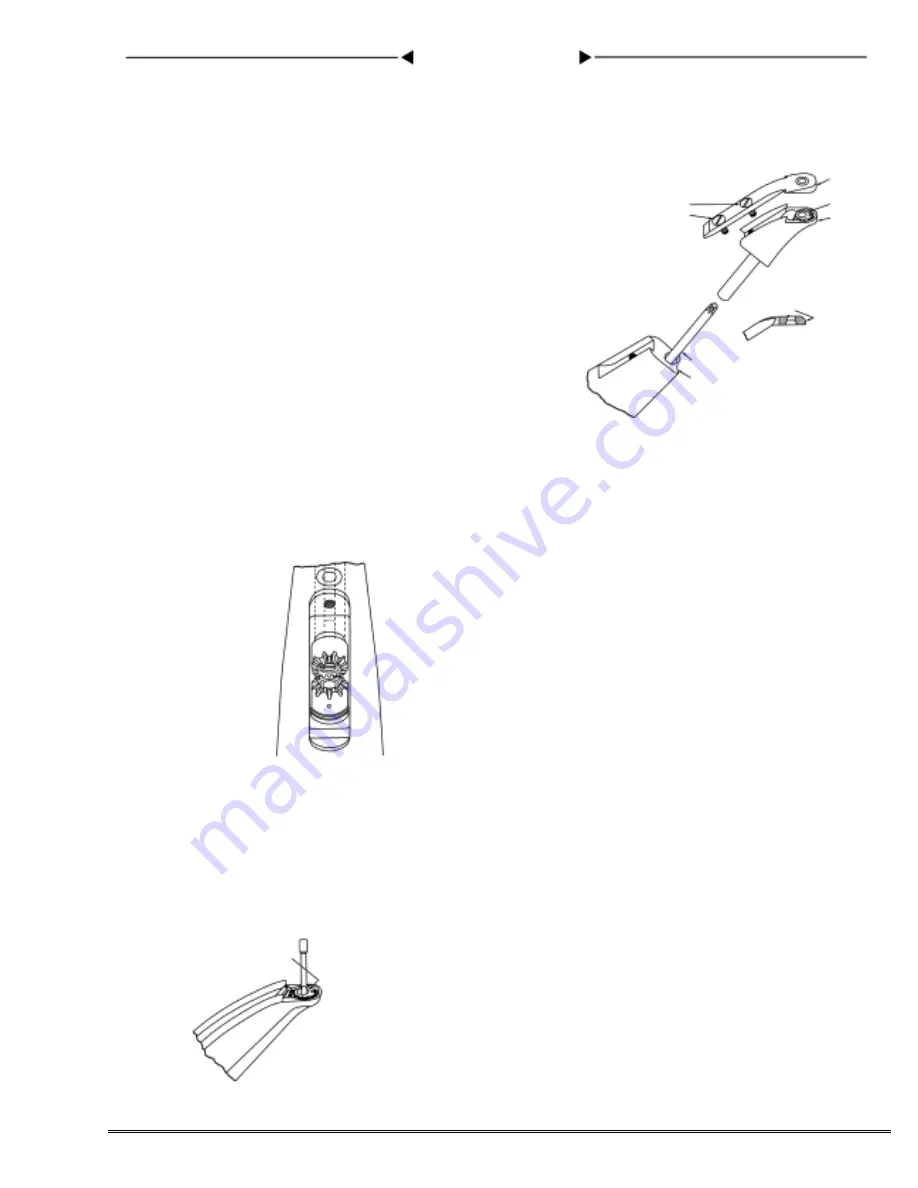
Take out the two Fastening Screws S-504 and S-505, remove Horn
Tip S-502 and Horn Cap S-503; the Pinion S-508 may now be
lifted out and replaced with a new one.
Be sure that the new Pinion meshes with the Whirl S-507 prop-
erly. (See cut for Pinion Adjustment).
Replace the Horn Tip and Whirl. Be sure Whirl is correctly
timed as previously described. Replace Horn Cap and fasten
with two Screws. (See figure No. 12).
ADJUSTING PINION
To adjust Pinion S-508, remove Horn Rear Curved Plate S-555,
which will permit access to Pinion Adjusting Screw S-510.
To raise Pinion turn Adjusting Screw to the right; to lower Pin-
ion, turn Adjusting Screw to the left. Pinion and Whirl teeth
should mesh, and turn freely. (See figure No. 13).
HORN CAP
The top of the Horn Cap should be kept smooth at all times, also
the hole should be dressed out smooth with emery cloth if at any
time it is nicked or burred.
If not perfectly smooth, the thread may catch on sharp edges and
strand. (See figure No. 12).
ALIGNMENT OF HORN
The Horn is lined up at the factory. Should the occasion arise at
any time for re-alignment, it can be accomplished by the following
procedure:
Loosen four Screws S-531 under Horn Table slightly, which will
permit tapping the Horn to correct alignment. Tap into a central
position so that hole in Horn Cap runs true. After firmly tighten-
ing Horn Holding Screws, you can check the position by putting
needle down into the Whirl and see that it does not rub on the side
of the hole in Whirl. (See figure No. 14).
CLEANING HORN
IMPORTANT: Take off Horn Cap S-503 each day after you are
finished sewing and clean Whirl, Pinion and Rollers with kero-
sene. Your machine will be ready for work the next day and this
will eliminate any difficulty from hard and gummed wax.
On the LANDIS McKay Stitcher Model “77” the Horn is sepa-
rated in three parts to provide easy cleaning and threading.
S-503
S-507
S-502
S-504
S-505
Keep smooth at all times
S-508
S-501
TOP OF
HORN
Figure No. 12
When Horn is Centrally
Located, the Whirl Will
Not Rub Needle
Figure No. 14
Horn S-501
Hole for Screw
S-556
Hole for Cover Plate
S-555 in Back of Horn
To Adjust Pinion S-508 Up,
Turn Screw S-510 to Right
To Adjust Pinion S-508 Down,
Turn Screw S-510 to Left
Figure No. 13
Summary of Contents for McKay Stitcher 77
Page 2: ......


