1P124-2306
2-19
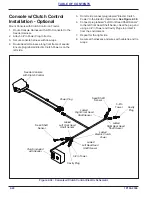
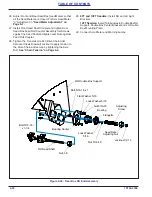
and secure with supplied Locknut on the outside of the
Seed Box. To get the Sensor Connector outside the
Seed Box, feed the terminals through the Cord Grip.
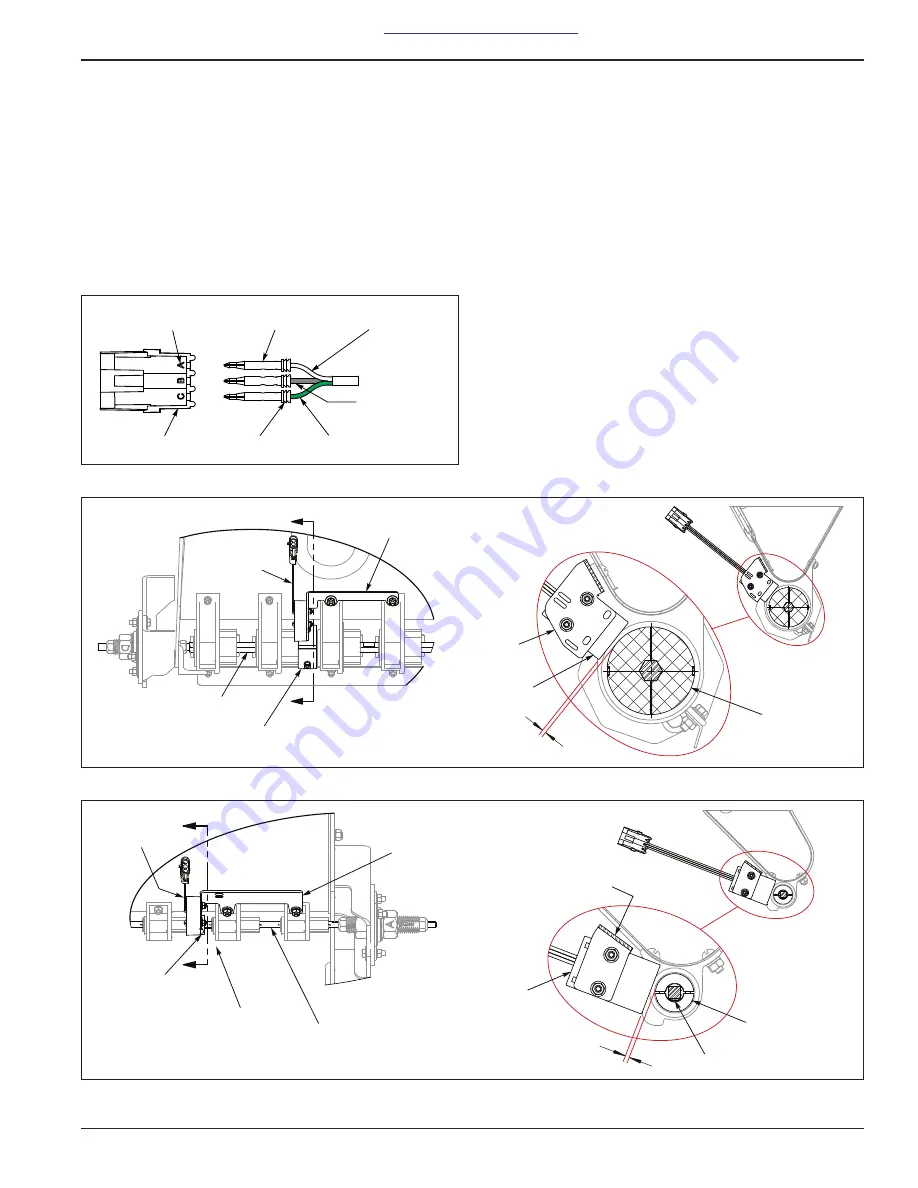
Install the terminals into the 3-Pin Shroud labeled “A”,
“B” and “C” as follows “A” White, “B” Black, “C” Green.
enough cord slack to the Bin Level Sensor Cord to
allow for future adjustments of the Sensor. Secure the
Bin Level Cord by tightening the Cord Grip
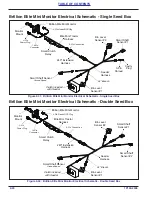
Compression Nut. Connect both Bin Level Sensors to
the Seeder Harness.
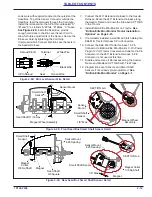
Figure 2-28: Bin Level Sensor Wire Detail
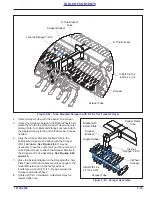
7. Connect the 240" Extension Harness to the Seeder
Harness. Route the 240" Extension Harness along
the Seeder Frame and down the Drawbar/3-PT Hitch
to the Tractor.
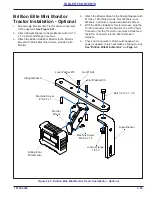
8. Install Brillion Elite Mini Monitor on Tractor.
“Brillion Elite Mini Monitor Tractor Installation -
Optional” on Page 2-23.
9. If not already installed, install Smart Clutch Relay into
Elite Mini Tractor Harness 3-Pin Connectors.
10. Connect the Elite Mini Tractor Harness 14-Pin
Connector to Brillion Elite Mini Monitor, 3-Pin Power
Plug to 12 Volt Tractor Convenience Outlet and 6-Pin
Connector to the 240" Extension Harness. 4-Pin
Connector is not used at this time.
11. Bundle and secure all Harnesses along the Seeder
Frame and Drawbar/3-PT Hitch with Tie Wraps.
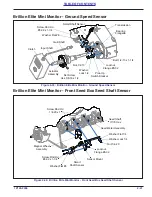
12. Program Bin Level Sensors and Smart Shaft
Sensors if not already pre-programmed.
See
“Brillion Elite Mini Monitor” on Page 4-1.
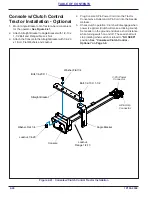
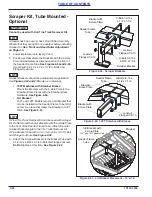
Figure 2-29: Front Seed Box Smart Shaft Sensor Detail
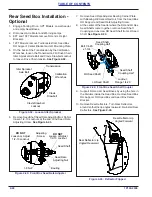
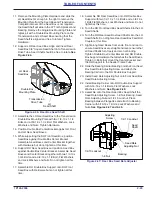
Figure 2-30: Rear Seed Box Smart Shaft Sensor Detail
White Wire
Black Wire
Green Wire
Terminal
3-Pin Shroud
Shroud Pin ID
Seal
A
A
Seed Shaft,11/16 Hex
SECTION A-A
1/8" Max
Sensor
Mount
Smart Shaft
Sensor
Magnet Wheel
Assembly
Magnet Wheel Assembly
Sensor Mount
Smart Shaft
Sensor
A
A
Sensor Mount,
4.25 Spacing
Seed Shaft,
3/8 Square
Magnet
SECTION A-A
1/8" Max
Smart Shaft Sensor
Magnet
Magnet Collar
3/8 Sq Shaft
Smart Shaft
Sensor
Sensor Mount,
4.25 Spacing
Magnet
Collar
3/8 Sq Shaft
Summary of Contents for Brillion Turfmaker III Series
Page 4: ......
Page 14: ...1 6 1P124 2306 TABLE OF CONTENTS Figure 1 4 Decal Placement Hitch SL2 HitchDecals 1 9 1 9 3...
Page 18: ...1 10 1P124 2306 TABLE OF CONTENTS Table provided for general use NOTES...
Page 45: ...1P124 2306 2 27 TABLE OF CONTENTS Table provided for general use NOTES...
Page 49: ...1P124 2306 2 31 TABLE OF CONTENTS Table provided for general use NOTES...
Page 57: ...1P124 2306 2 39 TABLE OF CONTENTS Table provided for general use NOTES...
Page 74: ...3 14 1P124 2306 TABLE OF CONTENTS Table provided for general use NOTES...
Page 102: ...6 4 1P124 2306 TABLE OF CONTENTS Table provided for general use NOTES...

