E2
Charging Plug
Plug
Lithium Battery
Capacity Display Button &
Battery Status Indicator
Fig.1
READY FOR OPERATION
To Charge the Battery for First Use
1. Connect the charger to standard 110 - 240 volt outlet; a red light should appear on the
charger. NOTE: Always connect charger to standard 110 - 240 volt outlet before connecting
battery.
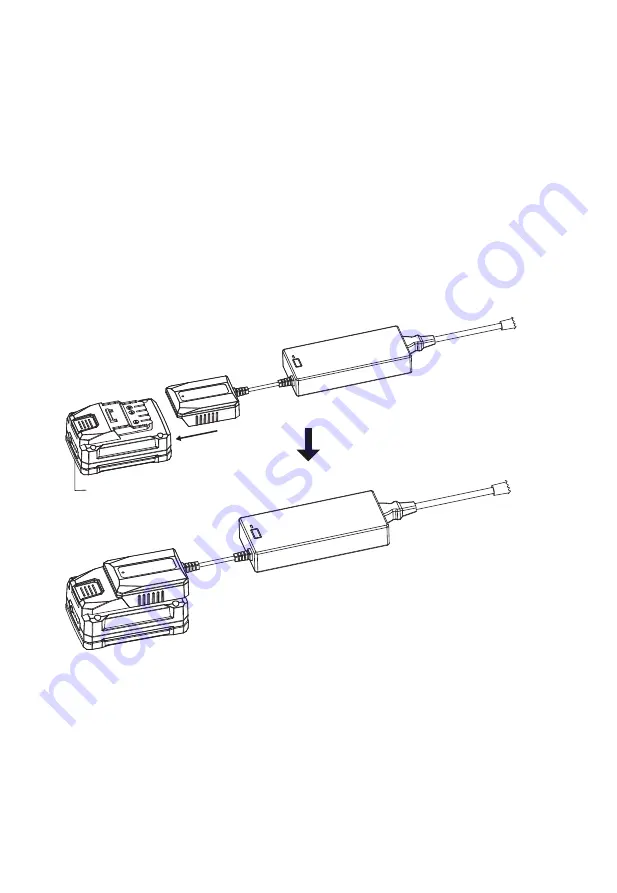
2. Fully insert the charging plug into the battery card slot until you hear a click or see the
battery button toggle back to a flat position. (See Fig. 1 & Fig. 2)
3. Charge the battery until the light on the charger turns stable green.
(
Depending on the
battery capacity, the charging time usually takes 2 to 4 hours
)
4. Press the battery button, pull out the charging plug, remove the three-pronged plug from the
outlet, and then disconnect the battery from charger.
5. Press the battery capacity display button, check the battery capacity through LED light.
NOTE: Do not leave the battery on the charger after the charge is completed. Unplug the
charger from the outlet, and then remove the battery.
IMPORTANT
BATTERY MUST BE FULLY CHARGED BEFORE FIRST USE.
Battery Charging and Monitoring
1. Battery must be fully charged before first use.
2. Plug the charger into a 110-240AC outlet.
3. Always charge the battery at room temperature. If the battery is used in a cold environment,
allow it to warm up for at least an hour before charging. Cold batteries will not be charged
completely and battery components may be damaged.
4. Only charge battery in well-ventilated area away from flammable materials such as cloth or
carpeting.
5. During the charging phase, the light on the charger is red. When the battery is completely
charged, the light will turn to green.
6. To disconnect charger, remove the three-pronged plug from outlet, then disconnect the
charger from the battery.


