background image


1

Corsair ARF 


WARNING!  THIS IS NOT A TOY! 


THIS IS NOT A BEGINNERS AIRPLANE 


This R/C kit and the model you will build from it is not a toy!  It is capable of 
serious bodily harm and property damage. It is your responsibility, and 
yours alone  - 

to build this kit correctly, properly install all R/C. components and 

flying gear (engine, tank, radio, pushrods, etc. and to test the model and fly it only 
with experienced, competent help, using common sense and in accordance with all 
safety standards as set forth in the Academy of Model Aeronautics Safety Code.  It 
is suggested that you join the AMA and become properly insured before attempting 
to fly this model.  If you are just starting R/C modeling, consult your local hobby 
dealer or write to the Academy of Model Aeronautics to find an experienced 
instructor in your area.                                                                                                                                       

Write to : Academy of Model Aeronautics, 5151 Memorial Dr, Muncie, IN 47302 


LIMITED WARRANTY 


Lanier R/C is proud of the care and attention that goes into the manufacture of parts for 
its model kits.  The company warrants that for a period of 30 days, it will replace, at the 
buyers request, any parts or material shown to the company's satisfaction to have been 
defective in workmanship or material at the time of purchase. 
 
No other warranty of any kind, expressed or implied, is made with respect to the 
merchandise sold by the company.  The buyer acknowledges and understands that he is 
purchasing only a component kit from which the buyer will himself construct a finished 
flying model airplane.  The company is neither the manufacturer of such a flying model 
airplane, nor a seller of it.  The buyer hereby assumes the risk and all liability for personal 
or property damage or injury arising out of the buyers use of the components or the 
finished flying model airplane, whenever any such damage or injury shall occur. 
 
Any action brought forth against the company, based on  the breach of the contract of 
sale to the buyer, or on any alleged warranty thereunder, must be brought within one year 
of the date of such sale, or there after be barred.  This one year limitation is imposed by 
agreement of the parties as permitted by the laws of the state of Georgia 


Summary of Contents for Corsair ARF

Page 1: ...of parts for its model kits The company warrants that for a period of 30 days it will replace at the buyers request any parts or material shown to the company s satisfaction to have been defective in workmanship or material at the time of purchase No other warranty of any kind expressed or implied is made with respect to the merchandise sold by the company The buyer acknowledges and understands th...

Page 2: ... TO ASSEMBLE THIS KIT The following items listed below are needed to complete the kit but are not included in the kit EPOXY GLUE 5 minute and 30 minute CYANOACRYLATE GLUE medium thickness MODELING KNIFE SCREW DRIVER HAND OR ELECTRIC DRILL STRAIGHT EDGE RULER SAND PAPER NEEDLE NOSE PLIERS WIRE CUTTERS SCISSORS Other items required not included A 4 CHANNEL RADIO W 5 SERVOS 12 AILERON EXTENSIONS ONE ...

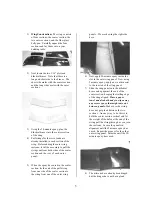
Page 3: ...the pull string from one side of the center section to the string from one of the outer wing panels We are showing the right side here 6 Next apply 30 minute epoxy inside the slot in the outer wing panel Now using 5 minute epoxy apply an even thin coat to the root rub of the wing panel 7 Slide the wing panel onto the dihedral brace and up against the end of the center section keeping the trailing ...

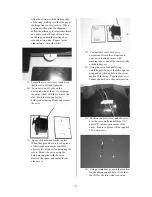
Page 4: ...cured cut a piece of shirt cardboard or other suitable object to use as spacer for mounting the servo Mount the servo using the hardware supplied with the servo Remove the spacer and repeat for the other cover 12 You will need two 8 inch servo extensions Attach the extensions to your servo lead and secure with masking tape or one of the commercially available keepers 13 Using the servo lead pull s...

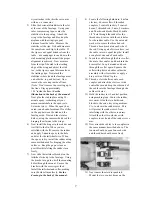
Page 5: ...the wheels using two of the supplied wheel collars on each axle 20 The final step of the wing assembly is mounting the belly pan You will need the fuselage for this step Begin by mounting the wing on the fuselage Now position the belly pan on the wing as shown and tape in place Note that the end with the flange goes toward the front of the aircraft Using a ballpoint pen mark the edges of the belly...

Page 6: ... distance from the back of the mount is not critical Mount the one mount 3ith the drilled holes to a scrap piece of plywood Now align the other mount to the motor and secure it to the plywood Now you can drill the holes in the mount for the other side of the motor Secure the motor to the mounts and remove them from the plywood Now you can check to see if the pattern is the same as the template If ...

Page 7: ...e rudder turn freely 7 Now slide the tailwheel bracket on the tailwheel wire up to the fuselage Using the bracket as a guide drill the mounting holes through the mount Secure the bracket with the screws provided Install the tailwheel and collar making sure the wheel turns freely See the drawing in the back of the manual 8 Locate the following hardware 4 nylon clevises 4 brass collets 4 threaded co...

Page 8: ...oducts 3170 switch for the prototype It has a built in charging jack and heavy duty wires It can be ordered with connectors for all popular radio brands 18 Now connect your servos to your receiver Don t forget the Y harness for the ailerons Wrap the receiver in foam then wrap it in plastic to protect it from any possible fuel leakage Install the receiver in the fuselage in front of the servo tray ...

Page 9: ... them slightly oversized to make it easier to mount the cowling Now mount the cowl to the fuselage 22 The final step is the canopy installation Apply a thin bead of canopy glue we used RC56 to the inside edge of the canopy Set the canopy in place and secure with several strips of masking tape When the glue is dry remove the masking tape The construction of your Corsair is now completed 23 Prefligh...

Page 10: ...10 ...

Page 11: ...LANIER R C 11 ...

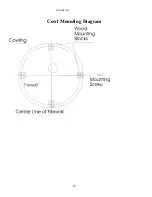
Page 12: ...LANIER R C 12 Cowl Mounting Diagram ...

Page 13: ...LANIER R C 13 F4U Corsair Parts Description ...

Page 14: ...LANIER R C 14 Tail Wheel Assembly ...

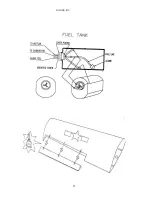
Page 15: ...PARTS Tail Wheel 1 Wheel Collars 3 5mm 1 Wood Screw 2 6x12mm 2 Tail Gear Mount FUEL TANK PARTS Fuel Tank 6oz 1 Fuel Tank Outer Plate 1 Fuel Tank Inner Plate 1 Fuel Tank Rubber Cap 1 Metal Tubing 3 Silicone Fuel Tubing 1 Fuel Pick up 1 Screw 3 x25mm CONTROL SYSTEM Pre made Split Elevator Pushrod 1 Tri Control Horn w mounting screws 4 Aileron Pushrod 2 Nylon Clevises 8 Nylon Brackets 6 Rudder Cable ...

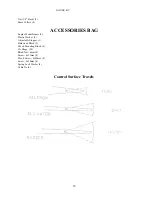
Page 16: ...ACCESSORIES BAG Engine Mount Beams 2 Plastic Washer 2 Adjustable Stopper 1 Hardwood Block 2 Wood Mounting Block 4 CA Hinge 20 Blind Nut 4mm 4 Screw 4x35mm 4 Wood Screw 4x20mm 8 Screw 4x20mm 4 Spring Lock Washer 4 Cable Tie 4 Control Surface Travels ...

Page 17: ...LANIER R C 17 Horizontal Stab Wing Alignment ...

Page 18: ...LANIER R C 18 ...

Page 19: ...LANIER R C 19 ...

Reviews: