LANIER
– 1.20 Edge 540T ARF -
INSTRUCTIONS
press a straight servo horn in each servo.
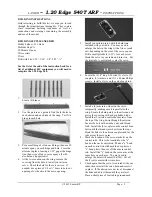
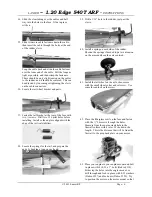
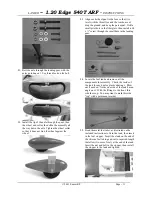
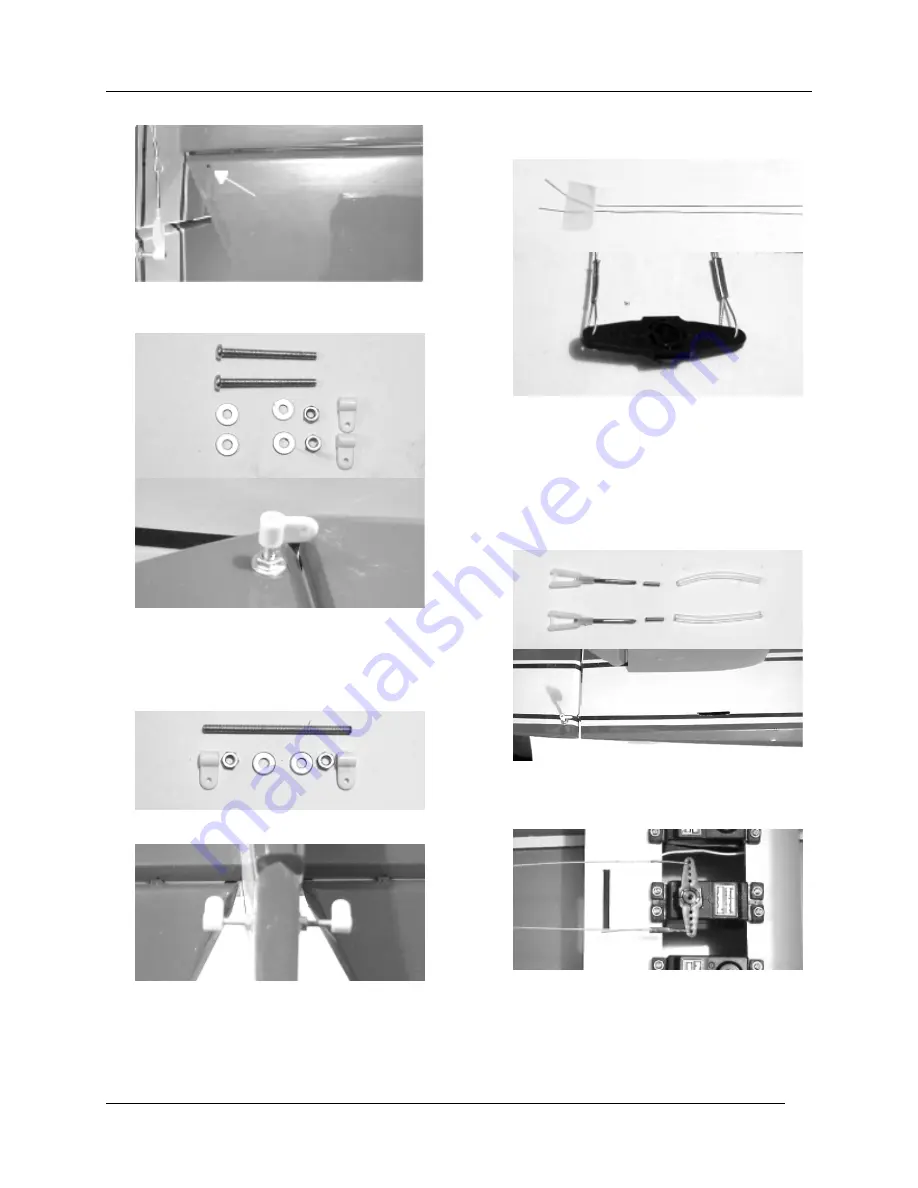
26. Locate the hard points for the control horn
screws in the elevator halves and pierce the
covering with a sharp hobby blade.
27. Install the (2) 3 x 35mm screw from the top of
the surface and fasten with a washer, nut, and
thread lock. Screw a coupler on the end of the
screws until the first thread is exposed. (the
elevator servo will be installed later after the
motor is mounted)
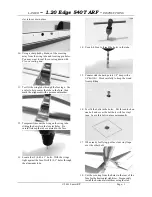
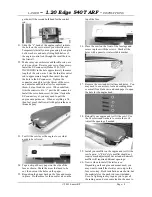
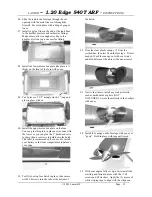
28. Locate the tail hardware, (1) threaded rod, (2)
couplers, (2) nuts, (2) washers.
29. Locate the rudder hard point and pierce the hole
on both sides with a sharp hobby blade. Put the
threaded rod through the hole and capture in
place with a washer, nut, and thread lock on each
side. Use your ruler to make sure the sides are of
equal length.
30. Install the rudder couplers on each side of the
threaded rod until the first thread is exposed and
the coupler points toward the front of the fuse.
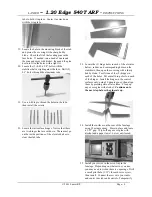
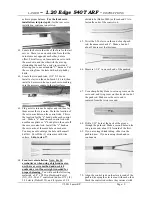
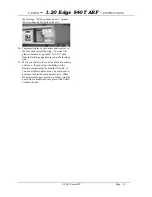
31. Locate a (4) arm servo horn and remove 2 arms
as shown above. Cut the cable for the rudder
control in two equal lengths, approximately 36”.
Slide a crimp fastener on each cable, then loop
the cable through the outside holes of the servo
horn. Slide the fastener back over the loose
cable end and pull up the slack as shown above.
Crimp the fastener several times using some
pliers. Pull the cable firmly to test.
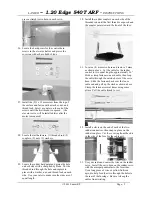
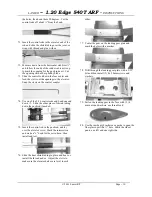
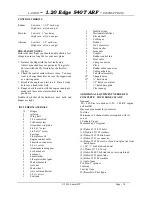
32. Install a clevis on the end of each of the two
rudder connectors, then snap in place on the
rudder couplers. Cut the covering from the slots
in the side of the fuse for the cable exit.
33. Use your radio and center the trim on the rudder
servo. Install the servo horn on the rudder servo
with the arms perpendicular to the fuse sides.
Use a long piece of wire or yellow Sullivan
nyrod to help feed the wire through the holes to
the rear of the fuselage. Be sure to keep the
cables from twisting.
© 2001 Lanier R/C
Page - 5


