background image

HTCA-E400 User Manual


33 


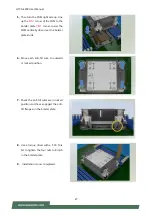
HMB-E200 supports optional slot for GPU graphic card expansion. The GPU graphic card requires a rather 
complex installation process; therefore, the assembly must be handled with care. Please read through the 
instructions in this section to make sure you have acquired the necessary knowledge and comply with the 
requirements. 
 

1.


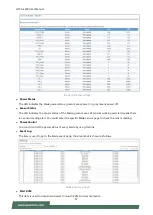
The GPU expansion kit will include: 


1x GPU module   


1x GPU power cable 


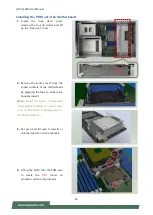
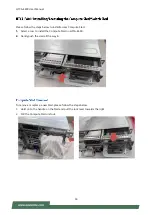
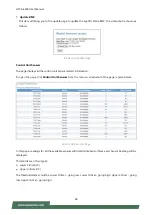
2. Power off the system. Locate the four (4) 

screws  securing  the  PCIe  bracket  to  the 
Compute Sled.   


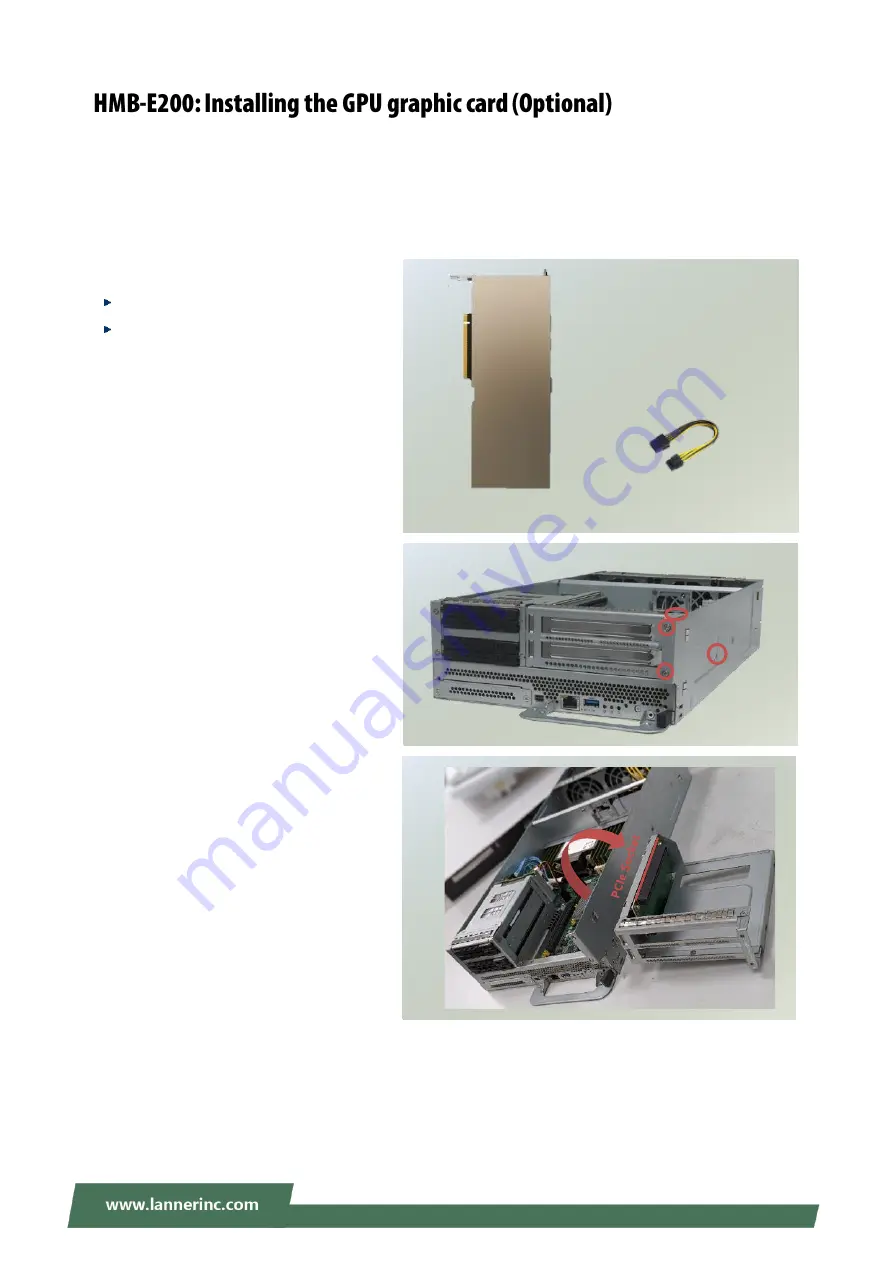
3.    Loosen the four (4) screws and take out 

the PCIe bracket. 


GPU Module 

GPU Module 
Power Cable


Summary of Contents for HTCA-E400

Page 1: ...HTCA E400 HMB E100 HMB E200 HLM E110 User Manual Version 1 1 Date of Release 2023 02 20 Telecom Datacenter Appliances...

Page 2: ...ndicates that there is something you should pay special attention to while using the product This mark indicates that there is a caution or warning and it is something that could damage your property...

Page 3: ...Town Changping District Beijing 102208 China T 86 010 82795600 F 86 010 62963250 E service ls china com cn USA Lanner Electronics Inc 47790 Westinghouse Drive Fremont CA 94539 T 1 855 852 6637 F 1 51...

Page 4: ...ESD Electrostatic Discharge and EMI leakage we strongly recommend the use of CE compliant industrial enclosure products This equipment has been tested and found to comply with the limits for a Class...

Page 5: ...es which can defeat a safety guard Disposal of a battery into fire or a hot oven or mechanically crushing or cutting of a battery which can result in an explosion Leaving a battery in an extremely hig...

Page 6: ...risk of the system s falling to the ground or other damages Lanner Electronics Inc shall not be held liable for any losses resulting from insufficient strength for supporting the system or use of inap...

Page 7: ...tez un bracelet anti ESD et veillez ce qu il soit bien au contact de la peau Si aucun bracelet n est disponible reliez votre corps la terre en touchant la partie m tallique du ch ssis V rifiez r guli...

Page 8: ...00 Front Panel 12 HTCA E400 Rear Panel 12 Package Content 13 Ordering Information 13 Optional Accessories 13 HMB E100 System Specifications 14 HMB E100 Front Panel 15 HMB E100 Block Diagram 15 Package...

Page 9: ...ing the System Memory 28 HMB E100 HMB E200 Installing the M 2 SSD Storage Module Optional 30 HMB E100 HMB E200 Installing the OCP NIC 3 0 Modules Optional 31 HMB E100 HMB E200 Installing Disk Drives O...

Page 10: ...U compute sleds Support 2x switch sleds 450mm Short Depth Chassis for Edge Deployment Distinguished Flexible and Front I O Access 1 1 Redundant Hot swappable PSU NEBS 3 Compliant for Harsh Conditions...

Page 11: ...Port 1x RJ45 LOM Port Expansion PCIe Depend on 1U Compute Sled or 2U Compute Sled Cooling Processor CPU Heatsinks with Fan Duct System Independent Smart fans on Compute Sled and Switch Sled Environme...

Page 12: ...te Sled 1x 2U Compute Sled F2 1U Compute Sled 1x 1U Compute Sled F3 1U Switch Sled 1x 1U Programmable Switch Sled F4 Power Supply 3000W 1 1 Redundant Hot swappable PSU F5 MGT Port 1x RJ45 Management P...

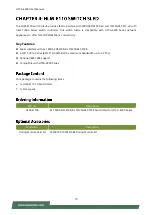
Page 13: ...0 Series network appliances Key Features Support 3rd Gen Intel Xeon Scalable Processor codenamed IceLake SP Front Access I O 2x Storage bays 1x PCIe 1x OCP NIC 3 0 slot 1x mini DP for VGA port 1x LOM...

Page 14: ...I O Reset Button Software Reset Control by GPIO LED Indicator Power Status Storage refer to Appendix A Power Button 1x ATX Power Switch USB Port 1x USB 3 0 Port Display Port 1x Mini DP Port VGA Signal...

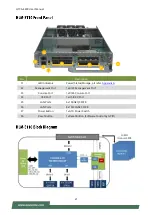
Page 15: ...gnal F5 LOM Port 1x RJ45 LOM Port F6 USB Port 1x USB 3 0 Port F7 LED Indicators Power Status Storage pls refer Appendix A F8 Power Button 1x ATX Power Switch F9 Reset Button 1x Reset Button Software C...

Page 16: ...CA E400 series network appliances Key Features Support 3rd Gen Intel Xeon Scalable Processor codenamed IceLake SP Front Access I O 4x Storage bays 1x PCIe 1x OCP NIC 3 0 slot 1x mini DP for VGA Port 1...

Page 17: ...D 7mm Trays Onboard Slots 1x M 2 2280 M Key I O Reset Button Software Reset Control by GPIO LED Indicator Power Status Storage refer to Appendix A Power Button 1x ATX Power Switch USB Port 1x USB 3 0...

Page 18: ...1x Mini DP Port VGA Signal F5 LOM Port 1x RJ45 LOM Port F6 USB Port 1x USB 3 0 Port F7 LED Indicators Power Status Storage pls refer Appendix A F8 Power Button 1x ATX Power Switch F9 Reset Button 1x...

Page 19: ...ivity Key Features Fabric interface with 6x 100GbE QSFP28 8x 10 25GbE SFP28 Intel Tofino Series BFN T10 032D B0 the maximum bandwidth up to 3 2 Tb s Optional IEEE 1588 support Compatible with HTCA E40...

Page 20: ...8 Console Port 1x Console Port Management Port 1x Management Port USB Port 1x USB 2 0 Port Power Button 1x Power Button Reset Button 1x Reset Button Software control by GPIO Memory Technology DDR4 320...

Page 21: ...endix A F2 Management Port 1x RJ45 Management Port F3 Console Port 1x RJ45 Console Port F4 USB Port 1x USB 2 0 Port F5 LAN Ports 6x 100GE QSFP28 F6 LAN Ports 8x 10 25GbE SFP28 F7 Power Button 1x ATX P...

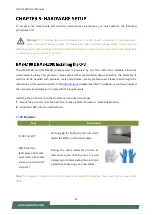
Page 22: ...e tools and extreme care by professionals Please read through the instructions in this section and refer to the official tutorial released by Intel to make sure you have acquired the necessary knowled...

Page 23: ...t please locate PIN1 on one of the corners an important indicator used to align this carrier with the processor and the bolster plate correctly Socket Cover This cover is used to protect the package l...

Page 24: ...And line up the two keying features on the processor carrier 3 Gently press on the each of the press tabs at the top and bottom of the carrier to engage the locking tabs Note During assembly it is ess...

Page 25: ...there are two corner cutouts on one heat sink either will do 6 Lower the PIN1 end of the heatsink over the processor carrier to engage the two locking tabs near the corners Then push the other end do...

Page 26: ...t contacts of the motherboard by grasping the tabs on either side Squeeze inward Note Inspect the surface of the socket under sufficient lighting to ensure there is no contamination or damage prior to...

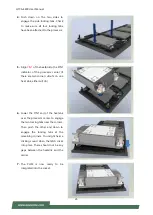
Page 27: ...rtically down over the bolster plate studs 6 Move each anti tilt wire to outward or locked position 7 Check the anti tilt wires are in locked position and have engaged the anti tilt flanges on the bol...

Page 28: ...l Slots 8 Number of Channels 8 1 DIMMs per channel Supported DIMM Capacity 4GB 8GB 16GB 32GB 64GB Memory Size Maximum 512GB 64GB 4 Memory Type DDR4 2133 2400 2666 2933 3200MHz RDIMM LRDIMM Minimum DIM...

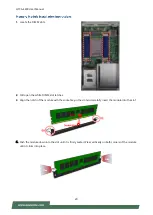
Page 29: ...M slot latches 3 Align the notch of the module with the socket key in the slot and carefully insert the module into the slot 4 Push the module down into the slot until it is firmly seated Press vertic...

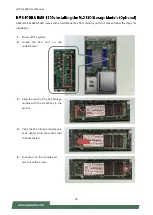
Page 30: ...ps for installation 1 Power off the system 2 Locate the M 2 slot on the motherboard 3 Align the notch of the M 2 Storage module with the socket key in the pin slot 4 Insert the M 2 Storage module pins...

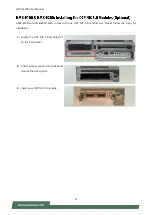
Page 31: ...B E200 each comes with one OCP NIC 3 0 module slot Please follow the steps for installation 1 Locate the OCP NIC 3 0 module slot on the front panel 2 Unscrew the screws on two sides and remove the doo...

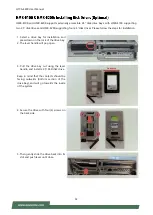
Page 32: ...for installation and press down on the lock of the drive bay 2 The lever handle will pop open 3 Pull the drive bay out using the lever handle and install a 2 5 SSD disk drive Keep in mind that the co...

Page 33: ...care Please read through the instructions in this section to make sure you have acquired the necessary knowledge and comply with the requirements 1 The GPU expansion kit will include 1x GPU module 1x...

Page 34: ...GPU module back in the Compute Sled Make sure to lock the trap door on the Compute Sled near the end side of the GPU 6 Secure the PCIe bracket to the system with four 4 screws 7 Insert the GPU power c...

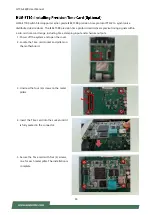
Page 35: ...ls within a sub micro second range including time stamping input and schedule outputs 1 Power off the system and open the cover 2 Locate the Time card socket and pillars on the motherboard 3 Unscrew t...

Page 36: ...pute Sled 1 Select a row to install the Compute Sled on HTCA E400 2 Gently push the sled all the way in To remove or replace a new Sled please follow the steps below 1 Hold on to the handle on the Sle...

Page 37: ...y units may wear out eventually and must be replaced Please follow the steps below to replace a power supply unit 1 Hold onto the handle of the power supply unit and pull the lock lever towards the ri...

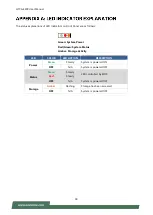
Page 38: ...ION DESCRIPTION Power Green Steady System is powered ON OFF N A System is powered OFF Status Green Steady LED controlled by BIOS Red Steady OFF N A System is powered OFF Storage Amber Flashing Storage...

Page 39: ...c com support download center drivers enter the product category and download the utility package For the latest driver update please visit Intel download center at https downloadcenter intel com use...

Page 40: ...atible chassis commands to the BMC over messaging interfaces The following list summaries the supported functions Chassis power on Feature Description IPMI 2 0 Standard Features System Interface suppo...

Page 41: ...ic over an IPMI session System administrators are able to establish a SOL connection with a standard IPMI client like IPMITOOL to remotely interact with serial text based interfaces such as OS command...

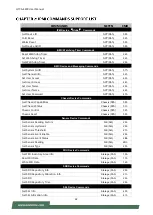
Page 42: ...ties Chassis 00h 00h Get Chassis Status Chassis 00h 01h Chassis Control Chassis 00h 02h Chassis Reset Chassis 00h 03h Sensor Device Commands Get Sensor Reading Factors S E 04h 23h Get Sensor Hysteresi...

Page 43: ...ation Parameters Transport 0Ch 02h Serial Modem Device Commands Set User Callback Options Transport 0Ch 1Ah Get User Callback Options Transport 0Ch 1Bh SOL Activating Transport 0Ch 20h Set SOL Configu...

Page 44: ...Password admin The default username and password are in lower case characters The BMC Web UI consists of various menu items Menu Bar The menu bar displays the following System Monitor System Monitor M...

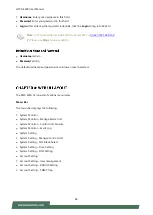
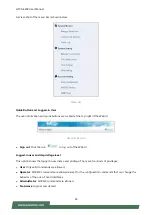
Page 45: ...t Click the icon to log out of the Web UI Logged in user and its privilege level This option shows the logged in username and privilege There are four kinds of privileges User Only valid commands are...

Page 46: ...the system schematic diagram of Compute Blades Switch Blades Control Unit and Powers Chassis Status The LEDs indicates the power status of the control unit and also the sensor status of the control un...

Page 47: ...s all sensors working well red means there is a sensor reading alert You could enter the specific Blade Sensor page to check the sensor reading Power Control You could control the power status of ever...

Page 48: ...formation To open the page click Control Unit Sensors from the menu A screenshot of the page is given below Control Unit Sensors Page In this page readings for all the available sensors with details l...

Page 49: ...nts or you can also sort the list of entries by clicking on any of the column headers To open the Event Log page click Event Log from the menu bar A sample screenshot of Event Log page is shown below...

Page 50: ...ll not work All open widgets will be closed automatically If upgrade process is canceled in the middle of the wizard the device will be reset Note The firmware upgrade process is a crucial operation M...

Page 51: ...ot of Network IP Settings is shown below Network IP Settings Modify LAN Setting To enable or disable the LAN Settings LAN Type Indicate the LAN connection type IP Address Subnet Gateway These fields a...

Page 52: ...to specify the internal IP domain configured for all devices SOL Blade Select This field is used to set the blade host system console for output via SOL A Sample screenshot of the page is as shown bel...

Page 53: ...ynchronize Date and Time with the NTP Server Primary NTP Server Configure primary NTP server to use when automatically setting the date and time Secondary NTP Server Configure secondary NTP server to...

Page 54: ...creenshot of the page is shown below DNS Setting Page DNS Service To enable disable all the DNS Service Configurations Host Configuration Choose either Automatic or Manual settings It displays hostnam...

Page 55: ...oose Manual you need to enter the Host Name 3 Enter the Host Name in the given field if you have chosen Manual Configuration 4 In DNS Server 1 DNS Server 2 and DNS Server 3 enter the server addresses...

Page 56: ...ive 3 Select Password Size 4 In the Password and Confirm Password fields enter and confirm your new password Note 1 Password should be the combination of alphabets numbers symbol and upper case charac...

Page 57: ...ore than 31 characters 2 Secret must be at least 4 characters long 3 Space is not allowed Save To save the settings Note Please use the following Reply Message to specify user privilege 1 Reply Messag...

Page 58: ...Mouse Options Media Keyboard Layout Video Record Power Active Users A detailed explanation of these menu items are given below This menu contains the following sub menu items Pause redirection This o...

Page 59: ...Alt Key This menu item can be used to act as the left side ALT key when in Console Redirection Left Windows Key This menu item can be used to act as the left side WIN key when in Console Redirection Y...

Page 60: ...use is moved faster in circle Mouse sync will depend on so many factors like network client machine video packet receive and rendering BMC CPU utilization etc In Normal use case scenario you will have...

Page 61: ...t mouse cursors might not be in perfect sync Fit to Host Resolution If the host screen resolution is lesser than the client screen resolution choose this option to resize the JViewer frame to the host...

Page 62: ...This option is used to detect keyboard layout automatically The languages supported are English US French France Spanish Spain German Germany and Japanese Japan If both the client and host languages a...

Page 63: ...Cancel if you don t want to save the changes In the Console Redirection window click Video Record Start Record Record the process To stop recording click Video Record Stop Record The power option is...

Page 64: ...xpense 5 The following conditions are excluded from this warranty Improper or inadequate maintenance by the customer Unauthorized modification misuse or reversed engineering of the product Operation o...

Page 65: ...HTCA E400 User Manual 65 When requesting RMA service please fill out the following form Without this form enclosed your RMA cannot be processed...

Reviews: