background image

16

17

5.2 Getting Started

1. 

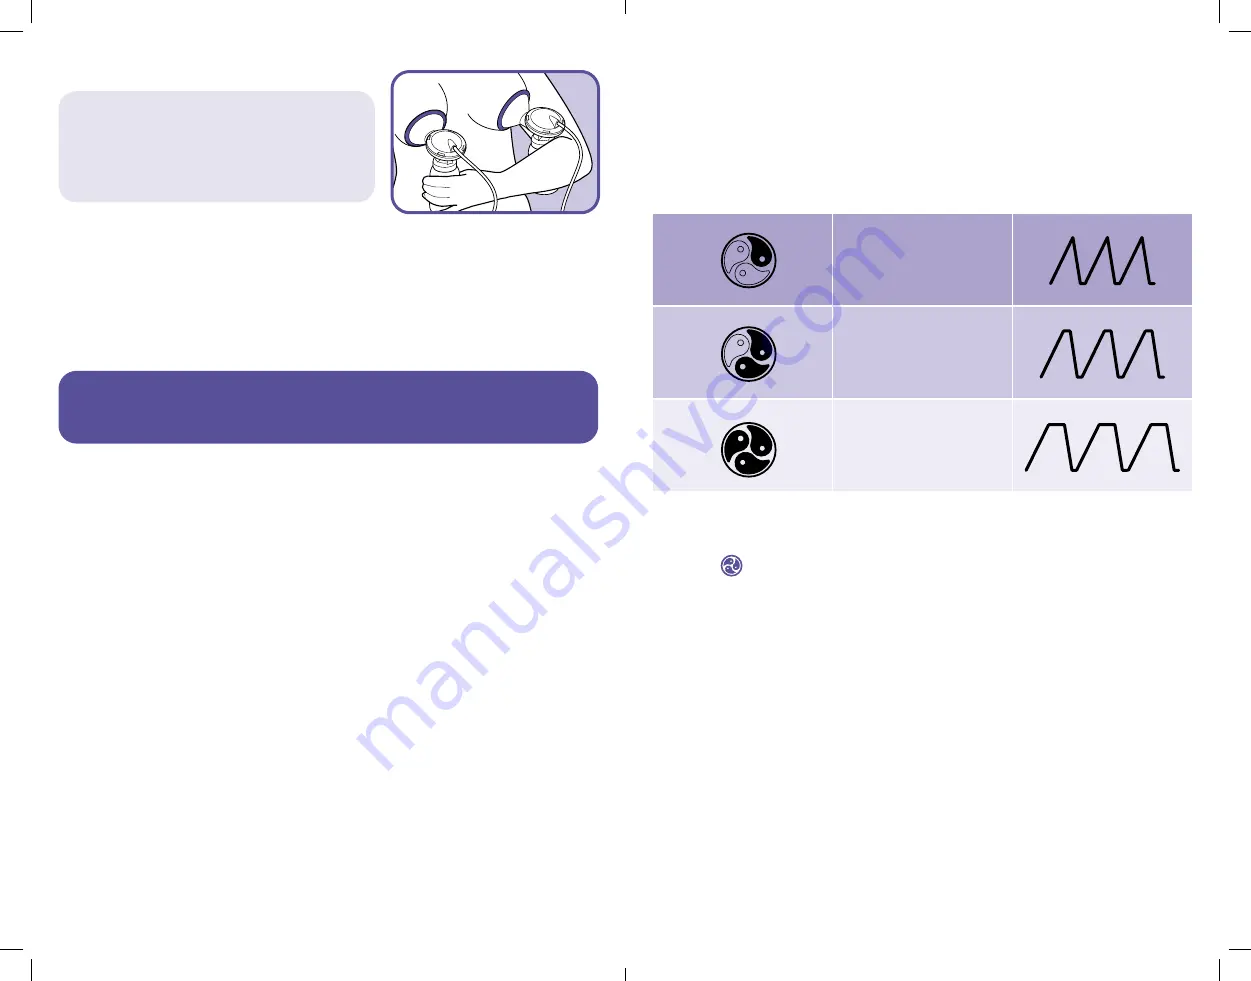
Hold the breastmilk expression set to your breasts so that the nipple is aligned 

to extend straight toward the nipple tunnel of the breast cushion.

2. 

Make sure the breast completely fills the breast cushion so that a vacuum is 

formed and no air escapes.

3. 

The breastmilk expression set and nipple tunnel should tilt slightly downward 

to allow milk to flow naturally toward the bottle.

5.4 Customisation for Comfort and Efficiency

Using Customisable Pumping Styles

Choose Your Pumping Style

Each baby is unique – right down to the way he or she feeds. The Lansinoh® 
Smartpump 2.0 offers three different pumping styles to choose from – so you 
can select the one that most closely matches your baby’s feeding pattern.

5.3 2-Phase Technology with Automatic Memory Function

Using Let-Down and Expression Phases

1. 

Press and hold the on/off button to turn the pump on. The Lansinoh® Smartpump 

2.0 will always start in the let-down phase. 

NOTE: When you turn the pump on for the very first time it starts in let-down phase, suction level 5. 

2. 

After two minutes, the let-down phase will automatically change to the 

expression phase.

NOTE: When you switch to the expression mode for the very first time the pump will start in 

pumping style 2, suction level 3. 

3. 

If you prefer to bypass the pre-set two minute let-down phase or your milk 

lets down sooner than two minutes, press the let-down/expression toggle 
button to move to the expression phase.

4. 

Automatic memory function will save the last pumping style and suction level 

for each phase. However, the suction level will gradually build to the last used 
setting for a more comfortable pumping experience. 

The style mode indicator will appear in the display to signify that you are in the 
expression phase.

1. 

With the pump in expression mode, select the pumping style that is most 

comfortable and efficient for you by pressing the pumping style toggle 
button 

.

2. 

Pressing the button again will select the next pumping style.

NOTE: The pumping style toggle button only functions when the pump is in expression mode.

3. 

The mode will be indicated on the LCD display by the pumping style mode 

indicator.

As your baby grows, you may find that their feeding pattern changes. The 
customisation features of the Smartpump 2.0 allow you to make adjustments 
so you’re always getting the best results.

If you experience friction or discomfort on your nipples, you may need a 

different size cushion. Larger size cushions are available. For more details,


please call 

0113 259 1425


or visit


lansinoh.co.uk

Pumping Style 1

Pumping Style 2

Pumping Style 3

If possible, wait until your breastmilk 
supply and breastfeeding are well 
established. This is normally at least 4-6 
weeks after birth, unless otherwise advised 
by your healthcare provider.

Summary of Contents for SM ARTPUMP 2.0

Page 1: ...1 INSTRUCTIONS FOR USE S M A R T P U M P 2 0 D o u b l e El ectr i c Breast P ump...

Page 2: ...ions should always be maintained To reduce the risk of burns electrocution fire or injury to persons This product should never be left unattended when plugged in Close supervision is necessary when th...

Page 3: ...24 27 PLEASE DO NOT RETURN THIS PUMP TO THE RETAILER Lansinoh s dedicated Customer Service team is here to help If you experience any issues with your Lansinoh Smartpump 2 0 breast pump please call 01...

Page 4: ...ery first time it starts in let down mode suction level 5 When you switch to the expression mode the pump will start in style 2 suction level 3 Adjusting Suction Levels Increase or decrease the suctio...

Page 5: ...eastmilk Expression Set Includes B1 ComfortFit Breast Cushion 25mm 2 53408 B2 ComfortFit Breast Cushion 30 5mm 2 50419 B3 Smartpump 2 0 Breast Cushion Body 2 53454 B4 Smartpump 2 0 Diaphragm 2 53402 B...

Page 6: ...te basin that is used only for cleaning infant feeding items 5 Place pump parts on a clean unused tea towel or paper towel in an area protected from dirt and dust Do not use a tea towel to rub or pat...

Page 7: ...4 Holding the base of the white valve gently secure the valve into the bottom of the breast cushion body 6 Attach end of 300mm tubing to back of diaphragm cap Ensure that tubing is pushed all the way...

Page 8: ...ng Replace batteries as a simultaneous set Do not mix old and new batteries Do not mix alkaline and standard carbon zinc batteries If batteries are in the pump but AC adapter is in use the pump will u...

Page 9: ...pass the pre set two minute let down phase or your milk lets down sooner than two minutes press the let down expression toggle button to move to the expression phase 4 Automatic memory function will s...

Page 10: ...it is not necessary to time your pumping sessions As you get more experienced with pumping you will get a better sense of the time it takes for your body to express your milk using a breast pump If yo...

Page 11: ...alve with one of the spare valves provided with the product 8 BREASTMILK STORAGE GUIDELINES Breastmilk Storage and Thawing Guidelines for Healthy Term Babies Check with your healthcare professional or...

Page 12: ...ble and controlled from keypad Suction vacuum level Minimum 80 mmHg maximum 250 mmHg Cap Teat Collar Bottle Insert the teat into top of the collar NOTE DO NOT MICROWAVE BREASTMILK Microwaving alters t...

Page 13: ...is encouraged to try to correct the interference by one or more of the following measures Reorient or relocate the receiving antenna Increase the separation between the equipment and receiver Connect...

Page 14: ...urbances induced by RF fields c d o IEC 61000 4 6 3 V m 0 15 MHz 80 MHz 6 V m in ISM bands between 0 15 MHz and 80 MHz n 80 AM at 1 kHz e 3 V m 0 15 MHz 80 MHz 6 V m in ISM and amatuer radio bands bet...

Page 15: ...DE53260IF0820 2020 Lansinoh Laboratories Inc Alexandria VA USA...

Reviews:

Related manuals for SM ARTPUMP 2.0