2
Cleaning and Disinfecting
1. Always wash and dry hands thoroughly with soap and water before handling the Wearable
Pump.
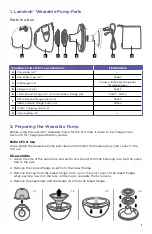
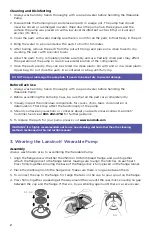
2. Disassemble the Pumping Cups and place all parts in a large pot. The pump hub should
never be rinsed or submerged in water. Wipe down the pump hub, the keypad, and the
surface the pump was placed on with a low-level disinfectant such as Ethyl or Isopropyl
alcohol (70-90%).
3. Cover the parts with water, making sure there is room for all the parts to float freely in the pot.
4. Bring the water to a boil and allow the parts to boil for 5 minutes.
5. After boiling, remove the parts from the pot with tongs and place on a clean towel to dry,
covering the parts with a second towel.
6. Allow the parts to dry completely before assembly and use. Partially dried parts may affect
the operation of the pump or could cause deterioration of the components.
7. Once the parts are dry, they can be stored in a clean plastic bin with a lid or in a clean plastic
zipper bag. Do not store the parts in a container or a bag until fully dry.
DO NOT rinse or submerge the pump hub. It needs to be kept dry to prevent damage.
Before Each Use
1. Always wash and dry hands thoroughly with soap and water before handling the
Wearable Pump.
2. Before assembling the Pumping Cups, be sure that all the parts are completely dry.
3. Visually inspect the individual components for cracks, chips, tears, discoloration or
deterioration. These may affect the functionality of the pump.
4. Should you have any questions or concerns about your parts please contact Lansinoh®
Customer Service at
800-292-4794
for further guidance.
5. To replace the parts for your pump, please visit
www.lansinoh.com
WARNING: It is highly recommended not to use any cleaning method other than the cleaning
methods mentioned in this instruction manual.
3. Wearing the Lansinoh® Wearable Pump
Assembly
Always wash hands prior to assembling the Wearable Pump.
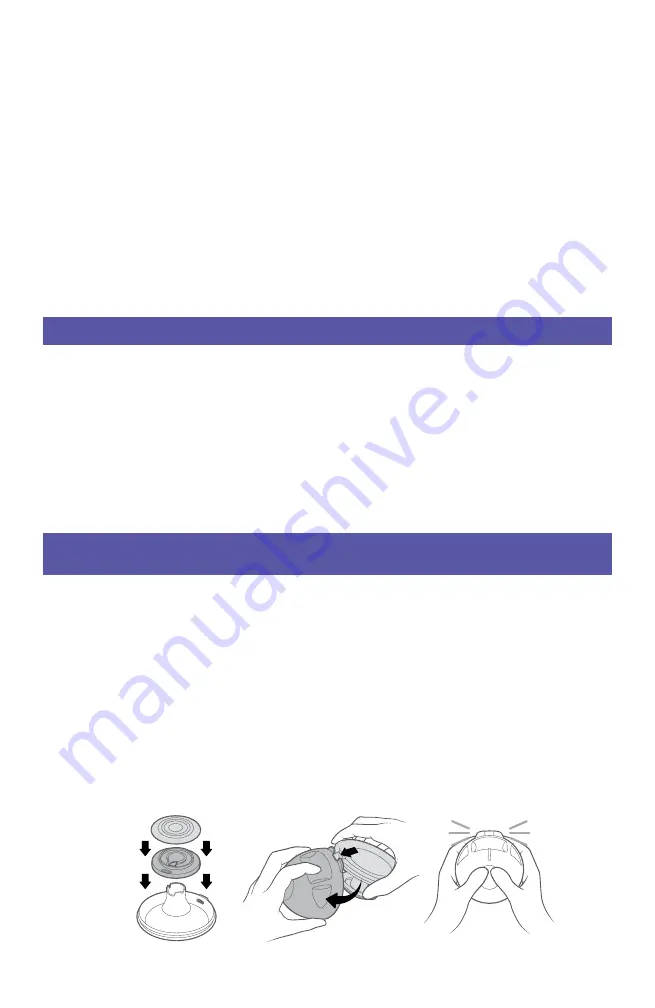
1. Align the flange disk with either the 25mm or 30.5mm breast flange, and push together.
Attach the flange disk to the flange tunnel, making sure to align the notches on each part.
Press firmly together, ensuring the base of the flange disk is fully placed on the flange tunnel.
2. Place the diaphragm onto the flange disk. Make sure there is no gap between them.
3. To connect the cup to the flange, first align the tabs on the cup to pour spout on the flange.
4. Press firmly together, squeezing all the way around the cup until the seal clicks, ensuring no gap
between the cup and the flange. If there is, try assembling again until there is a secure seal.
3.3
3.1, 3.2
3.4
Summary of Contents for Wearable
Page 17: ...13...
Page 18: ...14...
Page 19: ...15 Instrucciones de uso Extractor para llevar puesto...


