5: Network Settings
PremierWave® 2050 802.11ac Embedded Wi-Fi® User Guide
38
Using the CLI
To enter the command level:
enable > config > arp
Using XML
Include in your file:
<configgroup name=”arp”>
Configuring VPN Settings
You may edit or view VPN settings.
Using Web Manager
To view or configure VPN settings on the
Network
page, click
VPN
.
Using the CLI
To enter the VPN level:
enable > configure > vpn1
Using XML
Include in your file:
<configgroup name="vpn" instance="1">
Wi-Fi Protected Setup
Using Wi-Fi® protected setup (WPS), you have the option of connecting the PremierWave 2050
gateway to a router or access point in a single operation instead of manually creating a profile with
a network name (SSID), setting up wireless security parameters and updating the choice list. You
may setup WPS through pin or push button functionality through Web Manager or through CLI.
Note:
Not all access points support Wi-Fi protected setup pin or Wi-Fi protected setup
push button.
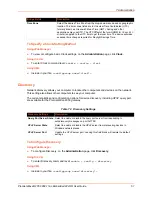
Table 5-10 Wi-Fi Protected Setup
To Initiate WPS
Using Web Manager
To initiate WPS, on the
Network
page, click
Wi-Fi Protected Setup
.
WPS buttons
Description
WPS (PIN)
Click the
WPS (PIN)
button in Web Manager to setup WPS by pin and click
OK
in the confirmation popup which appears. A randomly generated pin will
appear on the screen. Enter this pin at the access point and point your
browser to the correct IP address.
WPS (PBC)
Click the
WPS (PBC)
button in Web Manager to setup WPS by push button,
click
OK
in the confirmation popup which appears, and the credentials are
passed to the PremierWave 2050 gateway automatically. Then point your
browser to the correct IP address.
Note:
Make sure the WPS PBC is triggered on the
to utilize
this option.


