Lantronix
SM12XPA Web User Guide
33848 Rev. A
Page
93
of
473
IP Subnet-based VLAN
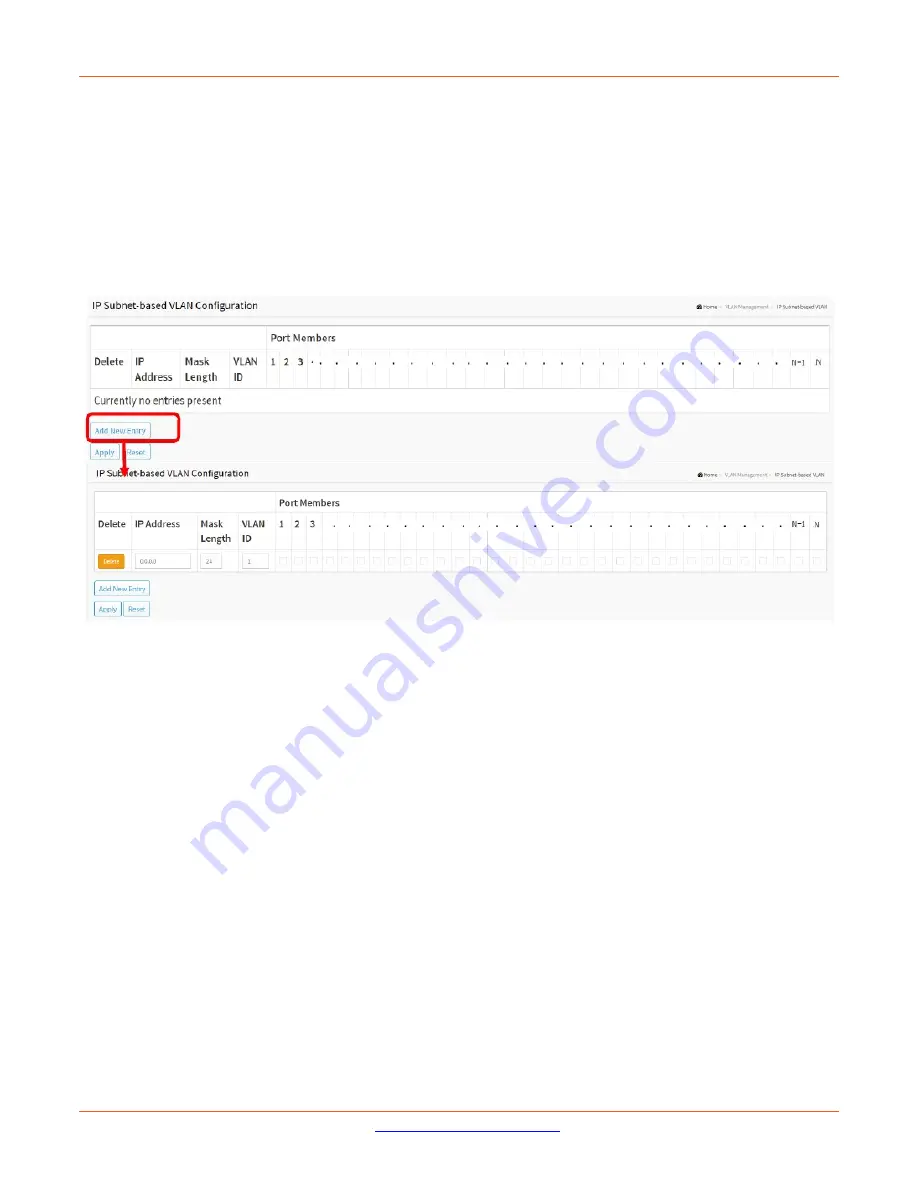
This page lets you add, update and delete IP subnet-based VLAN entries. To configure IP subnet-based VLAN
Membership in the web UI:
1.
Click VLAN Management and IP Subnet-based VLAN.
2.
Click “Add New Entry”.
3.
Specify IP Address, Mask Length, and VLAN ID.
4.
Check the desired Port Members checkboxes.
5.
Click Apply.
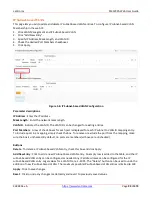
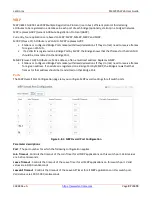
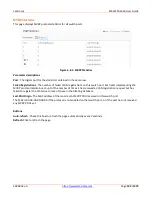
Figure 5-6: IP Subnet-based VLAN Configuration
Parameter descriptions
:
IP Address
: Enter the IP address.
Mask Length
: Enter the network mask length.
VLAN ID
: Indicates the VLAN ID. The VLAN ID can be changed for existing entries.
Port Members
: A row of check boxes for each port is displayed for each IP subnet to VLAN ID mapping entry.
To include a port in a mapping, simply check the box. To remove or exclude the port from the mapping, make
sure the box is unchecked. By default, no ports are members (all boxes are unchecked).
Buttons
Delete
: To delete a IP subnet-based VLAN entry, check this box and click Apply.
Add New Entry
: Click to add a new IP subnet-based VLAN entry. An empty row is added to the table, and the IP
subnet-based VLAN entry can be configured as needed. Any IP address/mask can be configured for the IP
subnet-based VLAN entry. Legal values for a VLAN ID are 1 - 4095. The “Delete” button can be used to undo the
addition of new IP subnet-based VLANs. The maximum possible IP subnet-based VLAN entries is limited to 128.
Apply
: Click to save changes.
Reset
: Click to undo any changes made locally and revert to previously saved values.


