Cloud Print Edition Quick Start Guide
4 SETTING UP GOOGLE CLOUD PRINT™ WITH YOUR XPRINTSERVER
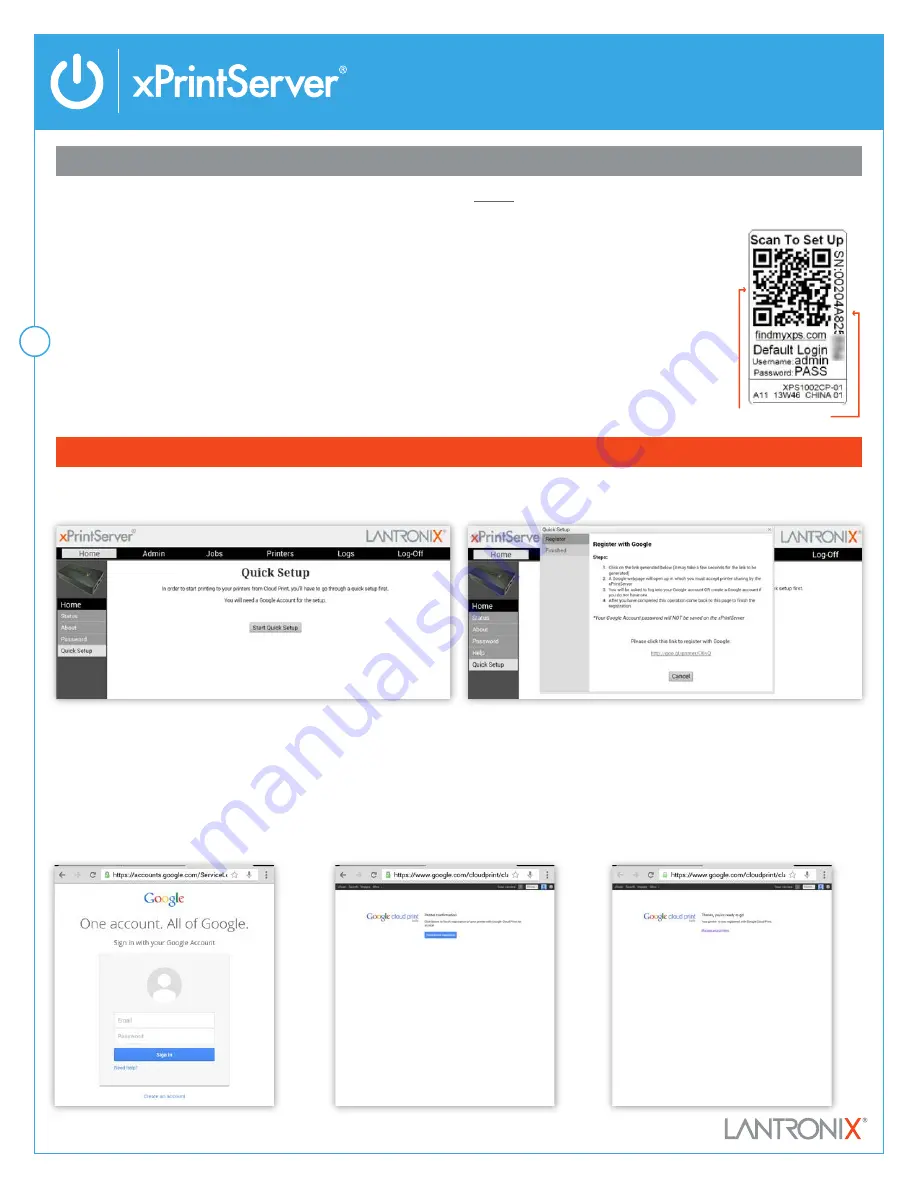
xPrintServer default USER NAME= admin, PASSWORD= PASS (case sensitive). You can change these once logged in to the xPrintServer.
1–
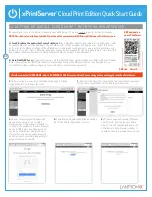
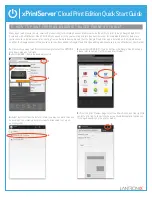
Launch and log in to the Admin interface in your xPrintServer—There are 2 ways to get to the Admin interface:
a) Scan QR code on the underside of your xPrintServer
-Use a QR code reader on your Android™ smartphone or tablet
to read the QR code on the underside of the xPrintServer. The QR code reader will display a link. Select this link to
go directly to the Admin interface of the xPrintServer. A login window will pop-up for you to enter a username and
password. If you don’t have a QR code reader app, one can be downloaded for free from Google Play™ store (most QR
code readers will work, however the ZXing Team based QR code reader is recommended).
b) Go to FindMyXPS.com
using a web browser - Go to FindMyXPS.com with a smartphone, tablet or PC web browser.
Enter the serial number (SN 12 alphanumeric characters) printed on the QR code label on the underside of your
xPrintServer. A login window will pop-up for you to enter a username and password.
NOTE: Your device (smartphone/tablet/PC) must be on the same network (WiFi/wired) that your xPrintServer is on.
QR Code label on
your xPrintServer
or
Serial #
QR Code
2–
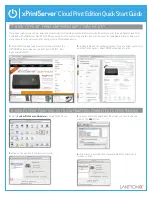
After you log in, you will see the Quick Setup page. Click the
Quick Setup button to begin the setup.
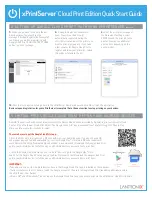
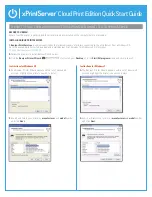
4–
A new, secure Google® webpage will
open up for you log in to or create a
Google account. If you recently logged in
to Google, the window in the next step will
open up. NOTE: Only one Google account
can be an xPrintServer admin at a time.
If more than one person needs access to
admin functions, consider using a Google
account that can be shared.
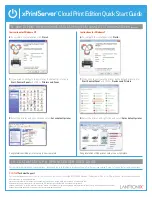
5–
Complete the Google registration by clicking
the “Finish Printer Registration” button.
6–
The next page will contain a “Manage
Your Printers” link. You do not need to
click on this link. Instead go back to the
xPrintServer Admin browser window. It
should be open in a previous browser tab.
3-
Register with Google® by clicking the link that will auto-generate.
It may take a few seconds for the link to auto-generate.