background image

5

Copyright LapSafe® Products

The Traveller™ Charge & Sync Range - User Manual

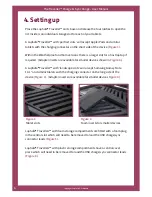
3. Moving your Traveller™

Do not attempt to move the LapSafe® Traveller™ while it is connected to a mains 
supply or a host laptop or pc.

Switch off the power to the Traveller™ at the wall, unplug and stow the mains 
lead and the PC to USB link lead. Close the lid and make sure that the latches are 
firmly snapped shut before moving the case.

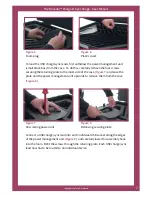
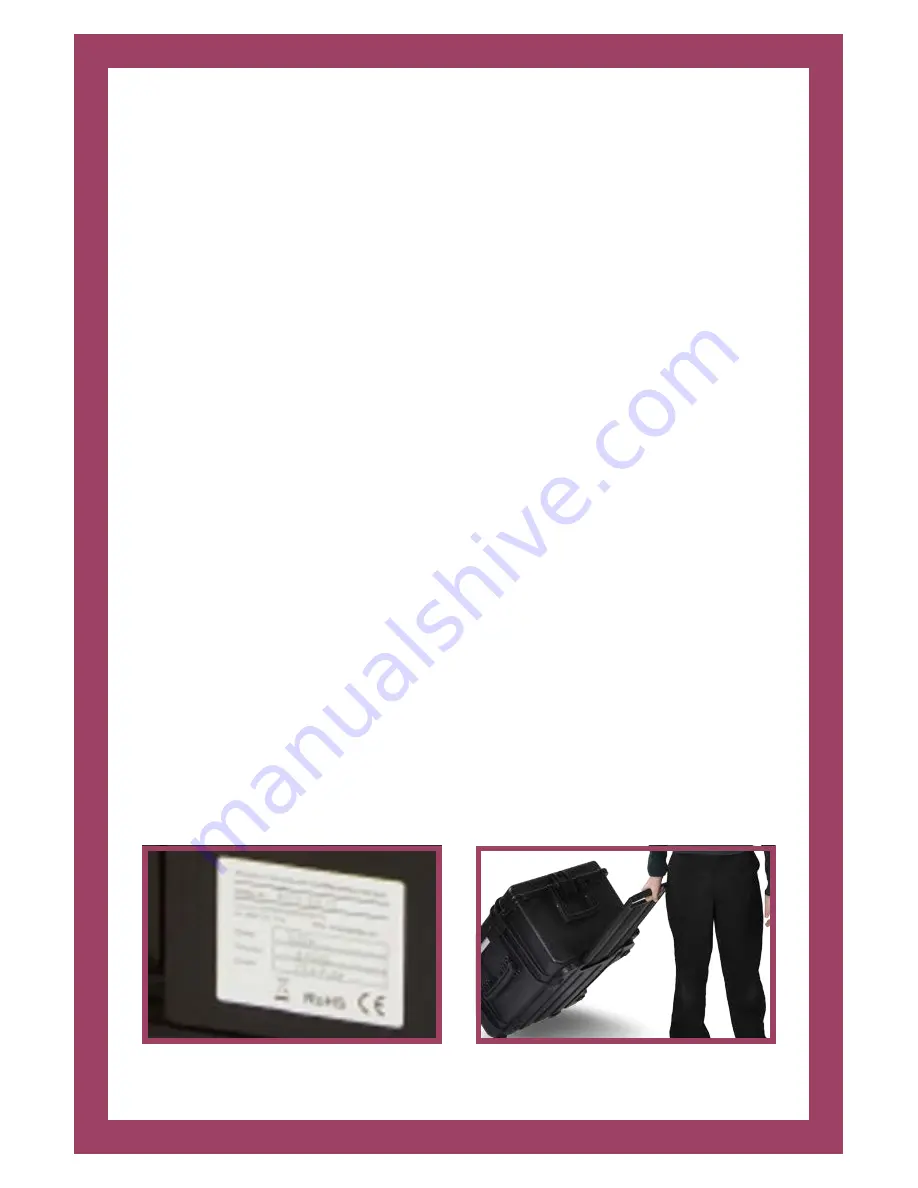
Stand the Traveller™ upright onto the ‘wheel end’, release the catch to deploy the 
pull-up handle and gently tip the case onto its wheels.  The LapSafe® Traveller™ 
can now be moved to a new location 

(Figure 2)

.

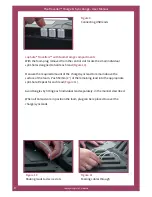
Take care not to bump your LapSafe® Traveller™ into furniture,  doorframes or 
other obstacles when moving it between locations.  Should any part of the 
LapSafe® Traveller™ become severely  damaged it should be taken out of use for 
repair / replacement.  Please contact us if your LapSafe® Traveller™ gets badly 
damaged and we will advise on the best method of repair.

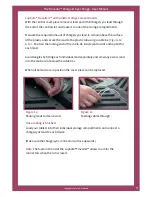
To protect the content of you LapSafe® Traveller™ when it is  necessary to move it 
up or down stairs we recommend that it is carried between two people using the 
handles on each end.
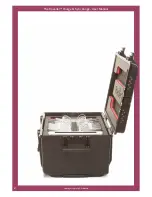
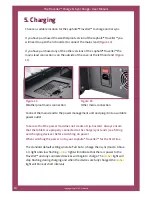
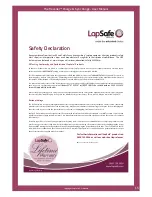
Figure 1

Serial plate

Figure 2

Pull-up handle

Summary of Contents for Traveller series

Page 1: ...The Traveller Range User Manual Date September 2015 Version 2 LAPSF215_22032013V2 Charge Sync Models ...

Page 2: ...2 The Traveller Charge Sync Range User Manual Copyright LapSafe Products ...

Page 3: ... Range User Manual Contents Page No Section Title Section No 4 Introduction 1 4 Important actions 2 5 Moving your Traveller 3 6 9 Setting up 4 10 11 Charging 5 11 13 Syncing 6 13 Warranty 7 14 Care maintainance 8 14 Health Safety 9 15 Safety declaration 10 ...

Page 4: ...ready to receive your devices All our products are manufactured to a high standard and we constantly monitor for any issues Should you encounter any difficulties with any element of using your LapSafe Traveller we would like to know about it so please call us on 0800 130 3456 or visit lapsafe com 2 Important actions Upon delivery of your new Traveller you must Take a note and store in a safe place...

Page 5: ...up handle and gently tip the case onto its wheels The LapSafe Traveller can now be moved to a new location Figure 2 Take care not to bump your LapSafe Traveller into furniture doorframes or other obstacles when moving it between locations Should any part of the LapSafe Traveller become severely damaged it should be taken out of use for repair replacement Please contact us if your LapSafe Traveller...

Page 6: ...nserts are available for smaller devices shown in Figure 4 A LapSafe Traveller with landscape slots will accept Samsung Galaxy Note 10 1 and similar tablets with the charging connector on the long side of the device Figure 3 Adapter inserts are available for smaller devices Figure 4 Figure 3 Tablet slots Figure 4 Foam inserts for smaller devices LapSafe Travellers with foam storage compartments ar...

Page 7: ...do this carefully remove the four screws securing the retaining plate to the inner side of the case Figure 7 and ease the plate and the power management unit upwards to remove them from the case Figure 8 Connect a USB charge sync lead into each individual USB socket along the edges of the power management unit Figure 9 and carefully lower this assembly back into the foam Refit the screws through t...

Page 8: ...d each lead Figure 10 Measure the required amount of the charge sync lead to remain above the surface of the foam Push 50mm 2 of the remaining lead into the appropriate split hole Repeat for each lead Figure 11 Avoid tangles by fitting each individual lead separately in the manner described When all 16 leads are in position the foam plug can be replaced to cover the charge sync leads Figure 10 Rou...

Page 9: ...ic and secure the lead to the plastic tab using a cable tie Figure 12 13 Position the locking end of the cable tie inside central slot and repeat for each lead Avoid tangles by fitting each individual lead separately and stow any excess lead into the central slot below the cable ties When all 16 leads are in position the cover piece can be replaced Once cabling is finished Load your tablets into t...

Page 10: ...ns connection Connect the mains lead to the power management unit and plug it into a suitable power outlet Take care that the power lead does not create a trip hazzard Always ensure that the tablets are properly connected to the charge sync leads see fitting and charging devices before switching on power When switching the power on to your LapSafe Traveller for the first time The standard default ...

Page 11: ...Sync synchronising describes an automatic process that is performed by the software on a computer when it is connected to another computer This is usually between a Host computer and a Slave computer or a number of Slave computers for the purpose of having the data on all devices the same or synchronised Apple iTunes is the syncing software that facilitates all communications between the host PC o...

Page 12: ...host device is connected when the unit is switched on charging will commence GREEN light off AMBER light comes on to indicate charge and will blink to confirm full charge All Off mode Pressing once after power up will select All Off mode AMBER and GREEN lights off BLUE light blinking briefly Power on with no activity From the All Off mode pressing the black button again will select All Charge mode...

Page 13: ...r laptop to be connected BLUE and AMBER lights off GREEN light solid syncing one or more devices BLUE and AMBER lights off GREEN light blinking briefly All connected devices have synchronised for the preset period Default is set to one hour after which the Traveller will return each device to charge status to maintain optimum readiness From the All Sync mode pressing the black button again returns...

Page 14: ...unt importance to LapSafe Products and as such this section should be read carefully Under no circumstances should the power management unit within the LapSafe Traveller be removed from the case opened or modified in any way The condition of the mains lead and the 3 pin power plug plugs may differ in other countries should be checked on a regular basis by a qualified person Should the mains lead b...

Page 15: ...st priority since we first introduced the concept of the mobile laptop trolley into the UK market in the last century This is indeed why we are called Lap SAFE Residual Voltage The HSE has raised a concern having identified at least one particular manufacturer s trolleys with this characteristic that many manufacturers trolleys if indeed not the vast majority may have a momentary residual voltage ...

Page 16: ...16 The Traveller Charge Sync Range User Manual Copyright LapSafe Products Powering Smart Technologies ...

Reviews: