background image

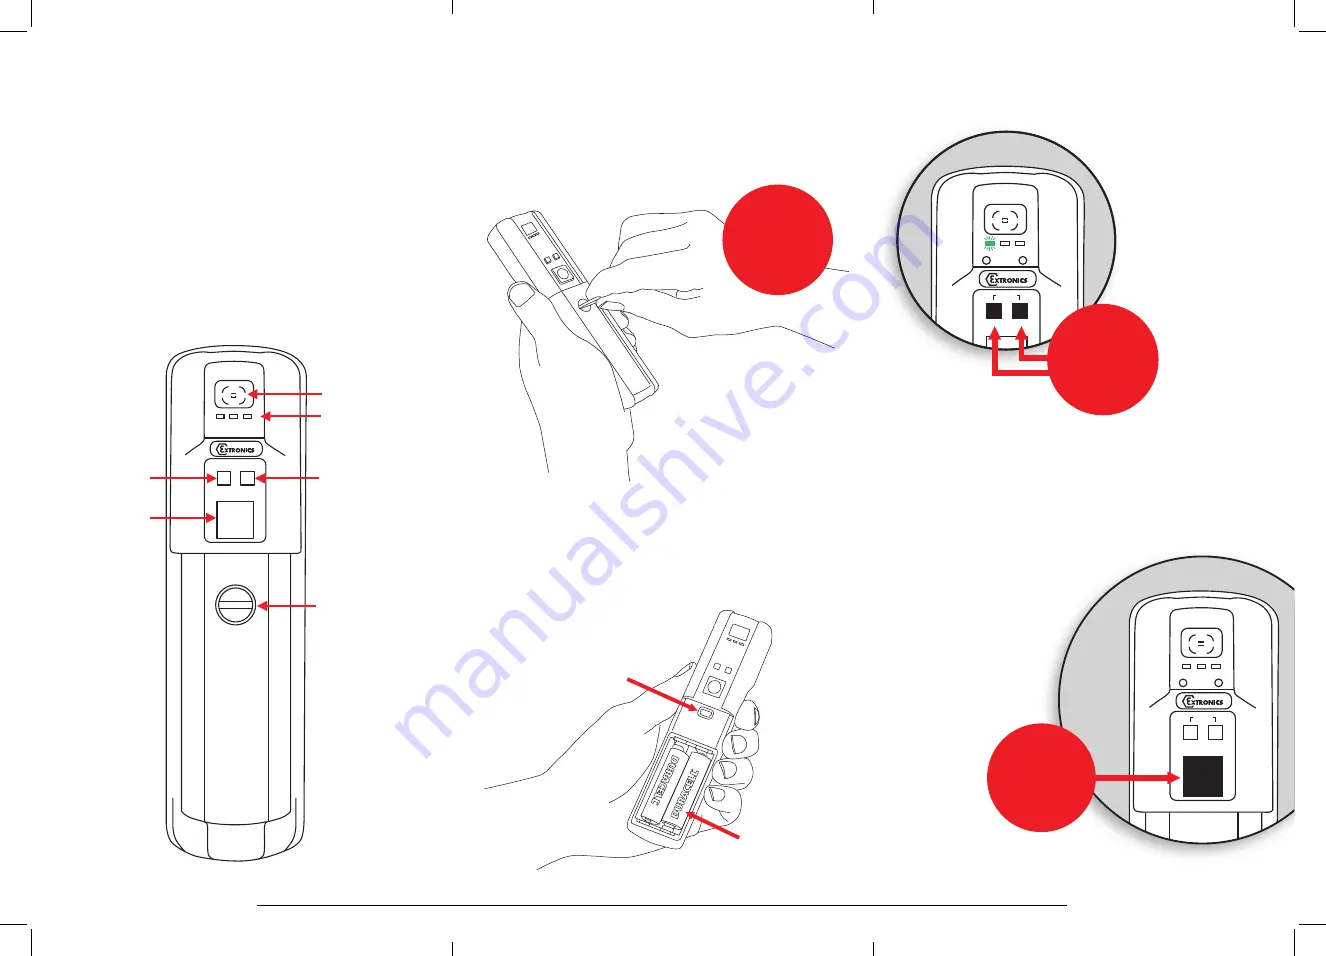
ON OFF

FLASH

RECORD

Hold the 

FLASH & 

RECORD 

buttons 

together

FLASH

RECORD

ON OFF

Press and 

hold the 

large square 

button

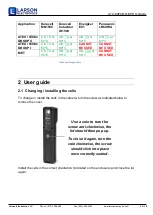
Inserting the battery

To change or install the batteries, 
turn the screw as indicated below 
to remove the cover

Install the batteries in the correct 
orientation (indicated on the 
enclosure) and close the lid 
again. 

PLEASE NOTE:


Only those 

batteries listed in the Safety 
Instructions can be used.

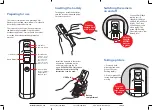
Switching the camera 
on and off

Green LED will flash 
rapidly for ~10 
seconds & the Blue 
and Red LED will flash 
briefly.  The Green 
LED then goes solid 
when ready. The 
green LED flashing 
slowly indicates a low 
battery level

Taking a picture

1. Press and hold
picture button until
green LED starts
flashing rapidly.

2. Wait for green LED
to stop flashing before
moving

Viewfinder
Function Lights

Record Button

Coin operated 
access to battery 
compartment
and USB port

Flash Button

Shutter Button

NB. When pressed 
simultaneously the 
Record and Flash 
Buttons are also 
used to switch the 
camera on and off.

Preparing for use

The 

camera

 is shipped with a protective film 

fitted to the front and rear windows. This should 
be carefully removed before use.

The 

camera

 may be used with the protective 

rubber overboot supplied. Only the rubber 
overboot supplied by 

Larson

 should be used as 

it is made from electrostatically-dissipative 
material.

Open the 

camera back 

with a coin

USB Port

Battery 
compartment

Picture Button

Larson Electronics, LLC


Phone: (877) 348-9680

 Fax: (903) 498-3364 

  www.larsonelectronics.com 

1

0

 of 

10


Summary of Contents for ATX-EXPCMR-BP-HH-QXGA

Page 1: ...s subject to the following two conditions 1 This device may not cause harmful interference and 2 this device must accept any interference received including interference that may cause undesired opera...

Page 2: ...sons 6 3 4 Cleaning and Maintenance 6 3 5 Safety Precautions 6 3 6 Cleaning and Maintenance Intervals 7 3 7 Aggressive substances and environments 7 3 8 Exposure to external stresses 7 4 Technical Dat...

Page 3: ...re batteries into the hazardous area is not permitted The temperature class for the equipment is determined by the type of batteries used T4 Duracell MN 1500 Duracell Industrial ID 1500 T3 Energizer E...

Page 4: ...N of T3 T3C when Energizer E91 or Panasonic LR6XWA cells are used see Table 1 Warning The user shall NOT mix different cells in ANY application Warning For ATEX IECEx GROUP II applications note that t...

Page 5: ...T4 at 60oC OK T4 at 60oC OK T3 at 60oC OK T3 at 60oC ATEX IECEx GROUP I OK T4 at 60oC OK T4 at 60oC CANNOT BE USED CANNOT BE USED MET OK T4 at 55oC OK T4 at 55oC OK T3C at 50oC CANNOT BE USED To clos...

Page 6: ...sk in such cases 3 2 Transportation and Storage All camera devices must be so transported and stored that they are not subjected to any excessive mechanical stresses 3 3 Authorized Persons Only person...

Page 7: ...ses e g vibration heat impact Additional protection is required to protect against these external stresses The camera will require additional protection if it is used in a location where it may be sub...

Page 8: ...ens Autofocus lens effective focal length 3 39mm F2 8 68o diagonal field of view Focal Distance 5cm to infinity View Finder Two element optical view finder Power Modes Operate and auto power down afte...

Page 9: ...picture To indicate a bad picture the three lights flash IN SEQUENCE three times from right to left i e red blue green etc Picture quality Picture quality is indicated by the LEDs below All pictures a...

Page 10: ...and hold picture button until green LED starts flashing rapidly 2 Wait for green LED to stop flashing before moving Viewfinder Function Lights Record Button Coin operated access to battery compartmen...

Reviews: