
4
Larson Electronics LLC - 1.800.369.6671 - sales@larsonelectronics.com - larsonelectronics.com
Camera
Image Sensor:
2 Megapixel Progressive Scan CMOS
Signal System:
NTSC
Effective Pixels:
1956(H) × 1266(V)
Min. Illumination:
0.01 lux @ (F1.2, AGC on), 0 lux with IR
Shutter speed:
1/30 sec to 1/50,000 sec
Lens:
5 - 50 mm motorized VF lens
Angle of view: 59.8° - 6.2°
Day & Night
ICR
Angle Adjustment
Pan: 0°~360°; Tilt: 0°~ 90°; Rotate: 0°~360°
Synchronization
Internal synchronization
Video Frame Rate
1080p @ 30 fps
HD Video Output:
1 HD-TVI output
Video Output: (CVBS)
1 Vp-p composite output (75 Ω BNC)
S/N Ratio
> 62 dB
Menu
Camera ID
ON / OFF (15 characters, position programmable)
AGC
Support
D / N Mode
Color / BW / EXT
White balance
ATW / AWC-SET / Manual
Privacy Mask
On / Off, maximum 8 zones
Motion Detection
On / Off, maximum 4 zones
BLC
Support
Anti-flicker
ON / OFF
Language
English, Chinese
Function,
Eclipse, Digital noise reduction, Digital zoom (62x), Slow shutter, Mirror, Defog,
Defective pixel correction, SMART D-ZOOM
Scene
Indoor, Outdoor, Indoor1, LOW-LIGHT
General
Operating Conditions:
-40 °F ~ 140 °F (-40 °C ~ 60 °C)
Humidity:
90% or less (non-condensing)
Power Supply:
24V DC
Power Consumption:
Max. 11 W (heater off)
Max. 20 W (heater on)
Weather Proof:
IP67
Communication
HD output: ALIBI-C protocol
CVBS output: Pelco-C (requires UTC controller)
Dimension:
12.34” × 3.97” × 4.22” (313.5 × 100.8 × 107.3 mm)
Weight:
3.7 lbs (1678 g)
•
ADJUST
—
SHARPNESS: Rock the joystick right or left to set the image sharpness level (0
.. 15)
—
MONITOR: Rock the joystick right or left to select LCD or CRT.
—
LSC (Lens Shading Compensation): This feature compensates the brightness of
the image to reduce the shading effect in image. Rock the joystick right or left to
select the LSC feature to either OFF or ON.
•
RESET: Select to reset all camera settings to factory default configuration.
•
EXIT: Close the OSD menu system.
CONTROLLING THE OSD WITH A HVR
Some Alibi DVRs and HVRs recorders feature using a PTZ controls menu that can be
used to configure the camera through the OSD. You can also control camera zoom
directly through the PTZ menu. These actions can occur at the recorder console, or
remotely through a browser connected to the recorder. Refer to your Alibi DVR or HVR
user manual for complete instructions on how to use this feature.
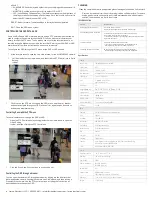
To configure the OSD through the PTZ menu at the DVR or HVR console:
1.
At the recorder console, open the Live View window for the ALI-BC5050AF camera.
2.
Left click inside the live view window, and then click the PTZ Control icon in Quick
Setting
toolbar.
3.
Click Iris + on the PTZ menu to open the OSD menu, use the p, q, t
and u
buttons to navigate through the OSD, and use Iris + again to open a submenu
and save a parameter setting.
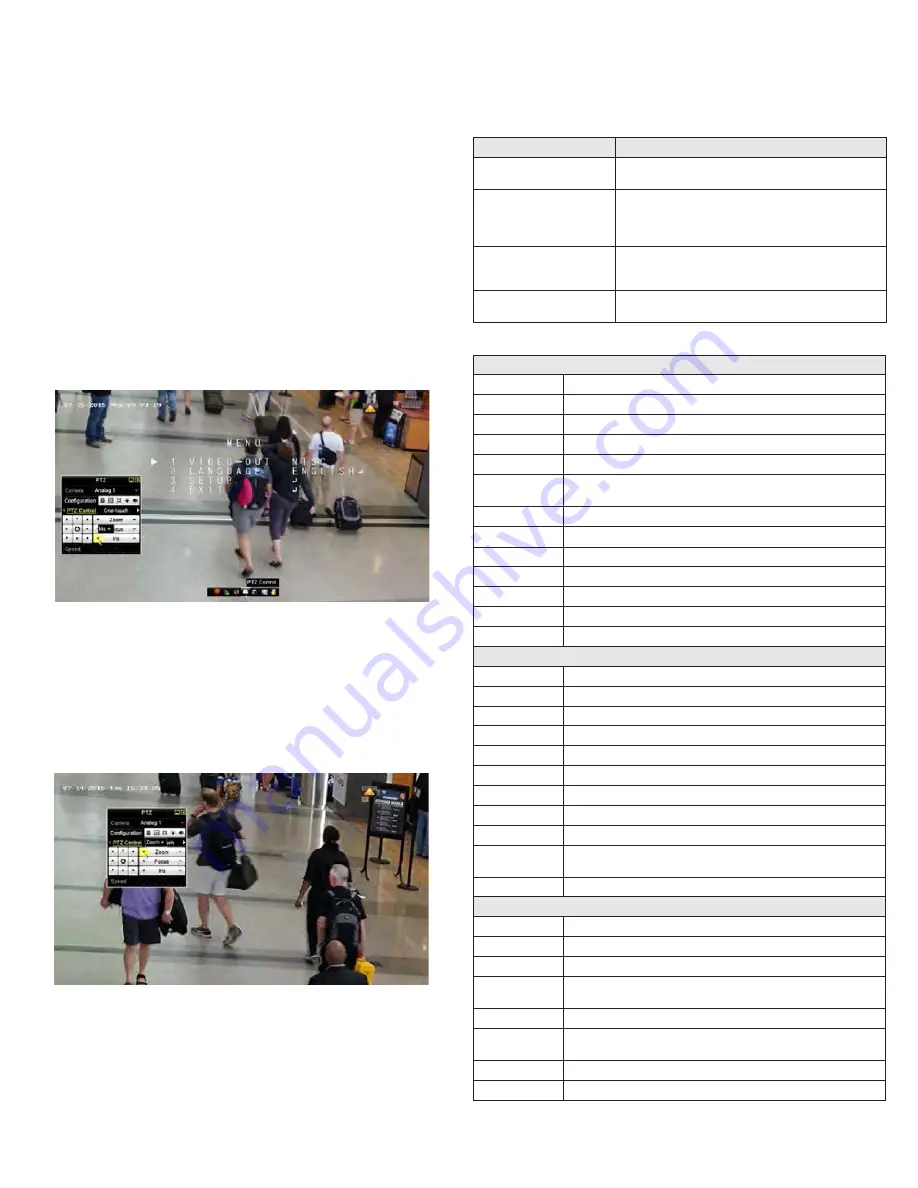
Controlling Zoom with the PTZ menu
To control camera zoom through the DVR or HVR:
1.
Open the PTZ Control panel by clicking inside the live view window to open the
Quick Setting
toolbar, and then clicking the PTZ Control icon.
2.
Click the Zoom+ and Zoom- buttons to zoom in and out.
Controlling the OSD through a browser
You can open the camera OSD through a browser by logging into the Alibi recorder
that manages the camera, opening the camera Live View window, and then issuing a
Preset96 to the camera. Use the PTZ control buttons, including the Iris+ button, as
described above to change the OSD.
CLEANING
Clean the camera dome with an approved glass cleaning solution and a lint free cloth.
•
Dust can be removed from the unit by wiping it with a soft damp cloth. To remove
stains, gently rub the surface with a soft cloth moistened with a mild detergent
solution, then rinse and dry it with a soft cloth.
TROUBLESHOOTING
Problem
Possible Cause
Nothing appears on the screen
-
Check the power connection.
-
Check the video signal cable connection to the monitor.
The video image is dim or not clear.
-
If the camera lens is dirty, clean it with a sof t, clean cloth.
-
Adjust the monitor controls, if necessary.
-
If the camera is facing a very strong light, change the camera position.
-
Adjust the lens focus.
The screen is dark.
-
Adjust the contrast control of the monitor.
-
If you have an intermediate device, set the impedance (75
Ω /Hi-Z) properly, and check the cable connections.
The image on the monitor flickers
- Make sure that the camera isn’t facing direct sunlight or
fluorescent light. If necessary,change the camera position.
Specifications


