

Larson Electronics, LLC
Phone: (800) 369-6671
Fax: (903) 498-3364
www.larsonelectronics.com
3
of
4
HALD-24-1X150LED-V3
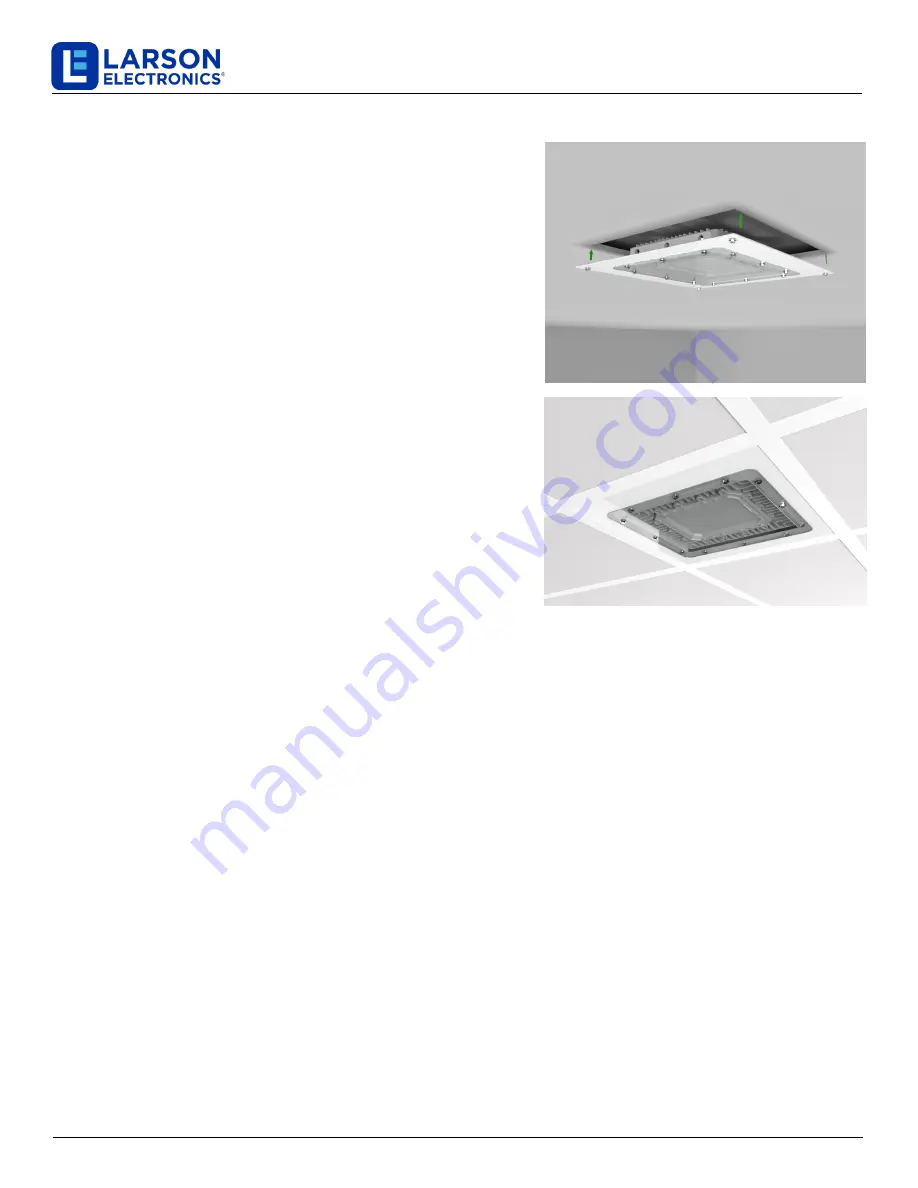
MOUNTING
This fixture offers recessed panel mounting.
Fixture is not intended to be suspended.
1.
Make sure power is turned off at the source to the location at
which you are installing the fixture.
2.
Remove existing troffer if applicable.
3.
Place the troffer in the drop-ceiling or flat surface cut-out. If
utilizing drop ceiling installation, operators may choose to
penetrate the flanges of the fixture to secure to the ceiling.
When installing on flat surface cutouts, operators will be
required to drill holes in the fixture flange to secure the fixture
to the surface. Use minimum of 3/8" anchor bolts to secure the
fixture to flat surfaces. When drilling holes, ONLY drill holes in
the outer flange of the fixture, minimum 2" distance between
LED assembly and drilled holes. Drilling holes for anchor bolts
does not void certification.
4.
Using provided wire, run provided wiring harness from the
back of the fixture inside of 3/4" rigid conduit. Secure the 3/4"
conduit to the back of the 3/4" NPT hub provided on the back
of the light fixture. Make remaining electrical connections
within a junction box that is approved for the environment
where the light fixture is being installed. This light fixture is
factory sealed and does not need a seal-off. Refer to wire
diagram. All local and national electrical/building codes must
be followed when installing this fixture in hazardous areas. If
unaware, contact local authority.
5.
When complete, ensure voltage matches fixture nameplate
and return power back to the source.
Installation is complete.
MAINTENANCE
Caution:
To avoid personal injury, disconnect power to the light and allow the unit to cool down before
performing maintenance.
Warning:
No user serviceable parts inside of fixture. Risk of electric shock. Removal of the lens will void
the warranty.
1.
Perform visual, mechanical and electrical inspections on a regular basis. We recommend routine
checks to be made on a yearly basis. Frequency of use and environment should determine this. It is
recommended to follow an Electrical Preventive Maintenance Program as described in NFPA 70B:
Recommended practice for Electrical Equipment.
2.
The lens should be cleaned periodically as needed to ensure continued photometric performance.
Clean the lens with a damp, non-abrasive, lint-free cloth. If not sufficient, use mild soap or a liquid
cleaner.
3.
Inspect the cooling fins on the luminaire to ensure that they are free of any obstructions or
contamination (i.e. excessive dust build-up). Clean with a non-abrasive cloth if needed.
4.
Do not operate if the lens is cracked or damaged. All fasteners should be properly seated.


