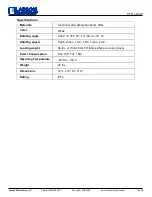
PTB-1-WHT
Larson Electronics, LLC
Phone: (800) 369-6671
Fax: (903) 498-3364
www.larsonelectronics.com
7
of
8
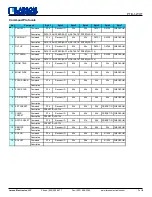
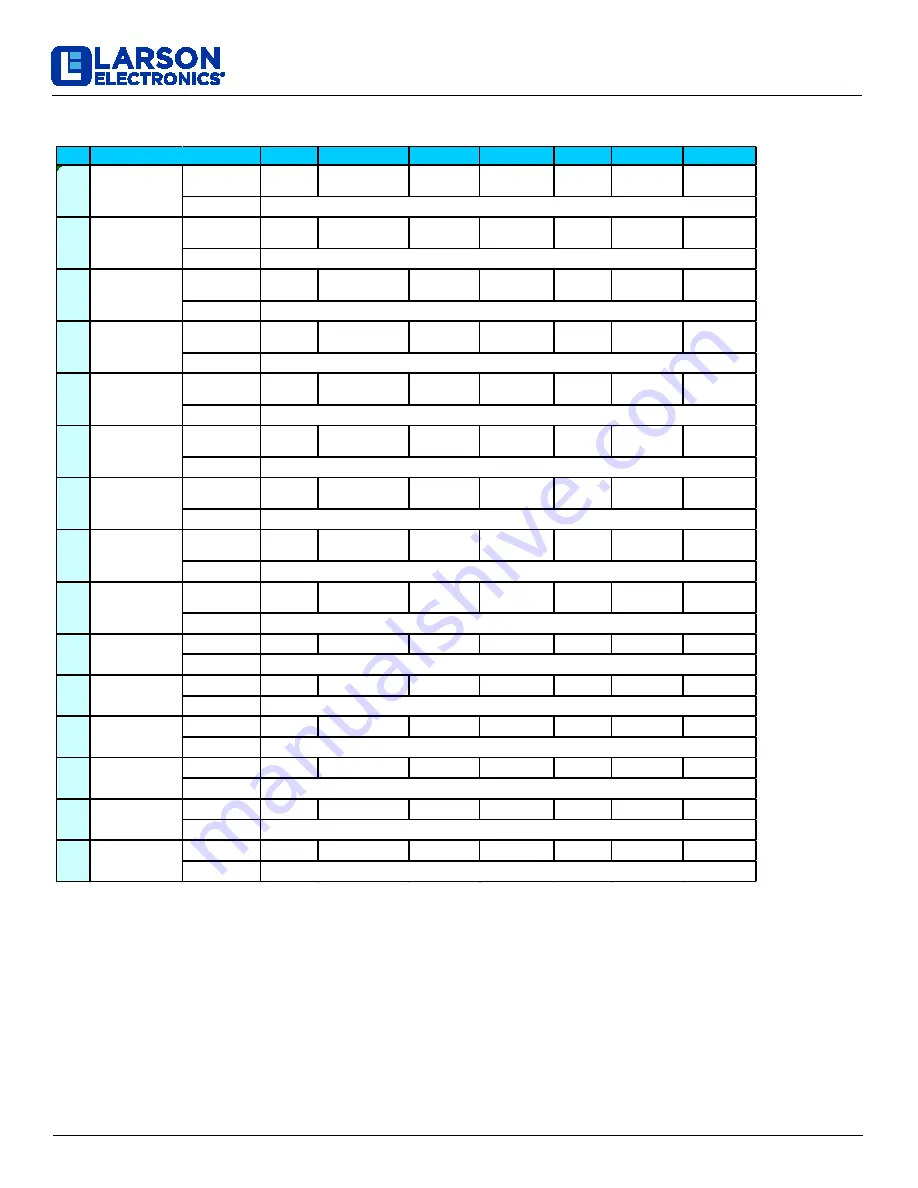
Command Protocols
No
Byte1
Byte2
Byte3
Byte4
Byte5
Byte6
Byte7
1
Command
FFh
Receiver ID
00h
04h
DATA1
DATA2
CHECKSUM
Description
2
Command
FFh
Receiver ID
00h
02h
DATA1
DATA2
CHECKSUM
Description
3
Command
FFh
Receiver ID
00h
08h
DATA1
DATA2
CHECKSUM
Description
4
Command
FFh
Receiver ID
00h
10h
DATA1
DATA2
CHECKSUM
Description
5
Command
FFh
Receiver ID
00h
20h
00h
00h
CHECKSUM
Description
6
Command
FFh
Receiver ID
00h
40h
00h
00h
CHECKSUM
Description
7
Command
FFh
Receiver ID
01h
00h
00h
00h
CHECKSUM
Description
8
Command
FFh
Receiver ID
00h
80h
00h
00h
CHECKSUM
Description
9
Command
FFh
Receiver ID
00h
00h
00h
00h
CHECKSUM
Description
10
Command
FFh
Receiver ID
00h
03h
00h
PRESET ID CHECKSUM
Description
11
Command
FFh
Receiver ID
00h
05h
00h
PRESET ID CHECKSUM
Description
12
Command
FFh
Receiver ID
00h
07h
00h
PRESET ID CHECKSUM
Description
13
Command
FFh
Receiver ID
00h
0Fh
00h
00h
CHECKSUM
Description
14
Command
FFh
Receiver ID
00h
09h
00h
01~02h
CHECKSUM
Description
15
Command
FFh
Receiver ID
00h
0Bh
00h
01~02h
CHECKSUM
Description
Command
PAN LEFT
DATA1:PAN SPEED(00~3Fh),DATA2:TILT SPEED(00~3Fh)
PAN RIGHT
TILT DOWN
DATA1:PAN SPEED(00~3Fh),DATA2:TILT SPEED(00~3Fh)
DATA1:PAN SPEED(00~3Fh),DATA2:TILT SPEED(00~3Fh)
DATA1:PAN SPEED(00~3Fh),DATA2:TILT SPEED(00~3Fh)
TILT UP
AUX OFF
AUX ON
ZOOM TELE
ZOOM WIDE
FOCUS NEAR
SET PRESET
PRESET ID=00~7Fh
FOCUS FAR
P/T/Z/F STOP
GOTO PRESET
PRESET ID=00~7Fh
CLEAR
PRESET
PRESET ID=00~7Fh
REMOTE
RESET


