PLMNL0252 REV. B Effective Date: 10/16/17
34
FiberCUT
®
HR Operation Manual
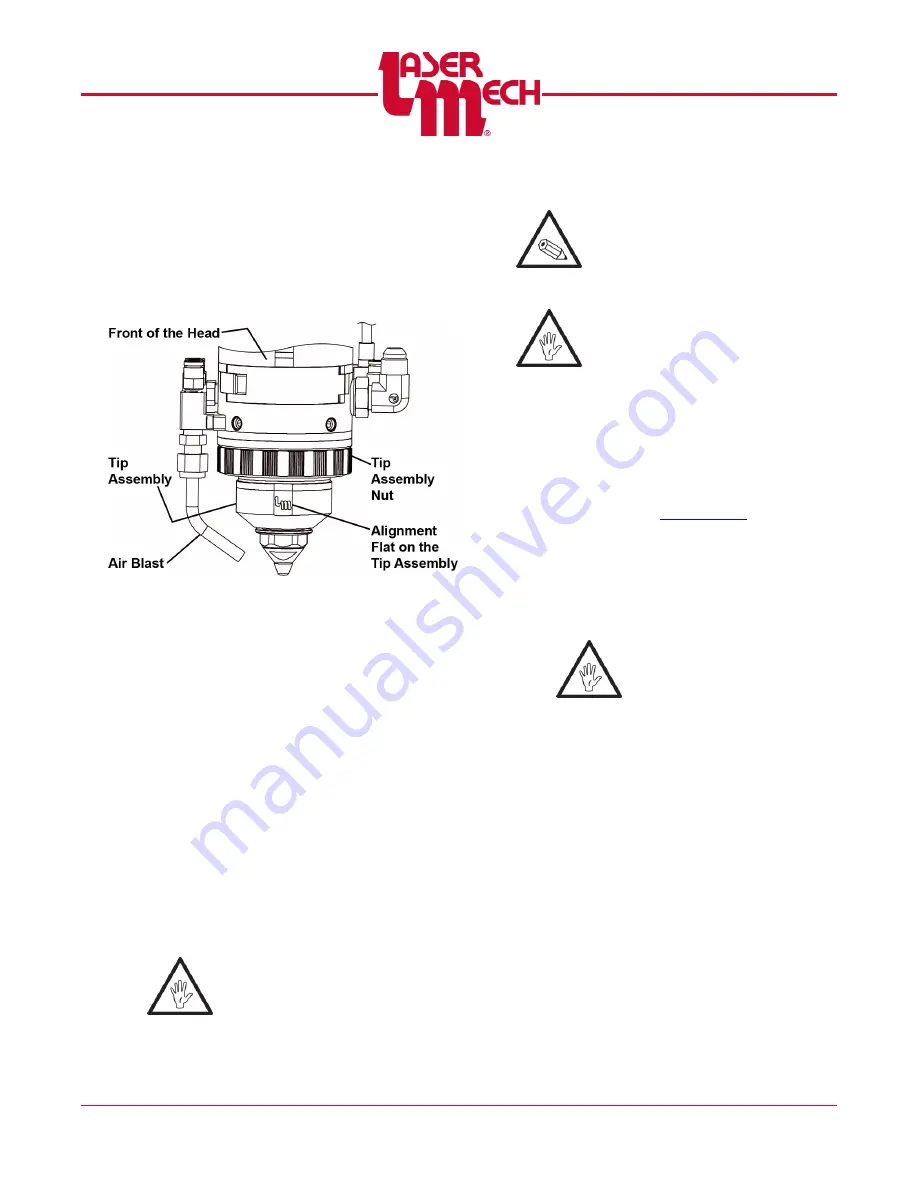
5.4 Servicing the Tip Assembly
To remove:
1. Unthread the tip assembly nut and
remove the tip assembly from the
head.
Figure 55
To install:
2. Verify that the alignment flat on the tip
assembly faces the front of the head.
3. Push the tip retainer assembly up until
it is centered on and flush against the
head.
It may be necessary to rotate the
tip retainer assembly slightly until
the alignment pin seats in the
alignment hole in the head.
4. Thread the tip assembly nut onto the
head.
Do not allow the aligned
components to rotate.
Fully HAND TIGHTEN the tip
assembly nut onto the head.
DO NOT USE A WRENCH.
5.5 Removing the Fiber
EVERY TIME the fiber is removed
and/or installed the upper cover
glass MUST BE inspected.
Before opening any part of the
head, clean off the dust and/or
process debris using an exterior
cleaning towel (PLTLS0023) or
equivalent.
1. Wipe the head clean of any foreign
matter prior to removing the head.
2. Verify that the upper cover glass is in
place.
3. Remove the upper fiber clamp
4. Remove the fiber optic cable from the
cutting head according to the
manufacturer’s instructions.
5. Cover the fiber end with an appropriate
cap from the fiber manufacturer.
Special attention must be
given to the fiber optic
cable.
Care must be taken to
insure dirt and debris do
not contaminate the glass
block at the end of the fiber.
Cover the fiber input
adapter with an appropriate
cap or tape to prevent
contamination.
Damage will occur if:
The fiber output is not
covered with
manufacturer’s cap.
The fiber input adapter
is not protected by the
provided dust cover.
6. Cover the fiber input adapter with an
appropriate cap or tape to prevent
contamination.


