Warning: Keep out of reach of children
How to use your Gas Soldering Kit
Filling the Soldering Iron With Gas
Use filtered butane fuel.
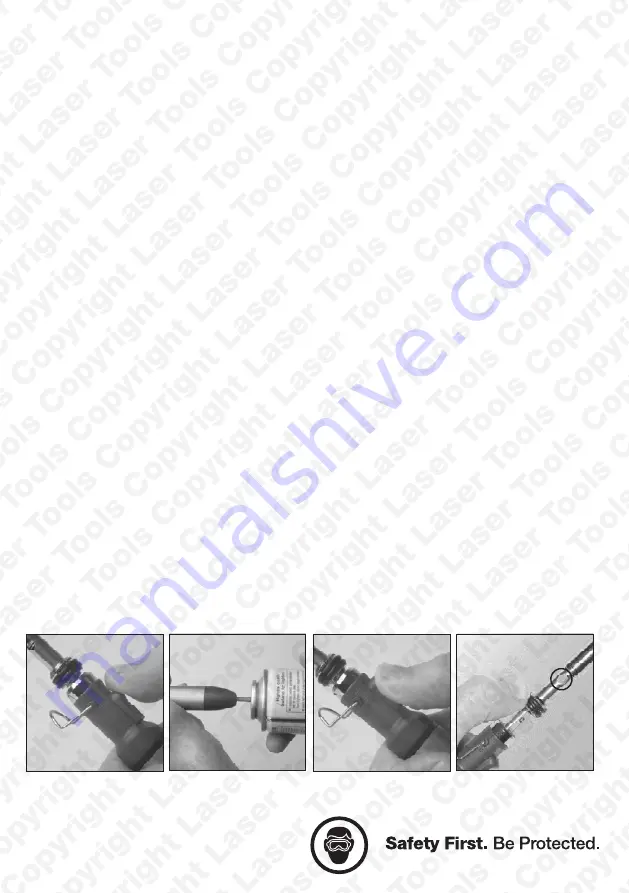
Before filling make sure that the knob is pushed to the ‘OFF’ position (See Fig 1).
Follow the directions on the butane fuel can. Applying the tip of the filler valve to the base of
the soldering iron. Using a pumping action, fill the container (See Fig 2).
A complete fill takes about 10 seconds. Allow the gas to stabilise for a few minutes, before
lighting the torch.
Assembling
Screw the spring loaded tip adaptor to the soldering iron
Lighting
Push the switch towards the ‘ON’ position, enough to hear a small ‘hissing’ sound
(See Fig 3).
Push the spring loaded adaptor upwards to expose the burner head through the
chrome sleeve
(Circled in Fig 4) then light through the oval hole, release the adaptor to cover the burner, the
tip will then heat up.
Storage
Make sure that the torch is switched to its ‘OFF’ and cool, before storing or leaving
unattended.
Caution
• The burn tip and other accessory tips get hot in operation.
• Do not touch the tip or accessories, or place them on flammable objects,
• Always wear safety glasses when using the torch.
• Always have a fire extinguisher, or bucket of water near the torch work area.
• Under no circumstances should you attempt to repair a damaged torch.
• Never attempt to repair or heat a gasoline can, aerosol can or any compressed
gas container.
• Use only in well ventilated areas.
• Avoid fumes from fluxes, lead based paint and all metal heating operations.
• Be especially careful to avoid fumes from cadmium plating and galvanised metal.
Fig 1
Fig 2
Fig 3
Fig 4