background image

DVBT-7TOUCH

               USER MANUAL


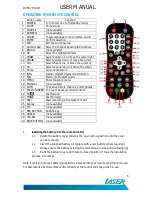
OPERATING THE REMOTE CONTROL 


Button name 

Function 


1  POWER 

Turn Power on or off (standby mode) 

2  MUTE 

Mute sound 

3  SOURCE 

(not available) 

4  PREVIEW 

(not available) 

5  AUDIO 

Toggle language or mono/stereo sound 

6  ENTER 

Confirm selection 

7  EXIT 

Exit the current setup 

8  Number Pad 

Select TV channel by using the numbers. 

9  RECALL 

(not available) 

10  OK 

Select the highlighted item 

11  VOL


Select volume up or move the cursor right 

12  VOL


Select volume down or move the cursor 

13  CH + 

Select channel up or move the cursor up 

14  CH - 

Select channel down or move the cursor 

15  Home 

Go to home screen 

16  INFO 

Display digital TV system information 

17  EPG 

Electronic Program Guide 

18  MENU 

Enter the setup menu 

19  MANUAL 

(not available) 

20  AUTO 

To scan and store channels automatically 

21  PLAY/PAUSE   To play or pause recorded content 
22  FR 


Fast Rewind 

23  FF 


Fast Forward 

24  REC


Start recording a TV program or exit 

25  Replay 

(not available) 

26  TTX 

(not available) 

27  RED BUTTON 

Subtitle key  

28  GREEN 

(not available) 

29  YELLOW 

(not available) 

30  BLUE BUTTON  (not available) 


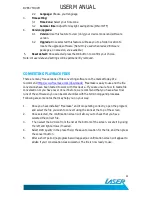
1. 

Installing the battery into the remote control 


1.1 

Rotate the battery cover towards the ‘open’ arrow position until the cover 


can be  removed. 


1.2 

Insert the supplied battery (or replace with a new battery where required). 


Please  ensure the battery is facing the correct way. (+ sign positive facing up) 


1.3 

Re-fit the battery cover and rotate to closed position. (This is the installation 


process, in reverse)  

 
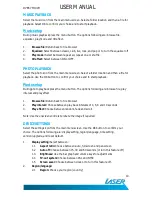
Note: Ensure the coin cell battery (supplied) is installed into your remote control prior to use.  
For best results aim the remote control directly at the touch control pad when in use. 
 

Summary of Contents for DVBT-7TOUCH

Page 1: ...DVBT 7TOUCH USER MANUAL 1 7 Portable DVBT T TV with Media player and touch panel controls User Manual Please read carefully before use...

Page 2: ...ct connection and use 4 Operating the remote control 5 The touch control panel 6 Media hot keys 6 The main menu 7 Watching TV 7 TV settings 8 Recording TV 8 Movie playback 9 Movie setup 9 Music playba...

Page 3: ...angerous machinery such as a motor vehicle Remove any power or data cords by pulling them from the plug and not the cord Using this device near other electronic devices may cause interference Do not u...

Page 4: ...gital TV 240 volt Power Adaptor with Australian New Zealand plug External Antenna for extended range AV cable RCA composite with L R audio to 3 5mm phono Remote control MCX to IEC connector allows con...

Page 5: ...L not available 20 AUTO To scan and store channels automatically 21 PLAY PAUSE To play or pause recorded content 22 FR Fast Rewind 23 FF Fast Forward 24 REC Start recording a TV program or exit 25 Rep...

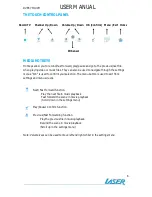
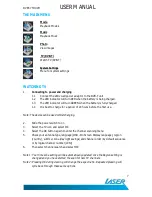
Page 6: ...d to exit from settings and menu screens Next Fast forward function Play the next file in music playback Fast forward the scene in movie playback Scroll down in the settings menu Play Pause Confirm fu...

Page 7: ...rst use Note The device can be used whilst charging 2 Slide the power switch to on 3 Select the TV icon and select OK 4 Select the OK button again to enter the channel scanning menu 5 Check your anten...

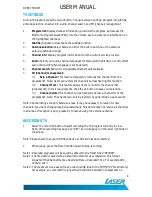
Page 8: ...he channel list program list to their requirements Click the ok button to save your selection 7 3 Channel delete This function will permanently delete a channel from the program list Note The channel...

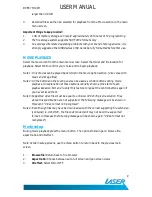
Page 9: ...buttons during movie playback An explanation of these buttons is briefly shown at the start of each playback session Exit and re enter this feature to repeat the control buttons again if you have mis...

Page 10: ...hoto playback press the menu button The options following are browse file play interval and play effect 1 Browse file Return back to file browser 2 Play interval Choose between play back intervals of...

Page 11: ...versions have been tested to work with this device If you are unsure how to tackle file conversation or you have never done it before we recommend that you have a few trial runs of the software so you...

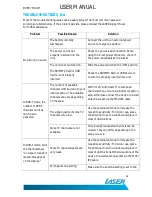
Page 12: ...The number of available channels is limited due to your local reception The available channels can vary depending on the area Perform an Auto Search to rescan all channels when you are in a better re...

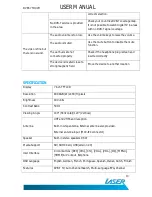
Page 13: ...The device is located close to strong magnetic field Move the device to another location SPECIFICATION Display 7 inch TFT LCD Resolution 800 RGB W x480 H pixels Brightness 400 units Contrast Ratio 500...

Page 14: ...ASP H 264 H 263 MKV H 264 Photo JPG BMP Video Recording Format TS Audio Analogue Stereo L R Input USB 2 0 Host port FAT FAT32 Single Partition drives only Power input 110 240VAC 50Hz 60Hz Power Consu...

Page 15: ...nature of the fault and refund or replace the product as per their store refund or warranty policy Step 2b If your place of purchase cannot be contacted then you can contact Laser Customer Service wit...

Reviews: