12
EN
6
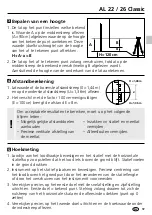
Calibration
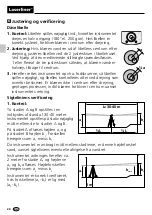
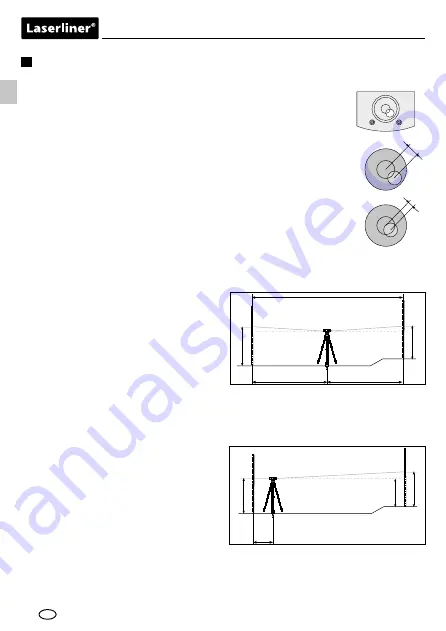
Levelling bubble
1. Control:
Set horizontal dial onto 0°. Place bubble right
into the centre of the circle on the levelling bubble by turning
the levelling screws. Turn telescope through 180°/200 gon.
2. Adjustment:
In case the bubble is now out of the centre
marking, set half of the deviation „a“ which is (fi a) by
operating the three calibration screws on the levelling
bubble. After that, adjust levelling bubble by using the
levelling screws, then check calibration by turning the
whole instrument through 180°/200 gon.
3.
Repeat control and calibration until the bubble of the
levelling bubble remains in the inner circle after each
turn of the instrument.
a
½a
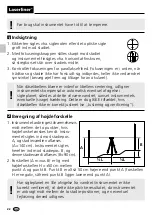
Crosshairs
1. Control:
Place instrument midway between two
fixed staves A and B which are some
30 to 40 metres apart.
At the point A on the staff, read the
value a
1
and at the point B on the
other staff, secure the value b
1
.
Calculate the height difference (a
1
- b
1
).
The result you get is right, even with the crosshairs dejusted, because the
distances between both staves are equal.
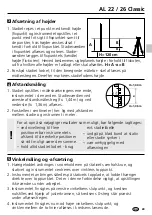
Now place instrument in a distance of
approx. 2 m away from staff A and
read the value a
2
.
Next, turn the instrument and aim the
level at point B on the staff. Read the
value b
2
and calculate the height
difference, which is (a
2
- b
2
).
The adjustment of the level is correct
when you get the reading (a
1
- b
1
) = (a
2
- b
2
). This means that the values of the
height differences achieved with the first and the second measurement are
equal, and the instrument operates error-free.
L=30-40 m
a
1
b
1
½L
½L
2 m
a
2
b
2
b
2nominal
Summary of Contents for AL 22 Classic
Page 2: ...02...
Page 69: ...69 AL 22 26 Classic...
Page 70: ...70...
Page 71: ...71 AL 22 26 Classic...


