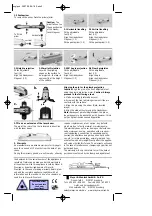
1. Vertical vial
2. Holder for pentaprism
3. Longitudinal vial
4. Transverse vial
5. Laser beam exit
6. Front adjustable foot
7. Aligning edge
8. Magnetic sole
9. Battery compartment
10. Rear adjustable foot
11. Pin
12. Rear adjusting screw
13. Prism ejector
14. Switch
15. Laser mode display
16. Plumb beam exit
17. Mirror for plumb projection
18. Front adjusting screw
1
2
3
4
17
14
15
16
11
10
7
9
8
7
6
5
18
12
13
Operating Instructions HandyLaser Magnum
1. Operation
1.1 Batteries
2 x 1.5 V alkali
micro-batteries
1.2 Fitting the adjustable feet
Insert the feet into the grooves as
shown.
1.3 Aligning the HandyLaser Magnum
1. First adjust the transverse vial Q with the
adjusting screw on the front adjustable foot.
2. Then adjust the longitudinal
vial L with the adjusting screw
on the rear adjustable foot.
Note:
Always view the vials directly from
above to avoid reading errors.
2.
1.
L
Q
1.4 Switch on - Press the button
Impulse Laser Technology
After switching on, the laser is in impulse mode. By
blinking continuously, the laser is much easier to see,
for example on rough plaster and coloured surfaces
and over bigger distances.
Switch on
impulse mode
Linear
mode
Off
switch
1.
2.
3.
engl.qxd 25.07.00 08:18 Seite 1


