20
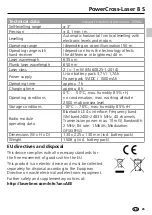
2x
2x
2x
4
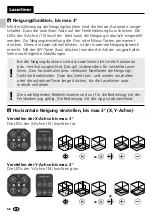
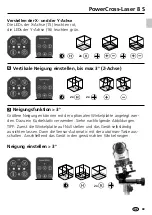
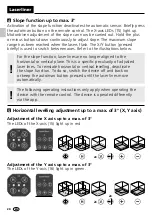
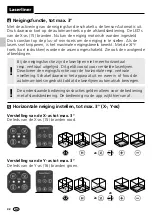
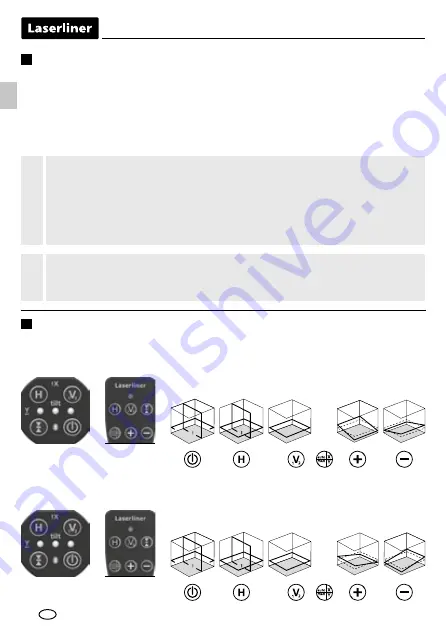
Slope function up to max. 3°
Activation of the slope function deactivates the automatic sensor. Briefly press
the auto/man button on the remote control. The X-axis LEDs (15) light up.
Motordriven adjustment of the slope can now be carried out. Hold the plus
or minus buttons down continuously to adjust slope. The maximum slope
range has been reached when the lasers flash. The X/Y button (pressed
briefly) is used to switch between axes. Refer to the illustrations below.
5
Horizontal levelling adjustment up to a max. of 3° (X, Y axis)
For the slope function, laser lines are no longer aligned to the
horizontal or vertical plane. This is a specific peculiarity of adjusted
laser lines. To reinstate horizontal or vertical levelling, deactivate
the slope function. To do so, switch the device off and back on
or keep the auto/man button pressed until the laser lines move
automatically.
!
The following operating instructions only apply when operating the
device with the remote control. The device is operated differently
via the app.
!
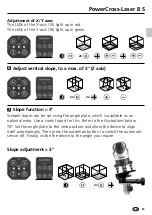
Adjustment of the X axis up to a max. of 3°
The LEDs of the X-axis (15) light up in red.
Adjustment of the Y axis up to a max. of 3°
The LEDs of the Y-axis (16) light up in green.
EN
Summary of Contents for PowerCross-Laser 8 S
Page 62: ...62...
Page 63: ...63 PowerCross Laser 8 S...

