ThermoSpot-Vision
13
GB
Charging li-ion battery
4
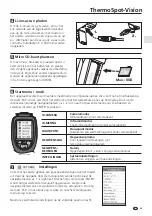
To charge the li-ion battery, connect one end
of the supplied USB cable to the mini-USB
port on the device and the other end to a
free port on your computer. Alternatively,
the battery can be charged using a USB-type
power supply unit (5 V, 500 mA).
1.
2.
Inserting micro-SD card
5
Max.: 8GB
Start menu / modes
6
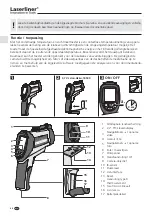
The device features several measuring modes and con
Ö
guration options. By brie
×
y pressing the "ESC"
button after switching on the device, the start menu with 6 options is shown in the display. Move to the
required menu item by pressing the corresponding navigation buttons (
/
) and press "ENTER" to
select.
IR CAM
Camera mode
Infrared measurement with camera image
IR MEASURE
Infrared mode
Fast infrared measurement (without camera image)
DEWPOINT
Dew point mode
Locating thermal bridges (without camera image)
DATALOG
Data recording
For long-term measurements with temperature
progression diagram
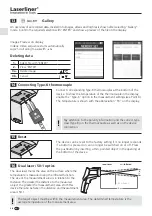
GALLERY
Gallery
Stored images, videos and data recordings
SETTINGS
System settings
Setting and changing device settings
Settings
7
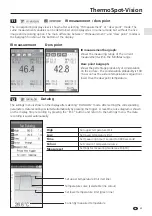
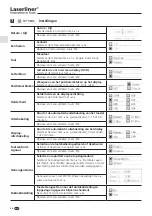
You will need to make a few basic settings in the device before using
it for the
Ö
rst time. The navigation buttons (
/
) are generally
used to navigate through the menu items. The chosen menu item is
selected by pressing the "ENTER" button. You also use the navigati-
on buttons to change values and selection options. Press the "ESC"
button to store a selection and to return to the previous menu.
Please change the settings on the following page as required.
To insert a micro-SD card
Ö
rst open the cover
to the battery compartment and then insert
the memory card as illustrated. Recorded
data are stored to the internal memory (40
MB) when the device is operated without a
memory card.
Summary of Contents for ThermoSpot-Vision
Page 222: ...222 ...
Page 223: ...ThermoSpot Vision 223 ...


